How to Transplant Dollarjoint pricklypear?
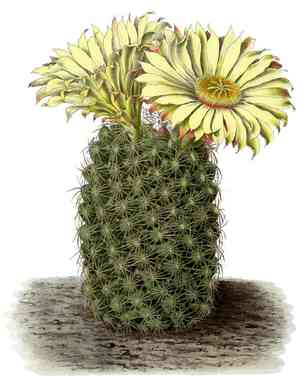
The ideal period for relocating dollarjoint pricklypear is once spring's warmth is firmly established, providing strong growth prospects. Select a bright location featuring soil that drains effectively. Carefully introduce dollarjoint pricklypear to its new environment to prevent stress, guaranteeing a smooth adaptation.
What Preparations are Needed Before Transplanting Dollarjoint Pricklypear?
What is the Ideal Time for Transplanting Dollarjoint Pricklypear?
The best time to move dollarjoint pricklypear is during the 'height of spring', when conditions are mild and consistent. Relocating dollarjoint pricklypear at this point promotes strong root development before summer heat, ensuring a smooth transition and vigorous growth. The favorable combination of increasing temperatures, longer daylight hours, and reduced frost risk during peak spring significantly boosts dollarjoint pricklypear's capacity to flourish in a new spot. This season perfectly aligns with dollarjoint pricklypear's growth cycle, allowing for successful adaptation and robust development. By choosing peak spring for transplanting, you are setting dollarjoint pricklypear up for success, guaranteeing new growth will be as abundant and healthy as the season promises.
How Much Space Should You Leave Between Dollarjoint Pricklypear Plants?
Hello! For your dollarjoint pricklypear, you'll want to provide ample room for optimal growth. Position them approximately 24-36 inches apart (61-91 cm). This spacing allows each dollarjoint pricklypear to expand and absorb essential soil nutrients without competing with nearby plants.
What is the Best Soil Mix for Dollarjoint Pricklypear Transplanting?
For dollarjoint pricklypear, let's prepare the perfect growing medium! Select a location with soil that drains well. Consider sandy or loamy types. Incorporate some slow-release fertilizer before planting to give your dollarjoint pricklypear a healthy start. Just follow the product's instructions for the quantity – a small amount goes a long way!
Where Should You Relocate Your Dollarjoint Pricklypear?
Sunlight is crucial for your dollarjoint pricklypear! Choose a site that receives full sun for most of the day. This means at least 6 hours of direct sunlight. A south-facing spot would be an ideal sunbathing location for your plant. Remember, more sun leads to a happier dollarjoint pricklypear!
What Equipments Should You Prepare Before Transplantation Dollarjoint Pricklypear?
Gardening Gloves
To safeguard your hands when handling the spiny dollarjoint pricklypear.
Shovel or Spade
To excavate the dollarjoint pricklypear from its initial position.
Hand Trowel
For minor adjustments and digging a suitable hole for the plant.
Watering Can or Hose
To hydrate the dollarjoint pricklypear following its relocation.
Pruning Shears
To trim any damaged roots or pads prior to transplanting.
Wheelbarrow or Plant Dolly
To move the dollarjoint pricklypear if it is large or heavy.
Measuring Tape
To correctly space plants when planting multiple dollarjoint pricklypears.
How Do You Remove Dollarjoint Pricklypear from the Soil?
How Do You Remove Dollarjoint Pricklypear from the Soil?
From Ground: First, moisten the dollarjoint pricklypear's soil. Carefully dig a wide circle around the dollarjoint pricklypear with a shovel or spade to keep the root ball intact. Gently work the tool beneath the plant to lift it from its original spot without harming the roots.From Pot: Carefully tip the pot and tap its sides to loosen the dollarjoint pricklypear, being mindful of its spines. Slowly ease the plant out while supporting the root ball with your other hand.From Seedling Tray: Gently scoop the dollarjoint pricklypear seedling using a hand trowel, ensuring the delicate roots remain undamaged. Support the plant's base carefully as you move it.
Step-by-Step Guide for Transplanting Dollarjoint Pricklypear
Prepare the Plant
Before moving, allow the dollarjoint pricklypear's soil to dry slightly. This will facilitate removal and lessen the chance of root damage.
Digging the Hole
Use the hand trowel to create a hole in the ground large enough to accommodate the dollarjoint pricklypear's root ball. The hole should be as deep as the root ball is tall and twice its width.
Plant Positioning
Place the dollarjoint pricklypear in the center of the hole. The top of the root ball should be level with the surrounding soil surface to ensure proper establishment.
Backfilling the Hole
Gently fill the hole with soil, patting around the plant. Be careful not to disturb the roots excessively, and do not bury the dollarjoint pricklypear deeper than its original position.
Watering after Transplanting
Water the dollarjoint pricklypear generously after planting to settle the soil around the roots and help reduce transplant shock.
How Do You Care For Dollarjoint Pricklypear After Transplanting?
Supporting the Plant
If the dollarjoint pricklypear is leaning or unstable, carefully stake it to ensure it grows upright and to provide additional support while its roots establish.
First Watering
Water the dollarjoint pricklypear thoroughly immediately after transplanting. Afterward, be conservative with watering, allowing the soil to dry between irrigations.
Monitoring for Stress
Observe the dollarjoint pricklypear for indications of transplant shock, which may appear as wilted pads or discoloration. Provide shade if the dollarjoint pricklypear seems stressed by excessive heat.
Pruning
Trim any damaged or diseased pads with pruning shears, ensuring you wear gloves and sanitize tools to prevent disease spread.
Troubleshooting Common Issues with Dollarjoint Pricklypear Transplantation.
When is the best time to transplant dollarjoint pricklypear?
The optimal transplanting period is mid to late spring, ensuring both warm soil and cooler temperatures for establishment.
How far apart should dollarjoint pricklypear be spaced when transplanting?
For ideal growth, maintain a distance of 24-36 inches (60-91 cm) between each dollarjoint pricklypear when transplanting.
Why is my dollarjoint pricklypear not thriving after transplanting?
Verify if it is planted at the correct depth, has adequate space, and if watering is sufficient but not excessive.
What soil conditions are best for transplanting dollarjoint pricklypear?
Utilize well-draining, sandy soil. Poor drainage can lead to root rot and impede the plant's ability to establish.
How much should I water dollarjoint pricklypear after transplanting?
Water dollarjoint pricklypear immediately after transplanting, then sparingly until it's established to prevent overwatering and encourage root growth.
Can I transplant dollarjoint pricklypear on a cloudy day?
Certainly! Overcast conditions lessen transplant shock by minimizing moisture loss and sun stress.
Should I fertilize dollarjoint pricklypear after transplanting?
Generally, dollarjoint pricklypear does not require fertilization right after transplanting; allow it time to adjust to its new environment first.
How do I know if dollarjoint pricklypear is getting enough light after transplanting?
Ensure dollarjoint pricklypear is in a location where it receives full sun, mimicking its natural desert habitat.
What signs indicate dollarjoint pricklypear might be planted too deeply?
Lack of growth or rot at the base can signal that dollarjoint pricklypear is planted too deeply.
My dollarjoint pricklypear looks wilted post-transplant. What should I do?
Wilt can be due to shock. Maintaining proper soil moisture and providing shade during the initial weeks can help dollarjoint pricklypear recover.



