How to Transplant Velvety nerisyrenia?
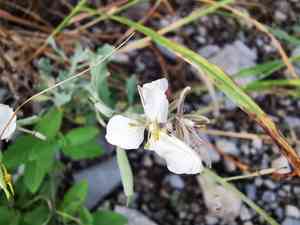
Velvety nerisyrenia flourishes when transplanted into the garden as spring reaches its peak. Choose a location that receives abundant sunlight and offers effective drainage to guarantee the success of velvety nerisyrenia. A helpful tip: confirm the soil is prepared to receive its soft allure!
What Preparations are Needed Before Transplanting Velvety Nerisyrenia?
What is the Ideal Time for Transplanting Velvety Nerisyrenia?
The optimal period to move your velvety nerisyrenia is during the onset of spring's warmth, typically from late April through early June. Selecting this timeframe capitalizes on stable temperatures and increasing daylight, which encourages velvety nerisyrenia's root development and growth. Transplanting velvety nerisyrenia then allows it to adapt before summer's heat, setting the stage for a robust growing season. This timing also aligns with the natural growth cycle of perennials, ensuring velvety nerisyrenia recovers strongly after relocation.
How Much Space Should You Leave Between Velvety Nerisyrenia Plants?
When relocating velvety nerisyrenia, aim for a spacing of approximately 10-12 inches (25-30 cm) between each plant to provide ample room for development and thriving.
What is the Best Soil Mix for Velvety Nerisyrenia Transplanting?
Prepare a site for velvety nerisyrenia with soil that drains well, fortified with a balanced, slow-release fertilizer to give your plants a strong start. A sandy loam is perfect for both drainage and nutrient retention.
Where Should You Relocate Your Velvety Nerisyrenia?
Choose a spot for velvety nerisyrenia that receives full sunlight, as this perennial flourishes in bright conditions. This will ensure your velvety nerisyrenia has the energy to produce its velvety blooms.
What Equipments Should You Prepare Before Transplantation Velvety Nerisyrenia?
Gardening Gloves
To safeguard your hands while handling soil and plants.
Spade or Shovel
To excavate the velvety nerisyrenia and prepare the new planting area.
Garden Trowel
For detailed work around roots and in confined spaces.
Pruning Shears
To trim any dead or excess foliage prior to transplanting.
Watering Can or Hose
For hydrating the velvety nerisyrenia before and after removal and replanting.
Wheelbarrow or Garden Cart
For moving the velvety nerisyrenia and any soil or compost.
Mulch
To help maintain soil moisture at the new site after transplant.
Rooting Hormone (optional)
For encouraging root growth in the new location.
How Do You Remove Velvety Nerisyrenia from the Soil?
How Do You Remove Velvety Nerisyrenia from the Soil?
From Ground: First, irrigate the velvety nerisyrenia to moisten the soil. Then, dig a wide trench around the plant using a shovel or spade, ensuring the plant's root ball remains intact. Gently work the spade beneath the root ball to lift the plant from its original spot.From Pot: Begin by watering the velvety nerisyrenia to facilitate its removal. Turn the pot on its side and gently tap to loosen the soil. Grasp the plant's base and carefully ease it out of the pot, taking care to support the root ball.From Seedling Tray: Water the seedlings to ensure the soil is damp. Use a garden trowel or similar tool to carefully lift each velvety nerisyrenia seedling by its roots, making sure a good amount of soil stays attached to the roots to minimize transplant shock.
Step-by-Step Guide for Transplanting Velvety Nerisyrenia
Preparation
Prepare the new site by digging a hole that is twice the width of the root ball and equal in depth. Water the hole before planting to create a moist environment for the roots.
Inspect Roots
Before placing the velvety nerisyrenia in the new hole, examine the roots. If they are tightly packed or circling, gently separate them to encourage outward growth.
Placing the Plant
Position the velvety nerisyrenia into the hole, ensuring it sits at the same level as it did in its previous location. Fill around the roots with soil and gently press down to remove air pockets.
Watering
Immediately after planting, thoroughly water the velvety nerisyrenia to settle the soil and hydrate the roots. Use a slow and steady watering method to ensure the water penetrates deep into the root zone.
Mulching
Apply a layer of mulch around the base of the velvety nerisyrenia to conserve moisture, regulate soil temperature, and reduce weed growth. Avoid piling mulch directly against the plant stem.
How Do You Care For Velvety Nerisyrenia After Transplanting?
Regular Watering
For the initial few weeks, keep the soil around the velvety nerisyrenia consistently moist, but not waterlogged, to aid root establishment.
Observation
Monitor the velvety nerisyrenia for indications of stress such as wilting, leaf drop, or discoloration. Adjust care as needed.
Pruning
Trim away any dead or damaged stems and leaves to direct the velvety nerisyrenia's energy towards establishing its root system.
Staking
If the velvety nerisyrenia is tall or top-heavy, provide a stake to support the plant as it adapts to its new environment.
Feeding
Refrain from fertilizing the velvety nerisyrenia immediately after transplanting to prevent root burn. Wait until the plant shows signs of new growth before applying a balanced fertilizer.
Troubleshooting Common Issues with Velvety Nerisyrenia Transplantation.
How far apart should I space out velvety nerisyrenia when transplanting?
For optimal growth, plant velvety nerisyrenia at intervals of 10-12 inches (25-30 cm) apart.
What's the best time to transplant velvety nerisyrenia for successful establishment?
The prime time for transplanting velvety nerisyrenia is from the heart of spring until just before summer starts.
Why do the leaves of my transplanted velvety nerisyrenia look wilted?
Leaf wilting post-transplant can occur due to shock. Keep the soil moist and provide shade to help velvety nerisyrenia recover.
What type of soil should I use when transplanting velvety nerisyrenia?
Use well-draining soil rich in organic matter to give your transplanted velvety nerisyrenia a strong start.
How much should I water velvety nerisyrenia after transplanting?
Right after transplanting, water thoroughly. Then, maintain consistently moist soil without overwatering.
Can I transplant velvety nerisyrenia on a hot, sunny day?
Transplanting velvety nerisyrenia on a cooler, overcast day is best to reduce transplant stress and sun damage.
Is it necessary to add fertilizer when transplanting velvety nerisyrenia?
It's not mandatory, but mixing a slow-release, balanced fertilizer into the soil can assist velvety nerisyrenia with new growth.
What if velvety nerisyrenia is not standing upright after transplanting?
Support velvety nerisyrenia with a stake temporarily, and ensure adequate watering to help the plant establish.
How deep should I plant velvety nerisyrenia when transplanting?
Plant velvety nerisyrenia so its root ball is level with the soil surface, to avoid root suffocation or exposure.
What should I do if the transplanted velvety nerisyrenia shows no new growth?
Be patient; some plants take longer to establish. Ensure proper care, and if necessary, check for root-bound issues.



