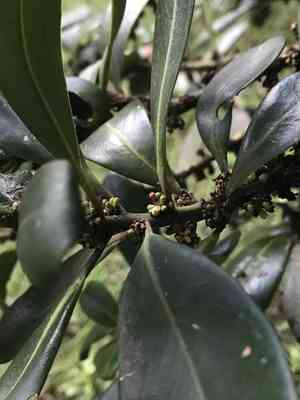
How to Transplant Myrsine guianensis?
Myrsine guianensis flourishes optimally when relocated during the initial to middle part of spring, enabling it to settle prior to summer. Verify its placement in an area receiving partial sunlight and possessing soil that drains effectively. Moving it during this period reduces strain and fosters robust development.
Essential Preparations Before Relocating Myrsine Guianensis
When is the Best Time to Move Myrsine Guianensis?
The most favorable period for relocating myrsine guianensis is from early to mid-spring, coinciding with the plant's emergence from winter dormancy into its active growth phase. Moving it at this time allows myrsine guianensis to benefit from milder temperatures and increased humidity, fostering robust root development and overall plant vitality.
What is the Recommended Spacing Between Myrsine Guianensis Plants?
When transplanting myrsine guianensis, aim for a separation of 24-36 inches (60-90 cm) between each plant. This provides ample room for growth and prevents overcrowding. Proper spacing aids air circulation and diminishes the likelihood of diseases.
Which Soil Mixture is Ideal for Myrsine Guianensis Transplantation?
Prepare a well-draining soil mix rich in organic matter for myrsine guianensis. Incorporating a balanced base fertilizer, particularly one high in phosphorus, will encourage strong root formation. Ensure the soil pH is slightly acidic to neutral, approximately 6.0 to 7.0.
Where Should You Replant Your Myrsine Guianensis?
Select a site for myrsine guianensis that receives partial to full sun exposure. Ideally, it should get 4-6 hours of direct sunlight daily. Confirm the area is shielded from strong winds to prevent plant damage.
Necessary Tools for Transplanting Myrsine Guianensis
Gardening Gloves
To safeguard your hands while handling soil and the plant.
Shovel or Spade
For digging around and lifting the myrsine guianensis from its original spot.
Hand Trowel
Used for more precise digging and planting tasks.
Wheelbarrow
Helpful for moving the plant and soil.
Watering Can
To hydrate the plant before and after its relocation.
Pruning Shears
For trimming any damaged or excess roots.
Mulch
To assist in retaining soil moisture around the myrsine guianensis post-transplant.
How to Extract Myrsine Guianensis from its Current Location
How to Extract Myrsine Guianensis from its Current Location
From Ground: First, moisten the soil around the myrsine guianensis. Then, use a shovel or spade to dig a wide trench around the plant, ensuring the root ball remains intact. Carefully work the spade beneath the root ball to lift the plant from its original position.From Pot: Gently water the myrsine guianensis and tilt the pot, supporting the plant at its base with one hand. Tap the pot's sides to loosen the soil, then carefully slide the plant out while supporting the root ball.From Seedling Tray: Water the seedlings and use a pencil or similar tool to gently push through the drainage hole, lifting the plant by its roots, taking care not to harm them.
Detailed Steps for Transplanting Myrsine Guianensis
Prepare the New Location
Dig a hole at the new site that is twice as wide and roughly the same depth as the myrsine guianensis's root ball. Loosen the soil at the bottom of the hole.
Root Examination
Inspect the root ball and trim any damaged or overly long roots with pruning shears. Gently untangle the roots if they are densely packed.
Planting Process
Position the myrsine guianensis in the center of the hole. Ensure the top of the root ball is level with or slightly above the surrounding soil. Backfill the hole with soil, gently firming it around the root ball to eliminate air pockets.
Initial Watering
Thoroughly water the myrsine guianensis immediately after planting to settle the soil and ensure proper root-to-soil contact.
Applying Mulch
Spread a layer of mulch around the base of the myrsine guianensis to retain moisture and regulate soil temperature, but keep it a few inches away from the stem to prevent rot.
Post-Transplant Care for Myrsine Guianensis
Watering Regimen
Maintain consistent moisture in the soil around the myrsine guianensis, avoiding sogginess, for the initial weeks after transplanting to aid in strong root establishment.
Regular Monitoring
Periodically check the plant for indications of stress or disease. Wilting or yellowing leaves might suggest the plant needs more water or is experiencing transplant shock.
Environmental Protection
Shield the myrsine guianensis from harsh weather conditions, such as strong winds or heavy rains, by providing temporary support or cover if necessary.
Fertilization Schedule
Allow a few weeks to pass before applying any fertilizer to enable the myrsine guianensis to settle into its new environment.
Addressing Common Issues During Myrsine Guianensis Transplantation.
What is the optimal time to move myrsine guianensis?
The best time to transplant myrsine guianensis is early to mid-spring, as conditions are ideal for growth.
How much distance should I maintain between each myrsine guianensis plant?
Space each myrsine guianensis 24-36 inches (60-91 cm) apart to ensure adequate growth and air circulation.
What kind of soil is most suitable for transplanting myrsine guianensis?
Myrsine guianensis thrives in well-draining, fertile soil. Ensure the soil has ample organic content for optimal development.
What depth should I plant myrsine guianensis during relocation?
Plant myrsine guianensis at the same depth it was in its original container to minimize stress.
How frequently should I water myrsine guianensis after transplanting?
Water myrsine guianensis thoroughly after transplanting, then keep the soil moist but not waterlogged, checking daily.
How should I prepare the site for moving myrsine guianensis?
Remove weeds, loosen the soil, and incorporate compost to prepare the site for myrsine guianensis.
What is the ideal temperature for transplanting myrsine guianensis?
The best temperature for transplanting myrsine guianensis is between 60-70°F (15-21°C) to minimize stress.
Should I prune myrsine guianensis before moving it?
Gently prune any damaged leaves or roots. Pruning encourages new growth after transplant.
How can I lessen transplant shock in myrsine guianensis?
Water thoroughly, avoid disturbing roots, and mulch around myrsine guianensis to retain moisture and reduce shock.
What are typical indicators of transplant stress in myrsine guianensis?
Yellowing leaves, wilting, and stunted growth signal transplant stress in myrsine guianensis. Ensure proper care.


