How to Transplant Pull-up muhly?
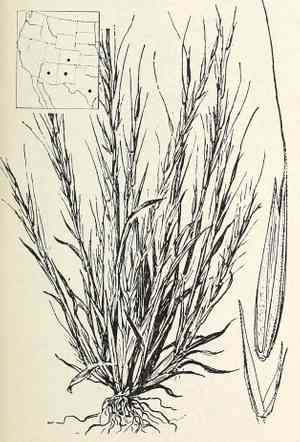
Pull-up muhly flourishes when relocated from mid to late spring, as this period guarantees peak development due to rising temperatures and extended daylight hours. Select a sunny spot with good drainage to replicate its native environment. Take precautions to prevent transplant stress.
What Preparations are Needed Before Transplanting Pull-up Muhly?
What is the Ideal Time for Transplanting Pull-up Muhly?
The best time to move pull-up muhly is from mid to late spring. This period offers mild temperatures and consistent moisture, promoting robust root development. Transplanting under these conditions ensures higher survival rates and vigorous growth, allowing pull-up muhly to establish its roots before summer's intense heat.
How Much Space Should You Leave Between Pull-up Muhly Plants?
For thriving and healthy pull-up muhly plants, position each one approximately 18-24 inches (46-61 cm) apart. This provides them with sufficient room to grow without becoming overcrowded.
What is the Best Soil Mix for Pull-up Muhly Transplanting?
Prepare a soil mixture that drains well for pull-up muhly. A sandy or loamy soil type is most effective. Incorporate a foundational fertilizer rich in organic material to give your plants a strong start.
Where Should You Relocate Your Pull-up Muhly?
Select a sunny location for transplanting pull-up muhly. Aim for an area that receives at least 6-8 hours of sunlight daily to ensure your plants flourish.
What Equipments Should You Prepare Before Transplantation Pull-up Muhly?
Gardening Gloves
To safeguard your hands while handling soil and plants.
Shovel or Spade
For excavating the transplant hole and extracting the plant.
Hand Trowel
For more precise digging and smoothing the ground.
Watering Can or Hose
For hydrating the plant before and after its relocation.
Mulch
To conserve moisture and shield the newly transplanted plant.
How Do You Remove Pull-up Muhly from the Soil?
How Do You Remove Pull-up Muhly from the Soil?
From Ground: First, hydrate the pull-up muhly plant to moisten the soil. Next, excavate a wide trench around the plant using a shovel or spade, ensuring the plant's root ball remains intact. Carefully maneuver the spade beneath the root ball to lift the plant from its original spot.From Pot: Gently loosen the soil along the pot's edges. Grasp the base of the pull-up muhly plant and carefully invert the pot. Tap the pot's base to release the root ball and the plant. Lift the plant out of the pot, taking care not to harm the roots.From Seedling Tray: Water the tray to make the soil easier to manage. Gently press the bottom of the seedling cell to push the pull-up muhly plant and its root ball upwards. Use a hand trowel to carefully lift the seedling if necessary.
Step-by-Step Guide for Transplanting Pull-up Muhly
Choose Transplant Date
Plan to move your pull-up muhly on a cool, overcast day to minimize plant stress.
Prepare the New Site
Dig a hole that is twice as wide and the same depth as the pull-up muhly's root ball.
Add Organic Matter
Incorporate compost or other organic material into the hole to enrich the soil.
Remove the Plant
Carefully extract the pull-up muhly from its initial location using the appropriate removal method.
Place the Plant
Position the pull-up muhly in the new hole, ensuring it sits at the same depth as it was previously growing.
Fill the Hole
Backfill the hole with soil, gently pressing down to eliminate air pockets around the root ball.
Water Thoroughly
Water the pull-up muhly immediately after transplanting to settle the soil around the roots.
How Do You Care For Pull-up Muhly After Transplanting?
Watering
Keep the soil around the pull-up muhly consistently moist, but not waterlogged, for the initial weeks post-transplant to aid in strong root establishment.
Mulching
Apply a layer of mulch around the base of the pull-up muhly to retain moisture and regulate soil temperature.
Monitoring
Regularly check for indications of transplant shock, such as wilting or yellowing leaves, and adjust care as required.
Troubleshooting Common Issues with Pull-up Muhly Transplantation.
When is the best time to transplant pull-up muhly?
Relocate pull-up muhly between mid-spring and mid-summer for optimal outcomes.
How far apart should I space pull-up muhly plants?
Position pull-up muhly plants 18-24 inches (45-60 cm) apart to ensure healthy development.
What type of soil is ideal for transplanting pull-up muhly?
Utilize well-draining soil with a blend of sand and organic matter for peak growth.
How deep should I plant pull-up muhly during transplanting?
Plant pull-up muhly at the same depth it was originally growing to prevent stress.
Should I water pull-up muhly immediately after transplanting?
Yes, thoroughly water pull-up muhly right after transplanting to help it establish roots.
What should I do if pull-up muhly leaves start wilting after transplanting?
Inspect soil moisture and provide additional water if needed; ensure proper drainage.
How can I protect pull-up muhly from transplant shock?
Water consistently and maintain moist soil for the first few weeks.
Can I use fertilizer when transplanting pull-up muhly?
Yes, apply a balanced, slow-release fertilizer to support robust growth.
Do I need to trim pull-up muhly roots before transplanting?
Trim any damaged or excessively long roots to encourage better establishment.
Is it necessary to mulch around pull-up muhly after transplanting?
Mulch around pull-up muhly to conserve moisture, suppress weeds, and enhance soil conditions.



