How to Transplant Lesser swine-cress?
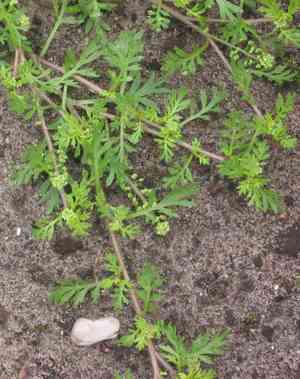
Relocate lesser swine-cress during the ideal period from late spring to mid-summer to ensure best adaptation. Select a bright location featuring soil that drains effectively, and although not mandatory, enhancing the area with compost can stimulate development.
Essential Preparations Before Relocating Lesser Swine-cress
Optimal Timing for Transplanting Lesser Swine-cress
The ideal period for moving lesser swine-cress spans from late spring through mid-summer. Transplanting during this timeframe ensures lesser swine-cress benefits from prime growing conditions, including warm soil and extended daylight. This schedule avoids the lingering cold of early spring and preempts the intense, potentially harmful heat of late summer, offering lesser swine-cress a gentle yet vigorous environment to establish itself in its new spot. Additionally, transplanting lesser swine-cress at this time allows it to settle in with minimal weed competition.
Recommended Spacing Between Lesser Swine-cress Plants
When preparing to transplant your lesser swine-cress, allocate ample room for each individual plant. Aim for a separation of approximately 1-2 feet (30.5 - 61 cm). This spacing will guarantee your plants have sufficient area to develop and flourish without competing with one another.
Ideal Soil Composition for Lesser Swine-cress Transplantation
Prepare your soil for lesser swine-cress by selecting a fertile, well-draining type. You can boost your soil's richness with a general-purpose base fertilizer. This will supply the vital nutrients lesser swine-cress requires for strong, healthy growth.
Choosing a New Location for Your Lesser Swine-cress
Lesser swine-cress thrives in sunlight, so select a garden spot that receives ample daily sun exposure. However, note that this plant can also endure partial shade. This way, lesser swine-cress can absorb the perfect amount of sun to bloom beautifully.
Tools Required for Transplanting Lesser Swine-cress
Gardening Gloves
To safeguard your hands while handling soil and lesser swine-cress plants.
Shovel or Trowel
For excavating holes for your lesser swine-cress.
Pointed Spade
For extracting the plant from its current site without harming the root system.
Watering Can
For hydrating your lesser swine-cress plant both before and after its relocation.
Pruning Shears
For trimming any dead or excessive growth to promote successful transplantation.
Organic Matter
To enhance soil quality and supply essential nutrients to the lesser swine-cress plant.
Method for Extracting Lesser Swine-cress from the Soil
Method for Extracting Lesser Swine-cress from the Soil
From Ground: Hydrate the lesser swine-cress plant to moisten the surrounding soil. Then, using a pointed spade or trowel, dig a trench around the plant, ensuring the root ball remains intact. Carefully work the spade beneath the root ball to gently lift the plant from its original position.From Pot: For indoor starts or container-grown plants, water the lesser swine-cress. Once saturated, carefully tilt the container sideways, supporting the plant with your fingers, and tap the pot's base to slide it out. Be cautious not to pull the plant or damage its roots.From Seedling Tray: If moving from a seedling tray, ensure the root ball and surrounding soil remain undisturbed. Gently press the bottom of the cell and lift the lesser swine-cress out, again taking care not to harm the roots.
Detailed Steps for Transplanting Lesser Swine-cress
Digging
Excavate a hole twice the width of the lesser swine-cress plant's root ball and equivalent in depth to its current growing conditions. The wider hole provides roots with room to expand and grow.
Planting
Position the lesser swine-cress plant into the hole, ensuring it stands upright. The top of the root ball should be level with or slightly above the ground surface.
Backfilling
Refill the hole with a mixture of the original soil and organic matter. Gently firm the soil around the lesser swine-cress plant to eliminate any air pockets.
Watering
Thoroughly water the newly transplanted plant, using a watering can to gently moisten the surrounding soil and the plant itself.
Pruning
If necessary, use pruning shears to trim any dead or excessive growth on the lesser swine-cress plant. This helps the plant direct its energy towards root establishment.
Post-Transplantation Care for Lesser Swine-cress
Watering
Maintain consistent moisture in the soil around the lesser swine-cress for the initial weeks after transplanting, avoiding waterlogging. This aids in developing a robust root system.
Weeding
Regularly inspect for and remove any weeds growing near the lesser swine-cress plant. These can compete for vital nutrients and water.
Monitor the lesser swine-cress plant
Observe your lesser swine-cress plant closely for the first few weeks. Watch for signs of disease or pests and address them promptly to ensure proper establishment.
Resolving Common Issues with Lesser Swine-cress Transplantation.
What is the optimal time of year for transplanting lesser swine-cress?
The best seasons for relocating lesser swine-cress are from late summer to early autumn (S3-S5). This allows lesser swine-cress ample time to establish itself before colder weather arrives.
How much spacing is required between each lesser swine-cress during transplanting?
For healthy development, lesser swine-cress plants should be spaced approximately 1-2 feet (30-60 cm) apart. This provides room for growth and prevents overcrowding.
What might cause my lesser swine-cress to struggle after transplant?
Ensure lesser swine-cress receives adequate, but not excessive, watering after transplanting. Extreme conditions (too dry or too wet) can stress the plant and hinder its growth.
Why are the leaves on my transplanted lesser swine-cress turning yellow?
Yellow leaves could indicate overwatering. Lesser swine-cress does not tolerate soggy soil well. Verify that your plant's location has proper drainage.
How can I safeguard my transplanted lesser swine-cress from harsh weather?
In windy or exceptionally hot conditions, provide a protective barrier using a microclimate. This could be an area sheltered by walls, fences, or other plants.
Why is my transplanted lesser swine-cress not producing flowers?
A lack of flowering may be due to insufficient sunlight. Lesser swine-cress requires full sun to bloom optimally. Consider moving it if the current spot lacks adequate sunlight.
Is pruning necessary for my lesser swine-cress after transplanting?
Pruning is generally not required for lesser swine-cress. These plants are quite resilient post-transplant. Simply remove any visibly damaged or diseased parts, if present.
What kind of soil is best for transplanting lesser swine-cress?
Lesser swine-cress prefers well-drained soil with an ideal pH between 6.0 and 7.0. Adjust your soil's acidity if necessary before transplanting.
How deep should I plant lesser swine-cress during transplanting?
The plant's root-ball should be positioned just below the soil surface, approximately 2 inches (5 cm) deep. This is vital for lesser swine-cress to establish correctly.
Which fertilizer is most suitable for lesser swine-cress after transplanting?
A balanced fertilizer, containing equal proportions of nitrogen, phosphorus, and potassium, is recommended after transplanting to encourage vigorous growth in lesser swine-cress.



