How to Transplant Honeyweed?
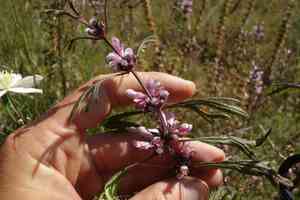
The optimal period for transplanting honeyweed spans from the refreshing onset of early spring through the mild temperatures of late spring. Choose locations that receive ample sunlight and possess soil with good drainage. During the relocation process, it is crucial to minimize disruption to the root system for a smooth establishment.
Essential Preparations Before Relocating Honeyweed?
Optimal Period for Moving Honeyweed?
The prime window for relocating honeyweed spans from the onset of early spring to the close of late spring. This timing allows honeyweed to establish its root system in cool, damp soil, leveraging the abundant spring growth energy. Cultivating honeyweed during this interval ensures robust development, capitalizing on the longer days ahead. A friendly reminder: transplant once frost danger subsides, providing honeyweed the best start in its new location.
Required Spacing Between Honeyweed Plants?
When arranging your lovely honeyweed, aim for a separation of approximately 18-24 inches (45-60 cm). This provides ample room for each plant to thrive and ensures sufficient air circulation, contributing to their happiness and health!
Ideal Soil Blend for Honeyweed Relocation?
Your honeyweed will flourish in well-drained soil rich in organic material. Incorporate some compost or a balanced slow-release fertilizer prior to planting to provide a nutritious beginning. Target a pH between 6.0 and 7.0 for peak growth.
Recommended Location for Your Honeyweed?
Select a sunny spot for your honeyweed that receives at least 6 hours of direct sunlight daily. They adore basking in the warmth! In hotter climates, some afternoon shade can offer protection from intense heat.
Necessary Tools for Honeyweed Transplantation?
Gardening Gloves
To safeguard your hands while handling soil and plants.
Spade or Shovel
For excavating and lifting the root ball during the extraction process.
Hand Trowel
For more precise tasks when removing smaller plants from containers or trays.
Watering Can or Hose
To hydrate the plant before and after removal, and to water the new site post-transplant.
Pruning Shears
To trim any dead or damaged roots or foliage prior to transplanting.
Wheelbarrow or Plant Dolly
To move the plant and soil without harming the roots or straining the gardener's back.
Garden Fork
To loosen the soil surrounding the roots when extracting from the ground.
Mulch
To apply around the plant's base after transplanting, aiding in moisture retention.
Stakes or Support Structures
If honeyweed requires assistance during its establishment phase.
Method for Extracting Honeyweed from the Soil?
Method for Extracting Honeyweed from the Soil?
From Ground: First, water the honeyweed plant to moisten the soil. Using a garden fork, gently loosen the soil around the plant. Take a spade or shovel and dig a wide circle around the honeyweed, ensuring you are far enough out to avoid severing major roots. Lever the spade underneath the plant to gently lift it out with the root ball intact.From Pot: Water the plant thoroughly. Tilt the pot sideways and gently tap the sides and bottom to loosen the root ball. Hold the base of the honeyweed plant with one hand, and with the other hand, pull the pot off. If the plant is stuck, you might need to slide the hand trowel around the inside edge of the pot to help release it.From Seedling Tray: Water the seedlings to ensure the roots are moist and pliable. Use a spoon or a dibber to gently lift each plant from its cell, making sure to support the root ball to prevent any damage.
Step-by-Step Guide for Relocating Honeyweed
Prepare the New Location
Ensure the new planting area is free of weeds and debris. Loosen the soil with a shovel or garden fork and create a hole that is twice as wide and just as deep as the root ball.
Examine the Root Ball
Before transplanting, inspect the root ball for any dead or damaged roots and trim them with pruning shears.
Positioning the Plant
Carefully place honeyweed in the center of the new hole. The top of the root ball should be level with the surrounding soil surface.
Backfill the Hole
Gently fill in the hole with the excavated soil. Firm the soil around the plant with your hands to eliminate air pockets but be careful not to compact the soil too much.
Watering
Water honeyweed generously to settle the soil around the roots and to help alleviate transplant shock.
Mulching
Apply a layer of mulch around the base of honeyweed to help retain moisture in the soil.
Support the Plant
If necessary, install stakes or support structures around honeyweed to help it maintain its posture as it grows.
Post-Transplant Care for Honeyweed?
Monitoring
Observe honeyweed for indications of transplant shock, which may appear as wilting or discolored leaves.
Watering
Ensure the soil remains consistently moist, watering as needed without over-saturating, especially during the initial weeks.
Mulching
Maintain the mulch layer around honeyweed to conserve soil moisture and regulate soil temperature.
Weeding
Regularly remove any weeds that emerge near honeyweed to prevent competition for nutrients and water.
Adjusting Support
Adjust stakes or support structures as honeyweed grows to ensure its stability.
Resolving Common Issues with Honeyweed Transplantation.
Why is my honeyweed wilting after transplanting?
Wilting post-transplant may be due to shock. Ensure gentle handling, consistent watering, and protection from strong sun until established.
What depth should I plant honeyweed?
Honeyweed should be planted at the same depth it grew in its previous container. Roots should be just below the soil surface.
When is the best time to transplant honeyweed?
Transplanting honeyweed thrives when done in the milder temperatures of early to late spring, ideally after the last frost.
How often should I water honeyweed after transplanting?
Water honeyweed generously at planting and then regularly, keeping the soil evenly moist but not waterlogged.
What spacing is needed between honeyweed when transplanting?
Space honeyweed at least 18-24 inches (45-60 cm) apart to give them room to reach full size and encourage air circulation.
Can honeyweed be transplanted in full sun?
Honeyweed can be transplanted in full sun, but provide some partial shade during the hottest parts of the day initially.
How to prepare the soil for transplanting honeyweed?
Work in organic matter like compost to enrich the soil and ensure it's well-draining to receive honeyweed tenderly.
What are the signs of overwatering honeyweed after transplanting?
Yellowing leaves, soft soggy stems, and a general lack of growth may indicate overwatering of honeyweed.
When is it too late to transplant honeyweed?
It's late when temperatures consistently soar or drop. Aim to transplant well before the heat of summer or the chill of fall.
Can I fertilize honeyweed immediately after transplanting?
Hold off on fertilizing right after transplanting. Let honeyweed establish for 4-6 weeks, then use a balanced fertilizer sparingly.



