How to Transplant San pedro daisy?
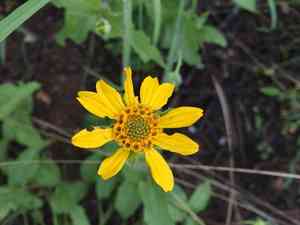
San pedro daisy flourishes most effectively when relocated from the beginning to the middle of spring or during early winter, owing to more moderate temperatures. Select a bright, adequately drained spot for peak development. If required, confirm the substrate is somewhat damp prior to the transfer.
What Preparations are Needed Before Transplanting San Pedro Daisy?
What is the Ideal Time for Transplanting San Pedro Daisy?
The best period for relocating san pedro daisy is from early to mid-spring or early winter. During these times, moderate temperatures lessen transplant stress and enable the plant to establish roots prior to severe weather. Moving san pedro daisy at these points ensures robust root growth and enhanced resilience, contributing to its longevity and vitality.
How Much Space Should You Leave Between San Pedro Daisy Plants?
When moving san pedro daisy, it's crucial to provide sufficient room for development. Aim for a separation of 24-36 inches (61-91 cm) between each plant to guarantee they have ample space to flourish without being too crowded.
What is the Best Soil Mix for San Pedro Daisy Transplanting?
Prepare a well-draining soil blend enriched with compost to keep san pedro daisy thriving and healthy. A sandy-loam soil type fortified with organic material will yield excellent results. Incorporating a base fertilizer with balanced nutrients, such as a 10-10-10 formula, promotes strong initial growth.
Where Should You Relocate Your San Pedro Daisy?
Select a sunny spot for transplanting san pedro daisy. This plant prefers full sun, meaning it should receive a minimum of 6-8 hours of direct sunlight daily. Ensuring ample light will lead to vigorous and vibrant growth.
What Equipments Should You Prepare Before Transplantation San Pedro Daisy?
Gardening Gloves
To safeguard your hands while handling soil and the plant.
Shovel or Spade
For excavating a hole and lifting the plant.
Trowel
To assist with smaller digging tasks and removing the plant from containers or trays.
Watering Can or Hose
For thoroughly hydrating the plant before and after relocation.
Pruning Shears
To trim any damaged roots or foliage during the transplanting process.
Wheelbarrow
Useful for moving the plant and soil.
How Do You Remove San Pedro Daisy from the Soil?
How Do You Remove San Pedro Daisy from the Soil?
From Ground: First, hydrate the san pedro daisy plant to moisten the soil. Then, dig a wide trench around the plant using a shovel or spade, ensuring the plant's root ball remains intact. Carefully work the spade beneath the root ball to lift the plant from its original spot.From Pot: Gently water the san pedro daisy plant to facilitate soil removal. Turn the pot on its side and tap the edges to loosen the soil. Carefully slide the plant out, supporting the base and roots.From Seedling Tray: Lightly water the san pedro daisy plant. Use a trowel or your fingers to gently loosen the soil surrounding the seedling. Carefully lift the seedling by supporting the base and roots, ensuring minimal disruption.
Step-by-Step Guide for Transplanting San Pedro Daisy
Prepare the Site
Choose a location with adequate sunlight and room for your san pedro daisy to reach its full size. Clear the area of any weeds or debris.
Dig a Hole
Excavate a hole in the prepared site that is twice as wide and equal in depth to the plant's root ball.
Water the Hole
Before placing the plant in the hole, water it thoroughly to ensure the soil is moist.
Place the Plant
Carefully position the san pedro daisy in the hole, ensuring the top of the root ball is level with the surrounding soil surface. Fill in around the root ball with the excavated soil, gently patting it down.
Water Again
Give the newly transplanted san pedro daisy a deep watering to help settle the soil and eliminate air pockets.
How Do You Care For San Pedro Daisy After Transplanting?
Watering
Keep the soil around the san pedro daisy consistently moist, but not waterlogged, for the initial weeks after transplanting to help establish strong roots.
Mulching
Apply a layer of mulch around the base of the san pedro daisy to retain moisture and regulate soil temperature.
Monitoring
Keep an eye on the plant for any indications of transplant shock, such as wilting or yellowing leaves, and provide additional water or shade if necessary.
Support
If needed, use stakes or supports to help the san pedro daisy stand upright while it establishes itself in its new location.
Troubleshooting Common Issues with San Pedro Daisy Transplantation.
When is the best time to transplant san pedro daisy?
Early to mid-spring or early winter is ideal for transplanting san pedro daisy.
How far apart should san pedro daisy plants be spaced?
Space san pedro daisy plants 24-36 inches (60-90 cm) apart for optimal growth.
How deep should I dig the transplant hole for san pedro daisy?
Dig a hole as deep as the root ball and twice as wide.
What soil type is best for transplanting san pedro daisy?
Well-draining soil with good organic matter is ideal for san pedro daisy.
Should I water san pedro daisy immediately after transplanting?
Yes, water thoroughly right after transplanting to help roots settle.
How can I reduce transplant shock for san pedro daisy?
Keep the root ball intact and water well to minimize transplant shock.
Do I need to fertilize san pedro daisy after transplanting?
Wait a few weeks before applying a balanced fertilizer to san pedro daisy.
What kind of mulch is best for san pedro daisy?
Use organic mulch like bark or compost to retain moisture around san pedro daisy.
How much sunlight does san pedro daisy need after transplanting?
San pedro daisy thrives in full sun, needing at least 6 hours of direct sunlight daily.
What is the ideal temperature for transplanting san pedro daisy?
Transplant san pedro daisy in temperatures between 50-70°F (10-21°C) for best results.



