How to Transplant Potato dwarf dandelion?
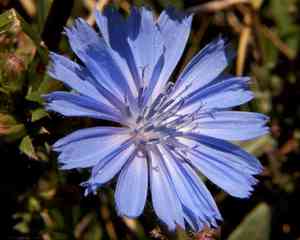
For potato dwarf dandelion, the optimal time for relocation is from early to mid-spring's resurgence, utilizing the temperate conditions for root development. Select a brightly lit location featuring soil that drains effectively. Should it be required, amend the area with compost to accommodate this delightful plant.
What Preparations are Needed Before Transplanting Potato Dwarf Dandelion?
What is the Ideal Time for Transplanting Potato Dwarf Dandelion?
The best period for moving potato dwarf dandelion is the revitalizing phase of early to mid-spring. Relocating during this time takes advantage of the mild weather, allowing potato dwarf dandelion to establish roots firmly and thrive. Engaging in this process as nature awakens ensures that potato dwarf dandelion benefits from increasing daylight and moderate temperatures, setting the stage for vigorous growth. This strategic timing promotes strong development before the stress of summer heat, helping your potato dwarf dandelion settle in confidently.
How Much Space Should You Leave Between Potato Dwarf Dandelion Plants?
When relocating your potato dwarf dandelion, aim to provide ample room for them to flourish. Spacing them 6 to 12 inches apart (15 to 30 cm) will suffice, ensuring they have enough area to spread their roots and expand!
What is the Best Soil Mix for Potato Dwarf Dandelion Transplanting?
For your potato dwarf dandelion, a successful beginning starts with the correct foundation! Choose well-draining soil rich in organic matter. Before planting, incorporate a balanced, slow-release fertilizer to give them a nutritional head start.
Where Should You Relocate Your Potato Dwarf Dandelion?
Now, let's highlight potato dwarf dandelion's perfect spot! Select a sunny to partially shaded area in your garden where they can enjoy the sun's rays for most of the day. They will reward you with vibrant growth!
What Equipments Should You Prepare Before Transplantation Potato Dwarf Dandelion?
Gardening Gloves
To safeguard your hands while handling soil and plants.
Shovel or Spade
For excavating and lifting the root ball of the potato dwarf dandelion.
Garden Trowel
To refine the planting hole or create smaller holes for the plant.
Watering Can or Hose
To hydrate the potato dwarf dandelion before and after relocation.
Pruning Shears
To trim any damaged roots or foliage.
How Do You Remove Potato Dwarf Dandelion from the Soil?
How Do You Remove Potato Dwarf Dandelion from the Soil?
From Ground: First, moisten the potato dwarf dandelion plant to dampen the soil. Then, dig a wide circle around the plant with a shovel or spade, being careful not to harm the root ball. Gently slide the spade under the root ball and lift the potato dwarf dandelion from its spot.From Pot: Water the potato dwarf dandelion thoroughly beforehand. Turn the pot sideways and gently tap the base or sides to loosen the soil. Grasp the plant at its base and carefully ease it out of the pot, supporting the root ball.From Seedling Tray: Dampen the soil in the tray to facilitate removal. Use a garden trowel to lift the soil and root section of each potato dwarf dandelion seedling, handling the plant by its leaves rather than its delicate stem.
Step-by-Step Guide for Transplanting Potato Dwarf Dandelion
Preparation
Water the potato dwarf dandelion thoroughly before beginning the transplant to ensure the soil is moist, which will help keep the root ball intact during removal.
Digging the Hole
Excavate a hole in the ground that is twice the width and the same depth as the potato dwarf dandelion's root ball to ensure ample space for root spread and establishment.
Root Ball Inspection
Carefully remove any damaged or dead roots with pruning shears, and examine the root ball for any signs of disease or pests before placing it in the new hole.
Planting
Position the potato dwarf dandelion in the center of the new hole, gently spreading out its roots. The plant's base should be level with the surrounding soil surface.
Filling the Hole
Backfill the hole with soil, gently compacting it around the root ball to eliminate any air pockets.
Watering
Immediately water the potato dwarf dandelion to settle the soil around its roots and help reduce transplant shock. This also aids in good soil-to-root contact.
Support
If needed, use stakes or other supports to help the potato dwarf dandelion stand upright and protect it from strong winds until it has established itself.
Mulching
Apply a thin layer of mulch around the base of the potato dwarf dandelion to help retain moisture and suppress weeds, but avoid piling it directly against the stem to prevent rot.
How Do You Care For Potato Dwarf Dandelion After Transplanting?
Regular Watering
Provide the potato dwarf dandelion with consistent moisture, allowing the soil to dry out slightly between waterings to encourage robust root development.
Monitoring for Pests and Diseases
Regularly check for any indications of pests or diseases and take prompt, appropriate action to protect the potato dwarf dandelion as it establishes.
Staking
If the potato dwarf dandelion appears unstable, add stakes for support and loosely tie the plant to them for added stability during windy conditions.
Pruning
Trim away any damaged or dead foliage to help the potato dwarf dandelion direct its energy towards new growth and root development.
Feeding
After a month, consider a mild application of fertilizer suitable for potato dwarf dandelion, avoiding excessive fertilization which can harm the plant.
Patience
Be patient as the potato dwarf dandelion adjusts to its new location. It may take some time before it begins to show vigorous growth.
Troubleshooting Common Issues with Potato Dwarf Dandelion Transplantation.
What's the best time to transplant potato dwarf dandelion?
The optimal period for relocating potato dwarf dandelion is when the weather is mild, ideally during the pleasant early to mid-spring.
How far apart should I plant potato dwarf dandelion?
Space potato dwarf dandelion seedlings 6 to 12 inches (15 to 30 cm) apart from each other to provide them with ample room to thrive.
Why are my transplanted potato dwarf dandelion wilting?
Potato dwarf dandelion might wilt after transplant due to shock. Ensure gentle handling, sufficient watering, and initially avoid direct sunlight.
How deep should the hole be for potato dwarf dandelion transplanting?
Dig a hole that is as deep as the root ball but twice as wide to comfortably accommodate potato dwarf dandelion's roots.
Can I transplant potato dwarf dandelion on a hot, sunny day?
It's preferable to transplant potato dwarf dandelion on a cloudy day or in the late afternoon to minimize stress on the plant.
What should I do if potato dwarf dandelion isn't growing after transplantation?
Patience is crucial! Ensure proper soil conditions, spacing, and water. If no improvement, gently check for root-binding or disease.
How much water does potato dwarf dandelion need after transplanting?
Water potato dwarf dandelion generously after transplanting to help roots settle. Then maintain consistent moisture, especially during the initial weeks.
Should I fertilize potato dwarf dandelion right after transplanting?
Avoid immediate fertilization, which can overwhelm potato dwarf dandelion. Wait several weeks before lightly fertilizing to encourage growth.
Why are potato dwarf dandelion's leaves turning yellow after transplant?
Yellow leaves could indicate over-watering or inadequate drainage. Ensure well-draining soil and adjust watering as needed.
How do I prepare the soil for transplanting potato dwarf dandelion?
Enrich the soil with compost and ensure it's loose and well-draining to welcome potato dwarf dandelion's roots and promote healthy growth.



