How to Transplant Field scabious?
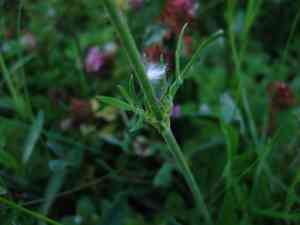
For field scabious, the optimal period for relocation is from mid-spring through early summer, which guarantees vigorous development. Select a location bathed in sunlight with soil that drains effectively. Careful manipulation is crucial to safeguard the fragile root structure of field scabious during its transfer.
Essential Preparations Before Relocating Field Scabious
Optimal Timing for Field Scabious Relocation?
The ideal period to move field scabious is from mid-spring to early summer. This timeframe provides consistent, mild temperatures, allowing roots to establish effortlessly. Selecting this flourishing season promotes vigorous development, as field scabious can benefit from longer days and gentle warmth, creating a strong base for impressive blooms. Transplanting field scabious during these months aligns with its natural growth cycle, fostering vitality and minimizing transplant shock, resulting in a vibrant floral display in your garden.
Recommended Spacing Between Field Scabious Plants?
When transplanting field scabious, ensure ample room for growth. A general guideline is to leave 1.5-2.5 feet (45-75 cm) between each plant. This spacing will allow them to flourish without competing for vital resources.
Best Soil Blend for Field Scabious Transplanting?
For transplanting field scabious, select a well-draining soil type enriched with organic compost. A base fertilizer high in phosphorus can aid root development. Begin by incorporating this into the soil a week beforehand.
Where to Replant Your Field Scabious?
Choose a spot that receives full sunlight for field scabious. This means the area should get at least 6-8 hours of direct sun daily. However, they can also endure partially shaded conditions if full sun isn't available.
Equipment Needed Before Transplanting Field Scabious?
Gardening Gloves
To maintain cleanliness and shield your hands from scrapes or cuts.
Garden Spade or Shovel
Used for digging the planting hole and extracting the plant from its original spot.
Trowel
Useful for excavating smaller holes and refining the transplant site.
Garden Hose or Watering Can
To hydrate the field scabious plant before and after its relocation.
Wheelbarrow or Gardening Basket
Helpful for transporting the field scabious plant from its initial location to the new one.
Pruning Shears
Essential for trimming tough stems or roots of the field scabious plant.
How to Extract Field Scabious from the Soil?
How to Extract Field Scabious from the Soil?
From Ground: First, water the field scabious plant to moisten the soil, making it easier to work with. Using your spade or shovel, create a wide circle around the plant, ensuring it's broad enough to keep the root ball intact. Then, carefully work the shovel beneath the root ball to loosen the soil. Gently lift the plant, taking care not to harm the roots.From Pot: If the field scabious plant is in a pot, start by watering it thoroughly. Carefully tilt the pot sideways and gently slide the plant out, making sure not to pull it by its stem or leaves. If the plant is stuck, use a trowel to loosen the soil around the edges. Keep the root ball intact and avoid removing soil attached to the roots, as this can cause damage.From Seedling Tray: For transplanting field scabious seedlings, first water the tray to dampen the soil. Then, use a small tool or even a popsicle stick to gently lift the seedling, ensuring you don't damage the roots. Hold the seedling by its leaves to prevent bruising on the stem, making sure all roots and the attached soil come out together to prevent root disturbance.
Step-by-Step Guide for Relocating Field Scabious
Preparation
Water the field scabious plant deeply the day before transplanting to reduce stress. On transplant day, prepare the hole where the field scabious will be placed. The hole should be twice as wide as the root ball but no deeper than its length.
Removal
Follow the extraction process from its original location as previously described.
Placing
Position the field scabious plant in the hole, ensuring it's set at the same depth as its previous spot. Fill the hole halfway with garden soil.
Watering
Water the plant thoroughly to settle the soil.
Final Adjustments
Continue filling the hole with soil, firming it around the base of the plant as you go. Finish by watering again.
Post-Transplant Care for Field Scabious
Watering
Water the field scabious generously after transplanting, and then consistently for the initial few weeks. Ensure the soil remains damp but not waterlogged, as field scabious dislikes standing water.
Pruning
Remove any dead or dying leaves to direct the field scabious's energy towards establishing its root system. As the plant matures, regular pruning will encourage denser growth.
Protection
Monitor for pests and diseases that might stress the field scabious during its adjustment period. Also, be ready to shade the plant if particularly hot, sunny days are predicted.
Addressing Common Issues During Field Scabious Transplantation.
When is the best time to transplant field scabious?
The optimal period for transplanting field scabious spans from late spring to midsummer (S2-S4). This provides the plant with a strong start before the cold winter.
What's the correct spacing when I transplant field scabious?
Field scabious prefers ample room to grow. Aim for a spacing of approximately 1.5-2.5 feet (45-75 cm) between each plant.
Can field scabious transplant well during periods of high or low temperatures?
Avoid transplanting field scabious during extremely hot or cold temperatures. Harsh weather conditions can cause undue stress to the plant, leading to poor development.
How should I prepare the soil for field scabious transplants?
Field scabious thrives in well-drained soil. Before transplanting, break up any compacted areas and incorporate organic matter to enhance soil fertility and structure.
Is there anything special to consider when transplanting field scabious?
Always handle field scabious with care to prevent damage to its root system. Ensure the roots are adequately covered with soil after planting.
Should I water field scabious immediately after transplanting?
Yes, watering right after transplanting is vital for field scabious. This helps settle the soil around the roots, minimizing transplant shock.
Do I need to prune field scabious after transplanting?
Pruning is not necessary for field scabious immediately after transplanting. However, you might consider removing any dead or diseased parts to improve its overall health.
What should I do if my transplanted field scabious shows signs of wilt?
If your field scabious begins to wilt after transplanting, it may be experiencing transplant shock. Ensure it is sufficiently watered and not exposed to extreme weather conditions.
Can I transplant field scabious in shady areas?
Field scabious can tolerate partial shade, but they prefer full sunshine. Too much shade can impede their growth and flowering capacity.
What should I do if field scabious does not flower after transplanting?
If your field scabious hasn't bloomed after transplanting, it might require more sunlight, better soil nutrients, or it could simply be adjusting to its new location. Patience is crucial!



