How to Transplant Redberry juniper?
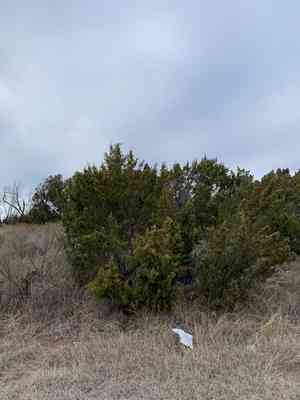
For redberry juniper, the ideal period for relocation spans from late spring to mid-summer, providing excellent conditions for establishment. Choose a location that receives ample sunlight and features soil with good drainage. Should it be necessary, adjust the soil's acidity or alkalinity to align with redberry juniper's requirements, facilitating a smooth acclimatization.
What Preparations are Needed Before Transplanting Redberry Juniper?
What is the Ideal Time for Transplanting Redberry Juniper?
The optimal period for relocating redberry juniper spans from late spring to mid-summer. This timeframe allows redberry juniper to establish its root system in warm soil, promoting vigorous development. Moving redberry juniper during this window benefits from extended daylight and moderate temperatures, facilitating successful acclimation to its new environment. Seize this season to provide redberry juniper with the best start in its new location!
How Much Space Should You Leave Between Redberry Juniper Plants?
When preparing to transplant your redberry juniper, a good guideline is to position them 6-8 feet apart (1.8-2.4 meters). This provides ample room for each plant to expand and thrive.
What is the Best Soil Mix for Redberry Juniper Transplanting?
For your redberry juniper, select well-draining soil and incorporate a slow-release fertilizer before planting. This creates a supportive medium for the roots to become established.
Where Should You Relocate Your Redberry Juniper?
Choose a location with abundant sunlight for your redberry juniper, as they flourish in full sun. This will help your plants prosper and maintain their vibrant foliage throughout the growing seasons.
What Equipments Should You Prepare Before Transplantation Redberry Juniper?
Gardening Gloves
To safeguard your hands while handling soil and the plant.
Shovel or Spade
To excavate around and extract the redberry juniper plant from its current spot.
Garden Fork
To loosen the soil surrounding the redberry juniper's root ball and assist with aeration.
Wheelbarrow
To comfortably transport the redberry juniper and the soil.
Watering Can or Hose
To hydrate the redberry juniper before and after its relocation.
Pruners or Sharp Knife
For trimming any lifeless or fractured roots.
Measuring Tape
To maintain proper spacing between plants during the transplanting process.
How Do You Remove Redberry Juniper from the Soil?
How Do You Remove Redberry Juniper from the Soil?
From Ground: Hydrate the redberry juniper plant to moisten the soil. Dig a wide circle around the plant using a shovel or spade, being careful not to sever roots. Gently work the tool beneath the root ball, and carefully lift the redberry juniper free.From Pot: Water the redberry juniper thoroughly to facilitate root ball removal. Turn the pot on its side, tap it gently, and carefully slide the plant out, preserving the root ball's integrity.From Seedling Tray: Water the seedlings to simplify their extraction. Use a fork or similar utensil to gently lift the redberry juniper from the tray, holding it by the stem's base and trying not to disturb the roots.
Step-by-Step Guide for Transplanting Redberry Juniper
Prepare the New Site
Excavate a hole in the prepared ground large enough to accommodate the redberry juniper's root ball.
Root Preparation
Gently remove any ties around the roots and use pruners or a sharp knife to trim away any damaged or excessively long roots.
Plant Positioning
Place the redberry juniper in the center of the hole, ensuring it sits at the same depth as before. The top of the root ball should be level with the ground surface.
Fill the Hole
Backfill the hole with soil, gently firming it around the base of the redberry juniper to secure it and eliminate air pockets.
Watering
Water the redberry juniper generously immediately after transplanting to help settle the soil around the roots and aid recovery.
Stabilization
If the redberry juniper is larger or top-heavy, stake it to prevent wind damage or leaning as the roots establish.
How Do You Care For Redberry Juniper After Transplanting?
Mulching
Apply a layer of mulch around the base of the redberry juniper to help retain moisture and regulate soil temperature.
Watering
Keep the soil around the redberry juniper consistently moist for the initial weeks following transplanting to encourage healthy root development.
Protection
If necessary, shield the redberry juniper from intense elements like harsh sun or wind using a shade cloth or wind barrier during the initial establishment period.
Observation
Regularly inspect the redberry juniper for indications of stress or pests and intervene as needed to maintain plant health.
Troubleshooting Common Issues with Redberry Juniper Transplantation.
What's the best time to transplant redberry juniper for optimal growth?
The prime window for transplanting redberry juniper is from the vigorous period of late spring to the warm mid-summer months.
How far apart should I plant redberry juniper for healthy development?
Aim for a separation of 6-8 feet (1.8-2.4 meters) between each redberry juniper to ensure ample room for growth.
Can I transplant redberry juniper during a heatwave?
It's best to postpone until cooler conditions prevail, as extreme heat can stress the transplanted redberry juniper.
What signs indicate my redberry juniper needs water after transplanting?
Wilting or browning foliage on redberry juniper suggests it needs a thorough watering to establish roots in its new home.
Should I fertilize redberry juniper right after transplanting?
Wait a few weeks before fertilizing new transplants of redberry juniper to allow them to settle without extra stress.
How much water does redberry juniper require post-transplant?
Regular soaking is crucial for redberry juniper, ensuring the root zone is moist but not waterlogged.
What if my redberry juniper starts to droop after transplanting?
Drooping can occur if redberry juniper is in shock; maintain consistent watering and avoid direct afternoon sun for a while.
How deeply should I dig to transplant redberry juniper?
Your hole should be twice as wide and just as deep as the root ball of redberry juniper to give roots space.
Can I prune redberry juniper while transplanting?
Light pruning is okay to shape redberry juniper, but heavy pruning can stress it during the transplanting period.
What to do if redberry juniper shows no new growth post-transplant?
Be patient, as redberry juniper can take some time to show new growth while it's establishing roots. Consistent care is key.



