How to Transplant Needlegrass rush?
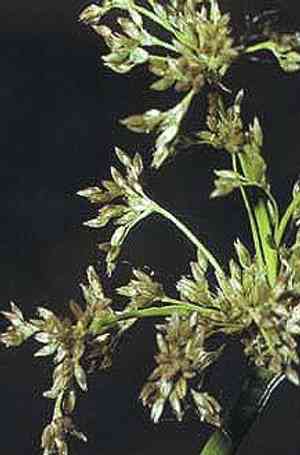
Needlegrass rush flourishes when relocated between the beginning and end of summer, as the warm ground aids in root development. Select bright, well-draining spots close to marshy environments. Steer clear of overly saturated zones for improved development. A gentle, encouraging method will produce optimal outcomes.
Preparations Required Before Moving Needlegrass Rush?
Optimal Period for Relocating Needlegrass Rush?
The best time for relocating needlegrass rush spans from the start of early summer to the conclusion of late summer. This timeframe benefits needlegrass rush as the warmer temperatures and extended daylight hours encourage strong root development and growth, ensuring a flourishing perennial for future seasons. Early to late summer offers the perfect conditions needed for the successful establishment of needlegrass rush's root system, securing its resilience and longevity in your garden.
Recommended Spacing Between Needlegrass Rush Specimens?
For needlegrass rush, ensure each plant is positioned 12-18 inches (30-45 cm) apart. This provides ample room for growth without competition for resources.
Ideal Soil Mixture for Needlegrass Rush Relocation?
Needlegrass rush thrives in a blend of sandy and loamy soil. Before relocation, enrich the soil with a foundational fertilizer, such as compost or a balanced 10-10-10 fertilizer, to give the plants a strong start.
Optimal Location for Your Needlegrass Rush?
Needlegrass rush prefers full sun to partial shade. Choose a garden spot that receives at least 6 hours of daily sunlight. This will ensure the plant grows healthily and vibrantly.
Tools to Prepare Before Transplanting Needlegrass Rush?
Gardening Gloves
To safeguard your hands while handling soil and plants.
Shovel or Spade
For excavating around the plant and lifting it from the ground.
Trowel
Useful for precise digging and assisting with the plant's transfer to its new spot.
Watering Can or Hose
To hydrate the plant both before and after its relocation.
Wheelbarrow or Bucket
For moving the plant if it's being relocated to a different area.
How to Extract Needlegrass Rush from the Ground?
How to Extract Needlegrass Rush from the Ground?
From Ground: First, moisten the needlegrass rush to dampen the soil. Next, dig a wide trench around the plant using a shovel or spade, ensuring the plant's root ball remains intact. Carefully work the spade beneath the root ball to lift the plant from its original position.From Pot: Water the needlegrass rush thoroughly a few hours prior to relocation. Gently tilt the pot sideways and tap its edges to loosen the soil. Hold the plant's base and carefully pull it out, making sure the root ball stays whole.From Seedling Tray: Water the seedlings in the tray to facilitate easier removal. Use a trowel to carefully lift the seedlings, taking care not to harm the delicate roots.
Step-by-Step Guide for Relocating Needlegrass Rush
Site Preparation
Prepare the new planting location by digging a hole that is twice the width and the same depth as the needlegrass rush's root ball.
Plant Positioning
Place the needlegrass rush into the hole, ensuring the top of the root ball is level with the surrounding soil. If the plant originated from a pot or seedling tray, gently spread its roots within the new hole.
Backfilling
Refill the hole with soil, gently pressing it around the roots to eliminate air pockets without overly compacting the soil.
Watering
Thoroughly water the newly relocated needlegrass rush to help settle the soil and hydrate its root system.
Mulching
Apply a layer of mulch around the base of the needlegrass rush to aid in moisture retention and soil temperature regulation.
Post-Transplantation Care for Needlegrass Rush?
Watering
Maintain consistent moisture in the soil around the needlegrass rush, avoiding sogginess, for the initial weeks after relocation to encourage strong root development.
Monitoring
Regularly inspect the needlegrass rush for indications of transplant shock, such as wilting or yellowing leaves, and adjust care as necessary.
Weeding
Keep the area surrounding the needlegrass rush clear of weeds to minimize competition for nutrients and water.
Support
If the needlegrass rush is tall or top-heavy, provide support with stakes or plant ties until it establishes a stable root system.
Resolving Common Issues with Needlegrass Rush Relocation.
When is the best time to transplant needlegrass rush?
Relocate needlegrass rush ideally from early to late summer for optimal growth and establishment.
How much space should I leave between plants?
Space needlegrass rush plants 12-18 inches (30-45 cm) apart for ideal growth conditions.
What soil conditions are best for needlegrass rush?
Utilize well-drained soil with a slightly acidic to neutral pH for successful relocation.
How can I avoid root damage during transplant?
Dig a sufficiently wide hole and handle the root ball gently to prevent root damage.
Should I water needlegrass rush immediately after transplanting?
Yes, water thoroughly right after relocating to help the plant settle in.
What if my transplanted needlegrass rush looks wilted?
Ensure adequate watering and check for any signs of root damage to revive wilting plants.
How can I prepare the planting site for needlegrass rush?
Clear weeds, and amend the soil with organic matter before relocating needlegrass rush.
Do I need to fertilize needlegrass rush after transplanting?
Apply a balanced, slow-release fertilizer to provide nutrients without stressing the plant.
How do I protect newly transplanted needlegrass rush from pests?
Employ natural repellents and ensure good air circulation to reduce pest infestation.
Can I transplant needlegrass rush during hot weather?
Relocate in early or late summer, avoiding extreme heat to prevent stress on the plant.



