How to Transplant Canada rush?
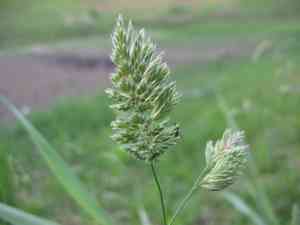
For canada rush, the ideal window for relocation is from the beginning to the end of spring, as this timeframe guarantees peak development. Select a humid, brightly lit to moderately shaded spot. Confirm the substrate stays hydrated, and offer delicate attention to facilitate the adjustment.
What Preparations are Needed Before Transplanting Canada Rush?
What is the Ideal Time for Transplanting Canada Rush?
Relocating canada rush during early to late spring provides prime conditions for root development prior to the active growth period. This timeframe ensures milder temperatures and increased soil moisture, fostering robust growth and minimizing transplant stress.
How Much Space Should You Leave Between Canada Rush Plants?
To allow your canada rush ample room to develop and flourish, position them 12-18 inches (30-45 cm) apart. This spacing helps prevent competition for nutrients and facilitates good air circulation.
What is the Best Soil Mix for Canada Rush Transplanting?
Prepare the ground by ensuring it is rich in organic material and drains effectively. A blend of loamy soil with a phosphorus-rich base fertilizer will aid canada rush in establishing strong roots. You can incorporate compost to enhance soil quality.
Where Should You Relocate Your Canada Rush?
Canada rush thrives in full sun to partial shade. Select a spot where the plant will receive at least 6 hours of daily sunlight, but can also endure some afternoon shade if you reside in a particularly warm climate.
What Equipments Should You Prepare Before Transplantation Canada Rush?
Gardening Gloves
To safeguard your hands while handling soil and plants.
Spade or Shovel
For excavating the plant and creating the new planting site.
Garden Trowel
To assist in loosening the soil surrounding the plant's roots.
Watering Can or Hose
For hydrating the plant before and after its relocation.
Wheelbarrow
To safely transport the plant to its new position.
Mulch
To help retain moisture and keep the root system cool.
How Do You Remove Canada Rush from the Soil?
How Do You Remove Canada Rush from the Soil?
From Ground: First, moisten the canada rush plant to dampen the soil. Then, dig a wide trench around the plant using a spade or shovel, ensuring the plant's root ball remains intact. Carefully work the spade beneath the root ball to lift the plant from its original spot.From Pot: Thoroughly water the canada rush plant. Gently invert the pot while carefully supporting the plant with your hand. Tap the base of the pot to loosen the soil and roots. Slide the plant out of the pot, taking care not to harm the root ball.From Seedling Tray: Water the canada rush seedlings. Use a garden trowel to gently lift each seedling from its cell. Be careful to keep the root ball intact. If the seedlings are small, you can push from the bottom of the tray to avoid disturbing the roots.
Step-by-Step Guide for Transplanting Canada Rush
Preparation
Ensure all necessary tools and equipment are ready before commencing the transplanting process.
Site Selection
Choose a location with adequate sunlight and space for your canada rush plant to reach its mature size.
Prepare the New Location
Dig a new hole that is twice as wide and equal in depth to the root ball of the canada rush plant. Loosen the soil at the bottom of the hole.
Transplanting the Plant
Position the canada rush plant in the center of the hole, ensuring it is at the same depth as it was in its original spot. Backfill the hole with soil and gently press down to eliminate air pockets.
Watering
Thoroughly water the canada rush plant after transplanting to help the soil settle around the roots.
Mulching
Apply a layer of mulch around the base of the canada rush plant to help retain moisture and keep the roots cool.
How Do You Care For Canada Rush After Transplanting?
Watering
Keep the soil around the canada rush consistently moist, but not waterlogged, for the initial weeks post-transplant to aid in establishing strong roots.
Monitoring
Regularly inspect the canada rush plant for indications of stress such as wilting or yellowing leaves, and take appropriate action if necessary.
Weeding
Keep the area surrounding the canada rush plant free of weeds to reduce competition for nutrients and water.
Maintenance
Prune any damaged or dead foliage to help the canada rush plant direct its energy towards establishing new roots.
Troubleshooting Common Issues with Canada Rush Transplantation.
When is the best time to transplant canada rush?
The optimal period to move your canada rush is from early to late spring for best outcomes.
What is the ideal spacing for canada rush?
Position your canada rush plants 12-18 inches (30-45 cm) apart to allow for healthy development.
How deep should you dig the hole for canada rush?
Excavate a hole twice as wide and deep as the root ball of your canada rush.
How do you prepare the soil before transplanting canada rush?
Ensure the soil is well-drained and enriched with compost to boost your canada rush's growth.
How do you ensure canada rush roots establish well?
Water thoroughly immediately after planting to help the canada rush roots settle in their new location.
How often should you water canada rush after transplanting?
Maintain consistently moist but not waterlogged soil to encourage healthy root development for canada rush.
Should canada rush be mulched after transplanting?
Yes, apply mulch around canada rush to retain soil moisture and prevent weeds.
What care does canada rush need post-transplant?
Monitor and water as needed, ensuring canada rush gets sufficient light and nutrients.
How can you avoid transplant shock in canada rush?
Relocate canada rush on a cool, cloudy day to reduce stress and avoid direct sun exposure.
How to tell if canada rush has successfully transplanted?
Look for new growth and ensure leaves appear healthy and vibrant, indicating canada rush is well-established.



