How to Transplant Spring quillwort?
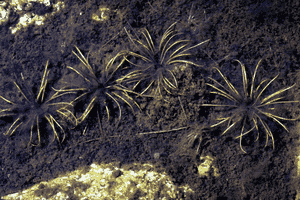
Spring quillwort flourishes when relocated between early and late spring, benefiting from prime growth circumstances. Preferred spots include bright to partly shaded zones featuring damp, adequately draining earth. Guarantee minimal disruption to the root system for optimal outcomes.
What Preparations are Needed Before Transplanting Spring Quillwort?
What is the Ideal Time for Transplanting Spring Quillwort?
The best period for relocating spring quillwort, a perennial, spans from the beginning of early spring to the end of late spring. This timeframe allows the plant to establish its root system before the summer heat intensifies. These conditions promote vigorous growth and adaptation, utilizing cooler temperatures and increased moisture, which are vital for successful transplantation.
How Much Space Should You Leave Between Spring Quillwort Plants?
When relocating spring quillwort, ensure each plant is spaced approximately 6-12 inches (15-30 cm) apart. This provides spring quillwort ample room to grow without overcrowding, fostering healthy development.
What is the Best Soil Mix for Spring Quillwort Transplanting?
For spring quillwort, prepare soil that drains well and is slightly acidic to neutral (pH 5.5-7). Incorporate a foundational fertilizer rich in organic matter, such as compost, to supply essential nutrients for robust growth.
Where Should You Relocate Your Spring Quillwort?
Select a site for spring quillwort that receives partial to full sun exposure. This plant thrives with about 4-6 hours of sunlight daily, particularly in the early morning, to ensure healthy and strong growth.
What Equipments Should You Prepare Before Transplantation Spring Quillwort?
Gardening Gloves
To safeguard your hands while handling soil and plants.
Shovel or Spade
For excavating the hole at the new site and for extracting the plant from its original spot.
Trowel
To assist with more precise digging around the plant's root system.
Watering Can or Hose
To hydrate the plant before and after its relocation.
Bucket or Container
To move the plant if necessary.
Mulch
To help maintain soil moisture and regulate temperature around the plant post-transplant.
How Do You Remove Spring Quillwort from the Soil?
How Do You Remove Spring Quillwort from the Soil?
From Ground: First, moisten the spring quillwort plant to dampen the soil. Then, dig a wide trench around the plant using a shovel or spade, ensuring the plant's root ball remains intact. Carefully work the spade beneath the root ball to lift the plant from its initial location.From Pot: Gently water the spring quillwort plant to loosen the soil. Grasp the base of the stem and carefully tilt the pot to slide the plant out. If the plant resists, gently tap the pot to aid in releasing the root ball.From Seedling Tray: Water the spring quillwort seedlings to loosen the soil. Use a trowel or your fingers to carefully separate each seedling, supporting the root ball and minimizing root disturbance.
Step-by-Step Guide for Transplanting Spring Quillwort
Plant Location
Determine the new spot for spring quillwort, ensuring it meets the plant's growth requirements.
Prepare the Hole
Dig a hole at the new site that is twice the width and equal to the depth of the spring quillwort's root ball to allow roots to spread.
Remove Plant
Following the specific removal instructions (from ground, pot, or seedling tray), carefully lift the plant from its original position.
Transplant Plant
Place the spring quillwort into its new hole at the same depth it was previously growing. Backfill the hole with soil, gently firming it around the root ball to eliminate air pockets.
Water the Plant
Thoroughly water the newly transplanted spring quillwort to settle the soil around the roots and help the plant adapt to its new surroundings.
Apply Mulch
Spread a 2-3 inch layer of mulch around the base of the spring quillwort, avoiding direct contact with the stem, to retain moisture and regulate temperature.
How Do You Care For Spring Quillwort After Transplanting?
Watering
Keep the soil around the spring quillwort consistently moist, but not waterlogged, for the initial weeks after transplanting to help establish strong roots.
Mulching
Replenish the mulch as needed to maintain a 2-3 inch layer.
Monitoring
Watch for signs of transplant shock, such as wilting or yellowing leaves, and adjust care practices accordingly. Ensure consistent watering and protection from strong winds or harsh sunlight during the initial recovery phase.
Troubleshooting Common Issues with Spring Quillwort Transplantation.
When is the ideal time to transplant spring quillwort?
The optimal period for transplanting spring quillwort is from early spring to late spring.
How should I prepare the soil for spring quillwort transplanting?
Ensure the soil is well-draining, rich in organic matter, and slightly acidic.
What is the recommended spacing for transplanting spring quillwort?
Plant spring quillwort 6-12 inches (15-30 cm) apart to allow for healthy growth.
How deep should I plant spring quillwort?
Plant spring quillwort at the same depth it was growing originally to avoid stress.
How do I handle spring quillwort roots during transplanting?
Handle roots gently to avoid damage and ensure they are well-covered with soil.
What should I do if spring quillwort shows signs of transplant shock?
Water thoroughly and provide shade; it may take a few weeks to recover.
How often should I water spring quillwort after transplanting?
Water spring quillwort regularly, keeping the soil consistently moist but not waterlogged.
What type of fertilizer is best for transplanted spring quillwort?
Use a balanced, water-soluble fertilizer to promote healthy growth after transplanting.
Can spring quillwort be transplanted in the summer?
Transplanting spring quillwort in summer is not recommended due to heat stress; spring is ideal.
How can I ensure proper root development in transplanted spring quillwort?
Ensure roots are spread out in the hole and avoid compacting the soil too much.



