How to Transplant Isodon serra?
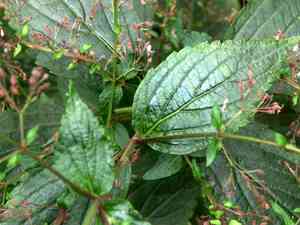
The optimal period for relocating isodon serra spans from the beginning to the end of spring, fostering vigorous development. Select a sunny spot with good drainage and sufficient room. Bear in mind that a smooth transition in temperate conditions promotes successful establishment.
Necessary Preparations Before Moving Isodon Serra?
Optimal Period for Relocating Isodon Serra?
The best time to move isodon serra is from the beginning to the end of spring. This timing allows the plant to establish its root system before the intense summer heat. Relocating during this period ensures vigorous growth and enhances the plant's resilience. It benefits from moderate temperatures and increased rainfall, which aid in root development and overall plant vitality.
Required Spacing Between Isodon Serra Plants?
When relocating isodon serra, ensure each plant is spaced 18-24 inches (45-60 cm) apart. This provides ample room for growth and prevents competition for resources.
Ideal Soil Blend for Isodon Serra Relocation?
Prepare well-draining soil, enriched with compost or a balanced base fertilizer, before moving isodon serra. This supplies essential nutrients and the proper soil structure for healthy development.
Where to Replant Your Isodon Serra?
Select a spot with full sunlight for relocating isodon serra. This plant thrives with 6-8 hours of direct sunlight daily, crucial for its development and blooming.
Equipment Needed Before Relocating Isodon Serra?
Gardening Gloves
To safeguard your hands while handling soil and the plant.
Hand Trowel
For digging around the plant and creating space in its new spot.
Spade or Shovel
To dig a trench around the plant if it's being moved from the ground.
Watering Can or Hose
To hydrate the plant before and after the move.
Wheelbarrow
For moving the plant if it's large or the new location is distant.
Garden Fork
To help loosen soil if moving from a pot or tray.
Pruners
To trim any damaged roots or foliage during the relocation process.
Mulch or Compost
To enrich the soil in the new location and retain moisture.
How to Extract Isodon Serra from the Soil?
How to Extract Isodon Serra from the Soil?
From Ground: First, moisten the isodon serra plant's soil. Then, dig a wide trench around the plant using a shovel or spade, ensuring the root ball remains intact. Carefully work the spade beneath the root ball to lift the plant from its original spot.From Pot: Water the isodon serra plant thoroughly to facilitate removal. Then, gently hold the plant's base and tip the pot sideways, tapping it to loosen the soil. Slide the plant out, keeping the root ball intact.From Seedling Tray: Gently push up from the cell's bottom to release the plant. If it resists, use a garden fork to loosen the soil around the edges.
Step-by-Step Guide for Relocating Isodon Serra
Site Preparation
Ensure the new location is ready with any necessary soil amendments like compost or mulch. The hole should be twice as wide and slightly deeper than the isodon serra's root ball.
Remove Plant
Follow the appropriate removal method based on the isodon serra's original location. Handle the plant with care to prevent root damage.
Relocating
Place the isodon serra into the prepared hole. Adjust the plant so the top of the root ball is level with the surrounding soil. Gently fill the hole, firming the soil around the roots to eliminate air pockets.
Watering
Thoroughly water the newly relocated isodon serra to help settle the soil around the roots and provide moisture.
Post-Relocation Care for Isodon Serra?
Watering
Keep the soil around the isodon serra consistently moist, but not waterlogged, for the initial weeks after relocation to aid in strong root establishment.
Mulching
Apply a layer of mulch around the base of the isodon serra to help retain moisture and regulate soil temperature.
Monitoring
Regularly check the isodon serra for signs of stress (wilting, yellowing leaves) and provide additional water if needed during dry spells.
Protection
Shield the isodon serra from strong winds and extreme temperatures for the first few weeks after relocation. Garden fabric or temporary fencing can be used for this purpose.
Addressing Common Issues with Isodon Serra Relocation.
When is the best time to move isodon serra?
Relocate isodon serra from early spring to late spring for optimal growth and health.
What spacing should isodon serra have when moved?
Space isodon serra plants 18-24 inches (45-60 cm) apart to ensure proper growth and air circulation.
How should I prepare the soil for moving isodon serra?
Enrich the soil with compost and ensure it is well-draining for healthy isodon serra growth.
How do I prevent transplant shock for isodon serra?
Water isodon serra thoroughly after relocating and keep the soil consistently moist but not waterlogged.
What if isodon serra leaves start wilting after relocation?
Increase watering frequency to keep the soil moist but ensure itâs well-draining to avoid root rot.
How deep should I plant isodon serra during relocation?
Ensure isodon serra is planted at the same depth as it was in its previous location.
What type of mulch is best for isodon serra after relocation?
Use organic mulch like straw or bark to retain soil moisture and regulate temperature for isodon serra.
How do I improve isodon serra root establishment post-relocation?
Apply a balanced, slow-release fertilizer to support root growth and overall plant health.
What watering schedule is ideal for newly relocated isodon serra?
Water isodon serra deeply once or twice a week, adjusting based on weather conditions and soil type.
How can I protect isodon serra from pests after relocating?
Monitor isodon serra regularly for pests and use natural insecticides if necessary to prevent infestations.



