How to Propagate Isodon serra?
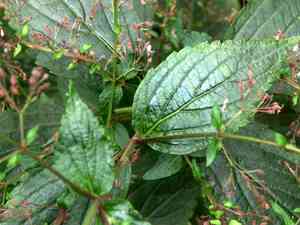
Isodon serra flourishes when reproduced via cuttings. Begin with a robust, pathogen-free stem, ideally during its vigorous development period. Confirm the cutting possesses multiple leaf nodes; these are essential for the emergence of new roots. Submerge the cutting's tip in rooting compound prior to inserting it into a damp, adequately draining substrate. Sustain steady humidity and warmth to foster root formation and initially avert direct sun exposure to mitigate strain.
Optimal Time for Isodon Serra Propagation
Propagation Method
Cutting
Propagation Period
Spring,Summer
Tools Required for Isodon Serra Propagation
Sharp Pruning Shears
Crucial for obtaining clean cuts from isodon serra, sharp pruning shears help minimize harm to both the parent plant and the cuttings. Precise cuts are vital as they increase the likelihood of rooting and decrease infection risks, ensuring healthy cuttings.
Rooting Hormone Powder
When propagating isodon serra via cuttings, dipping the severed end into rooting hormone powder can significantly boost root formation. This hormone promotes faster and more uniform root growth, essential for successful propagation and establishment of the cutting.
Sterilized Containers
Used for placing prepared cuttings, sterilized containers prevent the introduction of harmful pathogens that could impede the initial stages of cutting development. Ensuring containers are sterile helps maintain a healthy environment conducive to root growth.
Perlite
Incorporating perlite into the potting mix enhances drainage and aeration, both critical for isodon serra's root development from cuttings. Perlite's light nature helps maintain an ideal moisture balance within the substrate, thus supporting better rooting.
Humidity Domes
Utilizing humidity domes over isodon serra cuttings helps maintain a high humidity environment, which is vital during the initial rooting phases. This prevents cuttings from losing excessive water through transpiration, thereby improving survival and rooting rates.
Method for Propagating Isodon Serra
Propagation Difficulty
Easy
Post-Propagation Care for Your Isodon Serra
How to Care for Your Newly Propagated Isodon Serra?
Once roots have formed, typically within a few weeks, gradually introduce the rooted cuttings to less humid conditions by removing the plastic cover for extended periods daily. After acclimation, transplant the rooted isodon serra cuttings into individual pots with standard potting soil. Water regularly to keep the soil moist but not waterlogged, and place in a location with bright, indirect sunlight. Fertilize lightly once established to encourage growth.
Common Errors to Avoid When Propagating Isodon Serra
Overwatering
Excessive watering can lead to root rot in isodon serra, reducing its chances of successful propagation. This condition can prevent roots from absorbing nutrients and oxygen, ultimately weakening or killing the plant.
Deep planting
Planting isodon serra cuttings too deeply can impede their ability to sprout and establish a healthy root system. This mistake might cause the cuttings to rot before they can properly root.
Ignoring hygiene
Using unsterilized tools or pots for propagating isodon serra introduces the risk of disease transfer, which can severely impact the plant's health and hinder propagation efforts.
Advice for Propagating Isodon Serra
Appropriate moisture
Maintain consistent moisture levels for isodon serra without saturating the soil. This balance ensures adequate hydration for root development without risking waterlogging and associated diseases.
Shallow planting
Plant isodon serra cuttings shallowly, allowing the nodes to be just beneath the surface. This exposure aids in better root initiation and access to sufficient light, which is crucial for growth.
Sterilization
Use sterilized tools and clean pots when propagating isodon serra to prevent the spread of pathogens. This step is crucial in safeguarding the health of new plants and ensuring successful establishment.



