How to Transplant Cardinal creeper?
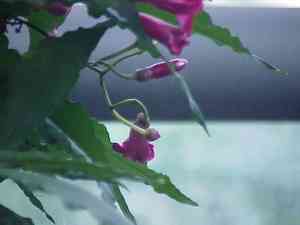
For Ipomoea quamoclit, the ideal period for relocation is in the active development phase of mid to late spring, facilitating an effortless adjustment. Select a brightly lit location with effective water runoff. Careful handling of the root system and sufficient hydration after transplanting will foster successful establishment.
What Preparations are Needed Before Relocating Cardinal Creeper?
What is the Optimal Period for Moving Cardinal Creeper?
The best time for relocating cardinal creeper is during the transition from mid to late spring. This timing allows the plant to establish its root system in moderate temperatures, ensuring a strong growth phase ahead. Choosing this season provides cardinal creeper with the benefit of the upcoming warm summer months for optimal development. Moving cardinal creeper during this period promises minimal transplant shock and a smooth adjustment to its new location, boosting its chances for thriving.
How Much Space Should You Provide Between Cardinal Creeper Plants?
For cardinal creeper, it's essential to allow ample room for each plant to spread. Aim for a spacing of approximately 1-2 feet (30.5-61 cm) apart. This ensures your plants have sufficient area to expand and flourish beautifully.
What is the Ideal Soil Mixture for Cardinal Creeper Relocation?
Before planting cardinal creeper, prepare a soil base that drains effectively. Loamy or sandy soil types are most suitable. A foundational fertilizer rich in potassium and phosphorus will supply the necessary nutrients for cardinal creeper to grow healthily.
Where Should You Replant Your Cardinal Creeper?
Since cardinal creeper thrives with plenty of sunlight, choose a sunny spot in your garden. However, if you reside in a very hot climate, a location with afternoon shade will protect cardinal creeper from scorching. Enjoy your planting endeavor!
What Tools Should You Prepare Before Relocating Cardinal Creeper?
Gardening Gloves
These will help safeguard your hands while working in the garden and handling the cardinal creeper plant and its root system.
Shovel or Spade
A shovel is necessary to excavate the cardinal creeper plant from its current spot and to dig a new hole at the relocation site. A spade can be utilized if the plant is in a container.
Gardening Trowel
This small hand implement is useful for gently detaching the plant from its pot or seedling tray and for making minor adjustments to the hole at the new planting location.
Watering Can or Garden Hose
An indispensable tool for hydrating the cardinal creeper plant both before and after the relocation.
Mulch
You'll use this to cover the root area after replanting, which helps maintain soil moisture and inhibits weed growth.
How Do You Extract Cardinal Creeper from the Soil?
How Do You Extract Cardinal Creeper from the Soil?
From Ground: Hydrate the cardinal creeper plant at its current location. This will make the soil easier to manage when removing the plant. Begin by digging a wide trench around the plant using your shovel. The trench should be deep enough to keep the plant's root ball intact. Carefully work your shovel beneath the root ball and gently lift it, freeing the plant.From Pot: If your cardinal creeper plant is in a container, start by watering the plant. Turn the pot on its side and gently tap it to loosen the plant. If the plant is somewhat resistant, you may need to use your gardening trowel to carefully ease the root ball out. Always handle your plant with care, as excessive force may harm its roots.From Seedling Tray: If the N plant is young and situated in a seedling tray, water the tray first. Gently squeeze the bottom of each cell to loosen the seedling. Then, using a spoon or your fingers, delicately lift the seedling by its leaves, not the stem, and carefully remove it from the cell.
Step-by-Step Guide for Relocating Cardinal Creeper
Preparation
Water your cardinal creeper plant thoroughly before beginning the relocation process. This will facilitate easier removal of the plant from its original spot and help minimize transplant shock.
Dig A Hole
You should excavate a hole at the new planting site that is twice the width and the same depth as the cardinal creeper plant's root ball.
Placement
Position your cardinal creeper plant in the hole. Ensure the top of the root ball is level with the surrounding soil. This allows the roots to spread and establish properly.
Backfill soil
Carefully backfill soil around the cardinal creeper plant's root ball, firming it as you go to eliminate any air pockets that could hinder root growth.
Watering
After the cardinal creeper plant is in its new location, water it thoroughly. This will help settle the soil.
How Do You Care For Cardinal Creeper After Relocation?
Monitoring
For the initial few weeks after relocating, regularly check on your cardinal creeper plant to ensure it's adjusting well to its new environment. Carefully observe its water requirements, as it may need more frequent watering than established plants.
Mulching
After the relocation process, apply a layer of mulch around the base of the cardinal creeper plant. This assists in retaining moisture and suppressing weeds.
Pruning
You can lightly prune your cardinal creeper after relocating to reduce water loss from the leaves and allow the plant to focus its energy on root establishment. Avoid severe pruning as this can cause additional stress to the plant.
Troubleshooting Common Issues with Cardinal Creeper Relocation.
When is the most suitable time of the year for relocating cardinal creeper?
The ideal seasons for relocating cardinal creeper are during the second and third quarters of the year.
What's the best spacing between cardinal creeper plants during relocation?
Ensure to maintain a distance of 1-2 feet (30-60 cm) between each cardinal creeper plant. This provides them with adequate room to grow.
What should I do if cardinal creeper isn't flowering after relocation?
Cardinal creeper might need some time to acclimate to its new surroundings. If it persists, consider nutritional adjustments, such as a high phosphorus fertilizer for enhanced blooming.
The leaves of my cardinal creeper are yellowing after relocation. Why is that?
Yellowing leaves could be caused by an excessively wet or dry environment. Ensure cardinal creeper receives proper watering - deeply, but allowing the soil to dry out between watering sessions.
Why is the growth stunted after relocating my cardinal creeper?
This could be due to plant shock resulting from unsuccessful relocation. To mitigate this, keep the roots moist and shaded until planting, and avoid damaging them during the process.
Should I prune cardinal creeper before or after relocating?
Pruning before relocating cardinal creeper can help reduce plant shock. This allows the plant to prioritize root development by lessening the need to support an excessive amount of foliage.
Why are the leaves of my cardinal creeper wilting after relocation?
This might be due to insufficient watering or heat stress. Maintain a consistent watering schedule, and consider providing shade to the plant in excessively hot conditions.
Can I relocate cardinal creeper into a pot?
Yes, cardinal creeper thrives in large containers. This also offers easy mobility depending on weather changes, as well as better soil management for nutritional requirements.
Why is cardinal creeper showing signs of yellow spots after relocation?
Yellow spots could indicate a fungal infection. Maintain proper ventilation and humidity levels around cardinal creeper, along with regular cleanliness of the surrounding area.
What type of soil works best for cardinal creeper relocation?
Cardinal creeper prefers well-drained, rich soil. A balanced mix of sand, silt, and clay with a good amount of organic matter is optimal for this plant's growth.



