How to Transplant Great St. John's wort?
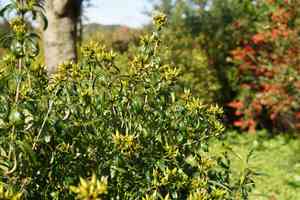
The most favorable period for relocating great St. John's wort is from the latter part of spring through the middle of summer, facilitating robust root development. Choose a location that receives ample sunlight and possesses soil with good drainage. Gradually introduce great St. John's wort to its new environment to minimize stress from the move.
What Preparations are Needed Before Transplanting Great St. John's Wort?
What is the Ideal Time for Transplanting Great St. John's Wort?
Move great St. John's wort during the transition from late spring to early summer to align with its active growth phase, promoting strong root development and plant vitality. This period offers balanced weather, with warm but not overly hot days and cool nights, which is vital for great St. John's wort as it adjusts to its new location. Stable temperatures and increasing daylight encourage healthy root growth without the stress of intense summer heat. By selecting this optimal moment, you provide great St. John's wort the best opportunity to flourish in its new environment.
How Much Space Should You Leave Between Great St. John's Wort Plants?
When getting ready to relocate great St. John's wort, ensure each plant has ample room. Ideally, maintain a spacing of about 1-2 feet (30-60 cm) between them. This guarantees sufficient space for growth, nutrient absorption, and minimizes competition from nearby plants.
What is the Best Soil Mix for Great St. John's Wort Transplanting?
Great St. John's wort prefers soil that drains well, enriched with a base fertilizer high in organic matter. Before moving them, confirm your soil is prepared. Turn it over, remove any weeds and rocks, and incorporate some well-rotted compost or manure.
Where Should You Relocate Your Great St. John's Wort?
For optimal results, select a site that provides abundant sunlight for great St. John's wort. They thrive in full sun to partial shade. This will ensure robust plant growth and a profuse bloom. Observe the area throughout the day to confirm it's the perfect spot!
What Equipments Should You Prepare Before Transplantation Great St. John's Wort?
Gardening Gloves
Crucial for safeguarding your hands from soil and potential cuts during the relocation of great St. John's wort.
Shovel or Spade
To excavate the appropriate hole in your garden for the great St. John's wort.
Garden Trowel
For carefully lifting and extracting the great St. John's wort from its current position.
Watering Can
To hydrate the great St. John's wort both before and after its transfer.
Wheelbarrow (Optional)
Useful for moving larger great St. John's wort plants from one spot to another.
Mulch
To shield the newly relocated great St. John's wort from temperature and moisture fluctuations.
Support Stakes (Optional)
For taller great St. John's wort plants, which may need additional support after being moved.
How Do You Remove Great St. John's Wort from the Soil?
How Do You Remove Great St. John's Wort from the Soil?
From Ground: Begin by thoroughly watering your great St. John's wort plant to moisten the soil, making it easier to work with. Then, using your spade or shovel, dig a trench around the great St. John's wort, being careful not to disturb the root ball. Once you have created a sufficient perimeter around the great St. John's wort, gently work your shovel or spade beneath the root ball and carefully lift the plant out.From Pot: If your great St. John's wort is currently in a container, water the plant thoroughly. Next, turn the pot on its side, hold the plant at its base, and try to slide out the plant along with its root ball. If the great St. John's wort plant is too firmly rooted, use your trowel to loosen the edges and attempt again.From Seedling Tray: If your great St. John's wort is a young plant growing in a seedling tray, water the plug well, then gently push from the base of the plug to lift the plant out, ensuring the seedling and its root ball emerge together.
Step-by-Step Guide for Transplanting Great St. John's Wort
Preparing the New Site
Excavate a hole that is twice the width and equal in depth to the great St. John's wort's root ball. If the soil is dense or compacted, gently loosen it.
Placing the Plant
Carefully position the great St. John's wort in the center of the hole, ensuring it stands upright. The top of the root ball should be level with or slightly below the surrounding ground.
Backfilling the Hole
Fill the hole halfway with garden soil, gently firming it around the base of the great St. John's wort. Water thoroughly, then fill the remainder of the hole with soil.
Watering
Water the great St. John's wort again after planting, ensuring the soil is moist but not saturated.
Mulching and Staking
Apply a layer of mulch around the base of the great St. John's wort to help stabilize the soil and retain moisture. If the plant is tall, consider using support stakes to keep it upright.
How Do You Care For Great St. John's Wort After Transplanting?
Watering
For the initial weeks following relocation, maintain consistent moisture in the soil around the great St. John's wort, but prevent waterlogging. Water preferably in the morning or late evening to minimize rapid evaporation.
Pruning
If any leaves or stems sustained damage during the move, trim them to allow the great St. John's wort to direct energy towards new growth.
Observation
Monitor your great St. John's wort for signs of transplant shock, such as wilting or yellowing leaves. If observed, adjust your care routine accordingly and ensure the plant receives adequate water and light.
Frost Protection
If frost is anticipated after the transplant, consider adding a temporary protective covering, like a frost cloth, over your great St. John's wort.
Troubleshooting Common Issues with Great St. John's Wort Transplantation.
When is the best time to transplant great St. John's wort?
The optimal period to relocate great St. John's wort is during seasons 3-5, which spans from mid-spring to early summer.
How far apart should I plant each great St. John's wort during transplantation?
For ideal growth, it's best to provide each great St. John's wort a minimum distance of 1-2 feet (30-60 cm) from others.
What is the ideal soil condition for transplanting great St. John's wort?
Great St. John's wort thrives best in well-drained soil with a pH that is neutral to slightly acidic.
How much water is needed after transplanting great St. John's wort?
After relocating great St. John's wort, water it thoroughly but avoid saturating the soil. The goal is to keep the soil uniformly moist.
In what type of light should I transplant great St. John's wort?
Great St. John's wort prefers full sun to partial shade. Select a site with these light conditions during transplantation for the best outcomes.
What's the effect of wrong transplantation time on great St. John's wort?
Moving great St. John's wort in unsuitable seasons can stress the plant, hindering its growth and potentially leading to its demise.
What should I do if my newly transplanted great St. John's wort looks withered?
If your great St. John's wort appears withered after transplant, it might be lacking water. Ensure it receives adequate water and also check the drainage.
Can I transplant great St. John's wort in a container?
Absolutely! Great St. John's wort can be cultivated in containers, just ensure the container offers ample space for great St. John's wort to spread its roots.
Should I trim great St. John's wort before transplanting?
Trimming is not mandatory but it can help reduce stress on great St. John's wort by decreasing the amount of foliage the roots need to sustain.
How deep should the hole be while transplanting great St. John's wort?
The hole should be twice as wide and the same depth as the root ball. Too deep can cause rot, while too shallow can lead to root desiccation.



