How to Transplant Queen-devil?
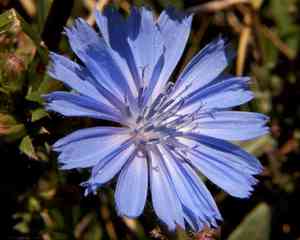
The most favorable period for relocating queen-devil is from late spring to early summer, a time of vigorous development, which guarantees strong root development. Select a location with good drainage and exposure to full sun or partial shade for optimal outcomes. Exercise caution to preserve the roots' structure.
What Preparations are Needed Before Relocating Queen-devil?
What is the Ideal Time for Relocating Queen-devil?
The best period for moving queen-devil is from mid-spring to early summer. This timeframe provides queen-devil with mild temperatures and consistent growth conditions it prefers. Shifting queen-devil during this season ensures root establishment while the ground is warm and prior to intense summer heat. A helpful tip: move queen-devil now to give it the best chance for strong development and vigor!
How Much Space Should You Leave Between Queen-devil Plants?
When relocating queen-devil, you'll want to allow ample room for growth. Aim for a separation of approximately 12-18 inches (30-46 cm) between each plant. This will guarantee each queen-devil has sufficient area to flourish!
What is the Best Soil Mix for Queen-devil Relocation?
For queen-devil, well-draining soil is crucial. A day before moving, enrich the soil by incorporating some compost or a balanced slow-release fertilizer. This will supply your queen-devil with the nutrients it requires to root and grow robustly.
Where Should You Relocate Your Queen-devil?
Select a location for your queen-devil that receives abundant sunlight. Full sun to partial shade is perfect, meaning an area that gets 4-6 hours of direct sun daily. This will help your queen-devil thrive and bloom beautifully.
What Equipments Should You Prepare Before Relocating Queen-devil?
Gardening Gloves
To safeguard your hands while handling soil and plants.
Shovel or Spade
For excavating the plant and preparing the new planting site.
Garden Fork
To loosen the soil surrounding the plant's root system.
Pruning Shears
For trimming any dead or excess root and plant parts.
Watering Can or Hose
To hydrate the plant before and after its move.
Wheelbarrow or Garden Cart
For transporting the plant and soil, if needed.
Burlap or Tarp
To wrap and move the root ball.
How Do You Remove Queen-devil from the Soil?
How Do You Remove Queen-devil from the Soil?
From Ground: First, water the queen-devil plant to moisten the soil and lessen transplant shock. Use a shovel or spade to dig a wide circle around the plant, ensuring no harm to the root system. Gently work the garden fork beneath the root ball to loosen it and assist in lifting the plant from its original spot.From Pot: Carefully tilt the container sideways and tap its base to help dislodge the queen-devil plant. Use your hands or a garden tool to slide the plant out, taking care to keep the root ball and surrounding soil intact.From Seedling Tray: Water the seedlings to facilitate removal. Gently use a spoon or a small implement to lift each queen-devil seedling from its cell, ensuring support for the root ball and avoiding damage to delicate roots.
Step-by-Step Guide for Relocating Queen-devil
Prepare New Location
Dig a hole in the ground that is twice as wide as the queen-devil plant's root ball and of equal depth. Loosen the soil at the bottom of the hole with a garden fork.
Root Pruning
Inspect the root ball and use pruning shears to snip off any broken or overly long roots. This encourages healthier growth and eases the transition.
Placement
Carefully position the queen-devil plant's root ball into the center of the hole. Ensure the plant is upright and at the same depth it was previously growing.
Fill-In Soil
Backfill the hole with soil, gently firming it around the root ball with your hands to remove air pockets. Avoid compacting the soil too tightly.
Watering
Water the queen-devil plant generously after planting to settle the soil and help reduce transplant shock.
Support
If the queen-devil plant is tall or top-heavy, gently stake the plant for additional support and tie it loosely with garden twine or a soft material.
How Do You Care For Queen-devil After Relocating?
Regular Watering
Maintain consistent moisture in the soil around the queen-devil plant, being careful to avoid overwatering.
Mulching
Apply a layer of mulch around the base of the queen-devil to help retain moisture and control weed growth.
Monitoring
Keep an eye on the queen-devil for signs of stress, such as wilting or yellowing, and respond promptly with care adjustments if necessary.
Protection from Pests
Check the queen-devil regularly for any signs of pests or diseases and treat them accordingly with non-toxic solutions if you want to keep an organic garden.
Troubleshooting Common Issues with Queen-devil Relocation.
Why is my queen-devil not thriving after relocation?
Ensure it was moved during the optimal period of mid-spring to early summer and has proper spacing of 12-18 inches (30-45 cm).
What's the ideal spacing for queen-devil when relocating?
For optimal growth, space queen-devil at least 12-18 inches (30-45 cm) apart. This allows room for expansion and airflow.
When should I relocate my queen-devil for best results?
The best window for relocating queen-devil is from mid-spring to early summer, when they can settle well.
Can I relocate queen-devil during the heat of summer?
Relocating queen-devil in high summer heat isn't ideal. Aim for cooler periods to avoid transplant shock.
What should I do if my queen-devil wilts after relocating?
Provide shade and ensure adequate watering without over-saturating. Check the soil's moisture regularly.
How much should I water queen-devil after relocating?
Water thoroughly upon relocating, then maintain consistent moisture without waterlogging the roots.
Why are my queen-devil's leaves turning yellow after relocation?
Yellowing may indicate overwatering or poor drainage. Check the soil moisture and adjust your watering habits.
How do I prepare the soil for relocating queen-devil?
Work compost into the soil for nutrients and ensure it's well-draining to prevent root rot.
What sunlight conditions are optimal for queen-devil post-relocation?
Ensure queen-devil receives full to partial sunlight to thrive after being relocated.
How deep should I plant queen-devil's root ball when relocating?
Place the root ball in a hole as deep as its container and twice as wide, then cover gently with soil.



