How to Transplant Dwarf hesperochiron?
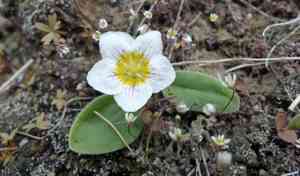
Dwarf hesperochiron flourishes when relocated from late spring to early summer, aligning precisely with its natural development phase. Provide a bright, adequately draining spot for peak performance. Prevent excessive density to furnish sufficient room for spreading.
What Preparations are Needed Before Transplanting Dwarf Hesperochiron?
What is the Ideal Time for Transplanting Dwarf Hesperochiron?
Moving dwarf hesperochiron between late spring and early summer guarantees ideal soil warmth and moisture, fostering strong root development. This period aligns with the plant's natural growth cycle, leading to improved survival and vigor. Early relocation also provides ample time for dwarf hesperochiron to adapt and flourish.
How Much Space Should You Leave Between Dwarf Hesperochiron Plants?
Dwarf hesperochiron thrives best when spaced 6-12 inches (15-30 cm) apart. This provides sufficient room for growth without nutrient competition.
What is the Best Soil Mix for Dwarf Hesperochiron Transplanting?
Prepare soil that drains well, incorporating organic matter such as compost. A balanced perennial fertilizer will greatly benefit dwarf hesperochiron's development. Ensure the soil is light and aerated.
Where Should You Relocate Your Dwarf Hesperochiron?
Select a sunny location for transplanting dwarf hesperochiron, as it prefers full sun. Ensure the site receives ample light and is not overshadowed by taller plants or structures.
What Equipments Should You Prepare Before Transplantation Dwarf Hesperochiron?
Gardening Gloves
To safeguard your hands while handling soil and plants.
Trowel
For creating holes and moving smaller plants.
Shovel or Spade
To excavate the plant from its initial spot.
Garden Fork
Useful for loosening the ground.
Watering Can or Hose
Crucial for hydrating the plant before and after relocation.
Wheelbarrow
For transporting significant amounts of soil or the plant itself.
How Do You Remove Dwarf Hesperochiron from the Soil?
How Do You Remove Dwarf Hesperochiron from the Soil?
From Ground: First, moisten the dwarf hesperochiron plant to soften the soil. Then, dig a wide trench around the plant using a shovel or spade, ensuring the root ball remains intact. Carefully work the spade beneath the root ball to lift the plant from its original position.From Pot: Gently water the dwarf hesperochiron plant to loosen the soil. Turn the pot on its side and lightly tap its edges to free the soil. Carefully slide the plant out, supporting the root ball to prevent damage.From Seedling Tray: Water the seedlings thoroughly before removal. Use a trowel to gently lift the dwarf hesperochiron seedling from the tray, taking care to keep the roots and surrounding soil undisturbed.
Step-by-Step Guide for Transplanting Dwarf Hesperochiron
Site Preparation
Prepare the garden bed by ensuring it is clear of weeds and debris, and cultivate the soil to make it loose and well-draining.
Digging the Hole
Excavate a hole that is twice the width and depth of the dwarf hesperochiron plant's root ball. This ensures ample room for root expansion.
Positioning the Plant
Carefully place the dwarf hesperochiron plant in the hole, making sure the top of the root ball is level with the surrounding soil surface.
Backfilling
Fill the hole with soil, gently pressing around the plant's base to remove air pockets. Water thoroughly after planting.
Mulching
Apply a layer of mulch around the plant to help retain moisture and suppress weeds.
How Do You Care For Dwarf Hesperochiron After Transplanting?
Watering
Keep the soil around the dwarf hesperochiron consistently moist, but not waterlogged, for the initial weeks post-transplant to encourage strong root development.
Monitoring
Regularly inspect the plant for any signs of transplant shock, such as wilting or yellowing leaves. If observed, ensure adequate watering and potentially provide shade.
Support
Consider adding stakes if the plant is tall and susceptible to wind damage until its roots become more established.
Troubleshooting Common Issues with Dwarf Hesperochiron Transplantation.
When is the best time to transplant dwarf hesperochiron?
The ideal period to transplant dwarf hesperochiron is from late spring to early summer for improved growth.
What is the ideal spacing for dwarf hesperochiron when transplanting?
Space dwarf hesperochiron plants 6-12 inches (15-30 cm) apart to allow for proper growth.
How should I prepare the soil for dwarf hesperochiron?
Ensure well-draining soil enriched with compost to support the growth of dwarf hesperochiron.
How do I minimize transplant shock for dwarf hesperochiron?
Water dwarf hesperochiron thoroughly before and after transplanting to reduce transplant shock.
What to do if the leaves of dwarf hesperochiron are yellowing after transplant?
Ensure proper watering and check for drainage issues; yellow leaves may signal overwatering or stress.
How deep should I plant dwarf hesperochiron during transplantation?
Plant dwarf hesperochiron at the same depth it was growing previously to avoid stress.
What should I do if dwarf hesperochiron is wilting after transplanting?
Provide shade temporarily and ensure consistent watering to help dwarf hesperochiron recover from wilting.
How can I improve the success rate of transplanting dwarf hesperochiron?
Transplant dwarf hesperochiron during the cooler part of the day and keep the soil moist.
When can I expect dwarf hesperochiron to establish after transplanting?
It typically takes a few weeks for dwarf hesperochiron to establish well after transplanting.
What should I do if pests attack dwarf hesperochiron after transplanting?
Use organic pesticides or neem oil to control pests on dwarf hesperochiron without harming the plant.



