How to Transplant Gynura japonica?
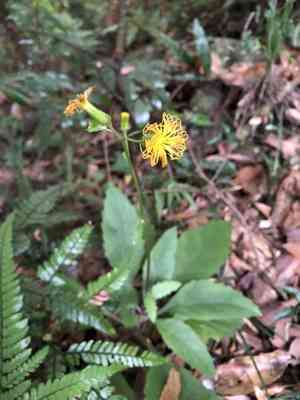
The optimal period for relocating gynura japonica extends from the onset of mid-spring to the conclusion of late spring, fostering vigorous development in a location offering partial shade. Verify that the new environment replicates previous circumstances for effortless acclimation.
What Preparations are Needed Before Transplanting Gynura Japonica?
What is the Ideal Time for Transplanting Gynura Japonica?
The optimal period to relocate gynura japonica is in the revitalizing phase of early to mid-spring. This season provides a blend of perfect growing conditions, from mild weather to the gradual increase of daylight, which promotes strong root development and adaptation. Moving gynura japonica during this stage leverages the plant's natural growth cycle, ensuring a smooth transition and vigorous establishment in its new spot. It's the perfect moment to give gynura japonica a fresh start, ensuring it flourishes with the season's nurturing touch.
How Much Space Should You Leave Between Gynura Japonica Plants?
When you're ready to rehome gynura japonica, remember to space them approximately 12-18 inches (30-45 cm) apart. This allows each plant ample room to thrive and expand its foliage!
What is the Best Soil Mix for Gynura Japonica Transplanting?
For gynura japonica, the soil should be fertile and drain well. I'd suggest incorporating some compost or a slow-release, balanced fertilizer into your garden bed to give gynura japonica a boost as they settle into their new area!
Where Should You Relocate Your Gynura Japonica?
Choose a location where gynura japonica will receive partial shade, as direct sunlight might be too intense. A spot with filtered sunlight or morning sun with afternoon shade will make gynura japonica happiest!
What Equipments Should You Prepare Before Transplantation Gynura Japonica?
Gardening Gloves
To safeguard your hands while handling soil and plants.
Spade or Shovel
For excavating the plant and preparing the new planting site.
Watering Can or Hose
To hydrate the plant before and after its relocation.
Wheelbarrow or Plant Dolly
For transporting the plant to its new spot, if it's large or heavy.
Pruning Shears
To trim any damaged roots or leaves prior to transplanting.
Measuring Tape
To ensure appropriate spacing between individual plants.
Garden Fork
To loosen the soil surrounding the plant's root mass.
Mulch
To help maintain soil moisture after the transplanting process.
How Do You Remove Gynura Japonica from the Soil?
How Do You Remove Gynura Japonica from the Soil?
From Ground: First, water the gynura japonica plant to moisten the soil. Then, dig a wide trench around the plant using a spade or shovel, ensuring the plant's root ball remains intact. Carefully work the spade under the root ball to lift the plant from its original location.From Pot: Water the gynura japonica plant thoroughly before beginning. Turn the pot on its side and gently tap to loosen the soil. Grasp the plant at its base and pull gently to extract it from the pot. If the plant doesn't come out easily, you may need to run a knife around the pot's rim to help release it.From Seedling Tray: Water the seedlings to make the soil damp, which will facilitate removal. Use a spoon or a dibbler to gently pry the gynura japonica seedling out of the tray, being careful not to harm the delicate roots. Hold the seedling by the leaves, not the stem, as the stem can be easily crushed.
Step-by-Step Guide for Transplanting Gynura Japonica
Prepare New Location
Dig a hole twice as wide and as deep as the gynura japonica's root ball in the new spot. Use a garden fork to loosen the soil at the bottom of the hole.
Root Ball Inspection
Examine the gynura japonica's root ball, trim any broken or damaged roots, and untangle if they are tightly packed, to encourage them to spread into the surrounding soil.
Plant Placement
Position the gynura japonica in the center of the prepared hole, ensuring that the top of the root ball is level with the surrounding soil surface.
Backfill the Hole
Carefully refill the hole with the excavated soil, gently firming it around the root ball to eliminate air pockets.
Water Deeply
After planting, water the gynura japonica thoroughly to settle the soil around the roots and help reduce transplant shock.
Mulching
Apply a 2-3 inch layer of mulch around the base of the gynura japonica, keeping it a few inches away from the stem to prevent rot.
How Do You Care For Gynura Japonica After Transplanting?
Initial Watering
Water the gynura japonica consistently to keep the soil evenly moist and aid in plant establishment. Do this frequently, every other day or as needed, depending on weather conditions.
Pruning
Trim back any damaged or diseased foliage to help the gynura japonica focus its energy on root establishment rather than sustaining compromised leaves.
Staking
If the gynura japonica is tall or top-heavy, provide support using a stake to prevent it from bending or breaking.
Checking for Pests
Monitor for pests and diseases. Early detection can prevent serious issues for your gynura japonica.
Adjustments
As the gynura japonica settles in, make necessary adjustments to the soil or its position if you observe signs of stress or poor growth.
Troubleshooting Common Issues with Gynura Japonica Transplantation.
When's the best time to transplant gynura japonica?
Optimal transplanting time is during mid to late spring, when the ground has warmed and the risk of frost has passed.
How much space does gynura japonica need when transplanting?
Ensure to give gynura japonica room to flourish by spacing them 12-18 inches (30-45 cm) apart.
What's the ideal soil for transplanting gynura japonica?
Gynura japonica thrives in well-draining soil rich in organic matter. Amend soil with compost before transplanting.
How deep should I plant gynura japonica?
Dig a hole that's as deep and twice the width of gynura japonica's root ball for the best start.
Can I transplant gynura japonica on a rainy day?
Overcast, milder days are perfect for transplanting gynura japonica to prevent transplant shock and sun scorch.
Why are my transplanted gynura japonica plants wilting?
Wilting post-transplant may indicate root damage or shock. Ensure proper watering and avoid disturbing roots too much.
How often should I water gynura japonica after transplanting?
Water gynura japonica generously right after transplanting and then regularly to maintain moist, but not waterlogged, soil.
Should I use fertilizer when transplanting gynura japonica?
Wait a few weeks before fertilizing gynura japonica to allow roots to settle, then use a balanced, slow-release fertilizer.
How to protect gynura japonica after transplanting?
Mulch around gynura japonica to retain moisture, suppress weeds, and regulate soil temperature, taking care not to cover the stem.
Is it necessary to prune gynura japonica during transplanting?
Prune any dead or damaged parts of gynura japonica to direct energy to root development and new growth.



