How to Transplant White-plumed Grevillea?
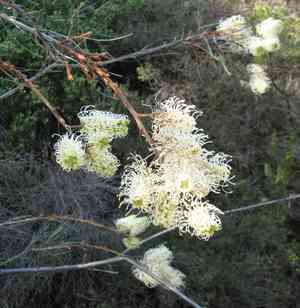
White-plumed Grevillea is most successfully relocated from early autumn to late autumn, a period when the plant is inactive or exhibits reduced vigor. Select a bright, adequately drained site to guarantee proper integration. Exercise care with the root system and prevent any disruptions following its relocation.
Essential Preparations Before Relocating White-plumed Grevillea?
When is the Best Time to Move White-plumed Grevillea?
The perfect period to move white-plumed Grevillea, a perennial species, is during early spring. This timing allows roots to settle before intense summer heat, promoting robust development and reducing relocation stress. Early spring relocation gives white-plumed Grevillea ample opportunity to adapt and form a strong root system, ensuring a healthier specimen.
What Distance Should Be Maintained Between White-plumed Grevillea Plants?
When relocating white-plumed Grevillea, aim to position each plant approximately 10-15 feet (3-4.5 meters) apart. This spacing ensures sufficient room for growth and the spread of their attractive foliage without becoming overcrowded.
What is the Ideal Soil Blend for White-plumed Grevillea Relocation?
Prepare well-draining soil for white-plumed Grevillea to flourish. A sandy or loamy soil type is most suitable. Incorporate some compost or a balanced base fertilizer to supply vital nutrients for healthy development.
Where Should You Replant Your White-plumed Grevillea?
For white-plumed Grevillea, select a spot that receives full sun exposure. Aim for at least 6-8 hours of direct sunlight daily to ensure it thrives and produces beautiful blooms.
What Tools Are Necessary Before Relocating White-plumed Grevillea?
Gardening Gloves
To safeguard your hands while handling soil and the plant.
Shovel or Spade
For excavating the plant from its original spot and preparing the new site.
Pruning Shears
For trimming any damaged roots or foliage.
Watering Can or Hose
To hydrate the plant before and after its move.
Compost or Organic Matter
To enrich the soil at the new location and encourage better growth.
Tarp or Sheet
To hold the plant and soil during transfer, minimizing disruption.
How Do You Extract White-plumed Grevillea from the Ground?
How Do You Extract White-plumed Grevillea from the Ground?
From Ground: First, moisten the soil around the white-plumed Grevillea plant. Then, dig a wide trench around the plant using a shovel or spade, ensuring the plant's root ball remains intact. Carefully work the spade beneath the root ball to lift the plant from its initial position.From Pot: Water the white-plumed Grevillea plant thoroughly. Turn the pot sideways and gently tap the base to loosen the plant. Carefully slide the plant out, supporting the stem's base and keeping the root ball whole.From Seedling Tray: Water the seedlings well. Use a small utensil like a spoon to gently lift the seedlings from the tray, ensuring the roots and surrounding soil remain as intact as possible.
Detailed Instructions for Relocating White-plumed Grevillea
Site Preparation
Select a location with suitable conditions for your white-plumed Grevillea plant to prosper. Dig a hole that is twice as wide and equally deep as the root ball.
Soil Amendment
Incorporate compost or organic material into the excavated soil to provide additional nutrients.
Plant Placement
Gently position the white-plumed Grevillea in the hole, ensuring the top of the root ball is level with the surrounding ground.
Backfilling
Carefully refill the hole with the amended soil, pressing lightly to eliminate air pockets. Avoid over-compacting the soil.
Watering
Thoroughly water the relocated white-plumed Grevillea to help settle the soil and lessen transplant shock.
Mulching
Apply a layer of mulch around the plant's base, but avoid piling it against the stem to prevent rot.
How Do You Care For White-plumed Grevillea After Relocation?
Watering
Keep the soil around the white-plumed Grevillea consistently moist, but not waterlogged, for the initial weeks post-relocation to aid in root establishment.
Monitoring
Regularly inspect the plant for signs of stress such as wilting or yellowing leaves, and adjust care as necessary.
Mulch Maintenance
Maintain the mulch layer around the plant to conserve moisture and regulate soil temperature.
Pruning
Trim any damaged or dying foliage to help the plant direct its energy towards rooting.
Resolving Common Issues with White-plumed Grevillea Relocation.
What is the optimal period to relocate white-plumed Grevillea?
Relocate white-plumed Grevillea ideally from early spring to late winter for prime growth conditions.
How much space should I allow between each white-plumed Grevillea?
Provide 10-15 feet (3-4.5 meters) of spacing for healthy development and root expansion.
How should I prepare the soil for relocating white-plumed Grevillea?
Ensure well-draining soil and mix in organic compost for enhanced nutrient content.
Should I water white-plumed Grevillea immediately after relocating?
Yes, thoroughly water white-plumed Grevillea to aid root establishment and minimize relocation stress.
How deep should the hole be for relocating white-plumed Grevillea?
Dig a hole twice the width and the same depth as the root ball.
Can I relocate white-plumed Grevillea during hot weather?
Avoid relocating during extreme heat; it increases the likelihood of relocation shock.
How do I handle the roots while relocating white-plumed Grevillea?
Handle roots gently, keeping the soil clump intact to prevent root damage.
How can I reduce relocation shock for white-plumed Grevillea?
Gradually acclimatize white-plumed Grevillea to its new environment and maintain consistent watering.
What should I do if the leaves wilt after relocating white-plumed Grevillea?
Temporary wilting is normal; continue watering and avoid direct sunlight until recovery.
Do I need to mulch around the relocated white-plumed Grevillea?
Yes, apply a 2-3 inches (5-7.5 cm) mulch layer to retain moisture and regulate temperature.



