How to Transplant Pearly globe amaranth?
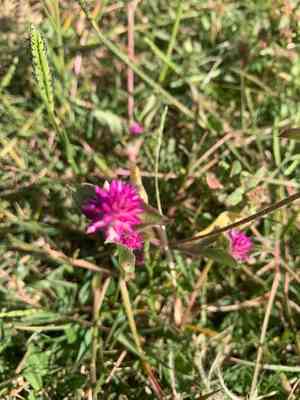
The most suitable time for relocating pearly globe amaranth is between the beginning and end of spring, when temperatures are moderate. Select a bright spot with soil that drains effectively. Should it be required, irrigate the plant right after moving it to aid its establishment.
What Preparations are Needed Before Transplanting Pearly Globe Amaranth?
What is the Ideal Time for Transplanting Pearly Globe Amaranth?
Moving pearly globe amaranth in early to late spring promotes best growth as the ground warms and daylight hours lengthen. This timing aids root development and lessens transplant stress, leading to robust, thriving plants. Proper soil preparation and consistent moisture during this period further maximize successful transplantation.
How Much Space Should You Leave Between Pearly Globe Amaranth Plants?
When relocating pearly globe amaranth, ensure each plant is spaced 12-18 inches (30-45 cm) apart. This provides ample room for development and good air circulation, helping to prevent disease and support healthy growth.
What is the Best Soil Mix for Pearly Globe Amaranth Transplanting?
Prepare a soil mixture that drains well for pearly globe amaranth. A loamy soil enriched with organic matter like compost is most effective. Before transplanting, incorporate a balanced base fertilizer to supply essential nutrients and give your plants an excellent start.
Where Should You Relocate Your Pearly Globe Amaranth?
Pearly globe amaranth flourishes in full sun, so select a spot where the plant will receive at least 6-8 hours of direct sunlight daily. Ensure the chosen area is clear of shade-casting structures or larger plants to maximize light exposure.
What Equipments Should You Prepare Before Transplantation Pearly Globe Amaranth?
Gardening Gloves
To shield your hands while handling soil and plants.
Trowel
For digging holes for the plant in its new spot.
Shovel or Spade
To excavate the plant from its original location if it's in the ground.
Watering Can or Hose
To thoroughly water the plant before and after moving it.
Compost or Organic Matter
To enrich the soil in the new site, if necessary.
How Do You Remove Pearly Globe Amaranth from the Soil?
How Do You Remove Pearly Globe Amaranth from the Soil?
From Ground: First, hydrate the pearly globe amaranth plant to moisten the soil. Next, dig a wide trench around the plant using a shovel or spade, making sure the plant's root ball stays intact. Carefully work the spade beneath the root ball to lift the plant from its initial position.From Pot: Water the pearly globe amaranth plant thoroughly. Gently tap the pot's sides to loosen the soil. Hold the plant's base and carefully lift it out, keeping the root ball as undisturbed as possible.From Seedling Tray: Water the seedlings well. Gently ease the seedlings out by pushing from the tray's bottom if feasible. Use a pencil or similar item if needed to carefully push the root ball out.
Step-by-Step Guide for Transplanting Pearly Globe Amaranth
Site Preparation
Prepare the new site by digging a hole that is twice the width and the same depth as the pearly globe amaranth's root ball.
Soil Amendment
Mix the excavated soil with compost or organic material to enhance drainage and nutrient content.
Plant Placement
Position the pearly globe amaranth in the center of the hole, ensuring the top of the root ball is level with the surrounding ground.
Backfilling
Gently fill the hole with the amended soil, lightly firming it to eliminate air pockets. Avoid over-compacting the soil.
Watering
Water the plant deeply after planting to help settle the soil and reduce transplant shock.
Mulching
Add a layer of mulch around the base of the pearly globe amaranth to retain moisture and regulate soil temperature.
How Do You Care For Pearly Globe Amaranth After Transplanting?
Watering
Keep the soil around the pearly globe amaranth consistently moist, but not waterlogged, for the initial weeks post-transplant to aid in strong root establishment.
Monitoring
Regularly inspect the plant for signs of stress, such as wilting or yellowing leaves, and adjust care as necessary.
Feeding
After a few weeks, once the plant shows signs of new growth, consider fertilizing with a balanced, water-soluble feed to encourage healthy development.
Weed Control
Keep the area around the pearly globe amaranth clear of weeds to lessen competition for nutrients and water.
Troubleshooting Common Issues with Pearly Globe Amaranth Transplantation.
When is the ideal time to transplant pearly globe amaranth?
Move pearly globe amaranth from early spring to late spring for optimal growth.
How much space should I leave between pearly globe amaranth plants?
Ensure pearly globe amaranth plants are spaced 12-18 inches (30-45 cm) apart for healthy growth.
What type of soil is best for pearly globe amaranth?
Utilize well-draining, nutrient-rich soil to provide pearly globe amaranth with the best start in your garden.
How can I prevent transplant shock in pearly globe amaranth?
Water thoroughly and apply a layer of mulch to help pearly globe amaranth adjust after transplanting.
What should I do if pearly globe amaranth leaves start wilting after transplanting?
Ensure consistent watering and shield the plants from intense sun until they adapt.
Should I fertilize pearly globe amaranth during transplanting?
Apply a balanced, slow-release fertilizer during transplanting to support initial growth of pearly globe amaranth.
How deep should I plant pearly globe amaranth seedlings?
Plant pearly globe amaranth seedlings at the same depth as they were in their original containers.
How should I acclimate pearly globe amaranth before transplanting?
Gradually expose pearly globe amaranth seedlings to outdoor conditions over a week for a smoother transition.
What do I do if pests attack pearly globe amaranth after transplanting?
Inspect pearly globe amaranth regularly and use natural or chemical pest controls to protect them.
How often should I water pearly globe amaranth after transplanting?
Keep the soil evenly moist, watering 1-2 times a week depending on weather conditions.



