How to Transplant Carveseed?
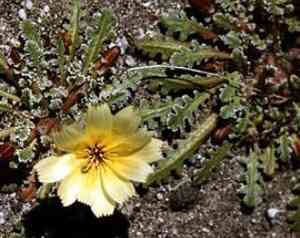
Carveseed flourishes when relocated between mid-spring and late spring, since this period coincides with optimal cultivation circumstances. Provide a bright spot with soil that drains effectively. Prevent significant temperature shifts for superior outcomes.
Essential Preparations Before Relocating Carveseed
Optimal Timing for Carveseed Relocation?
The best period to move carveseed is from mid-spring through late spring, or from early winter to early spring. During these times, the ground is manageable and temperatures are mild, lessening the impact of transplanting. Moving them then promotes strong root development and growth, boosting the overall health and vitality of this annual.
Recommended Spacing Between Carveseed Plants?
Carveseed should be positioned 12-18 inches (30-45 cm) apart to guarantee sufficient room for development. This spacing facilitates good air circulation and helps prevent overcrowding.
Ideal Soil Mixture for Carveseed Relocation?
Prepare soil that drains well, enriched with organic compost or a balanced plant food. Ensure the soil is light and nutrient-rich, which helps carveseed flourish. Avoid dense, clay-heavy soils that hold too much moisture.
Preferred Location for Your Carveseed?
Carveseed thrives in full sunlight, so select a spot where your plant will receive at least 6-8 hours of direct sun daily. A bright, sunny area in your garden or on your patio is perfect for healthy growth.
Tools Required for Carveseed Transplantation
Gardening Gloves
To safeguard your hands while handling soil and plants.
Trowel
Useful for excavating small holes and moving soil.
Shovel or Spade
For digging larger holes and trenches around the plant.
Watering Can or Hose
To hydrate the plant before and after its move.
Pruning Shears
To trim any damaged roots or foliage.
Bucket or Container
To hold the plant and its root system during the relocation process.
How to Extract Carveseed from its Current Location?
How to Extract Carveseed from its Current Location?
From Ground: First, moisten the carveseed plant to dampen the soil. Then, dig a wide trench around the plant using a shovel or spade, ensuring the plant's root ball remains intact. Carefully work the spade under the root ball to lift the plant from its original spot.From Pot: Water the carveseed plant thoroughly to soften the soil. Gently tilt the pot sideways and tap the bottom to loosen the soil. Carefully slide the plant out, holding the base of the stem. If the plant is stuck, use a trowel to gently loosen the soil around the pot's edges.From Seedling Tray: Water the seedlings well before removal. Use a trowel or your fingers to gently lift each carveseed seedling from the tray, ensuring you get as much of the root system as possible. Be gentle to avoid damaging the delicate roots.
Step-by-Step Guide for Relocating Carveseed
Site Preparation
Select a garden location where your carveseed plant will receive adequate sunlight. Prepare the planting site by digging a hole approximately twice the size of the plant's root ball. This aids in easier root establishment post-transplant.
Plant Removal
Follow the appropriate steps based on whether the carveseed plant is being moved from the ground, a pot, or a seedling tray. Handle the plant gently to prevent root damage during removal.
Planting the carveseed
Place the plant into the prepared hole, ensuring it sits at the same depth as it was in its previous spot. Gently backfill the hole with soil, pressing lightly to eliminate air pockets without compacting it excessively, which could hinder root growth.
Watering
Water the carveseed plant thoroughly immediately after planting to help settle the soil around the roots and provide essential moisture for initial root establishment.
Post-Transplant Care for Carveseed
Watering
Keep the soil around the carveseed consistently moist, but not waterlogged, for the initial weeks after transplanting to encourage strong root development.
Mulching
Apply a layer of mulch around the plant's base to help retain soil moisture and stabilize soil temperature.
Observation
Regularly check for any indications of transplant shock, such as wilting or yellowing leaves, and provide necessary care by adjusting watering or offering temporary shade.
Addressing Common Issues with Carveseed Relocation.
When is the best time to move carveseed?
Relocate carveseed from mid-spring to late spring or early winter to early spring for optimal outcomes.
How far apart should carveseed plants be positioned?
Space carveseed plants 12-18 inches (30-45 cm) apart to ensure healthy growth and development.
How should I prepare the soil for carveseed relocation?
Ensure the soil is well-draining, fertile, and enriched with compost before moving carveseed.
What should I do if the relocated carveseed shows signs of stress?
Provide ample water, shade, and a small amount of fertilizer to help carveseed recover from transplant shock.
How deep should I plant carveseed when relocating?
Plant carveseed at the same depth as they were in their original containers to prevent stress.
What common pests should I look for after moving carveseed?
Watch out for aphids and slugs, common pests that can affect carveseed after relocation.
How often should relocated carveseed be watered?
Water carveseed thoroughly after transplanting and maintain consistently moist but not waterlogged soil.
Why are the leaves of my relocated carveseed wilting?
Wilting could indicate transplant shock or insufficient watering. Ensure consistent moisture and shade.
How much sunlight does carveseed need after relocation?
Carveseed requires full sun to partial shade to thrive, ideally 6-8 hours of sunlight daily.
Can I fertilize carveseed immediately after relocating?
It's best to wait a couple of weeks before fertilizing carveseed to allow roots to establish first.



