How to Propagate Carveseed?
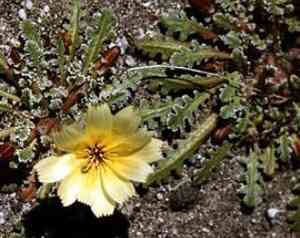
Carveseed is a member of the Asteraceae botanical group. It flourishes in porous, sandy substrates. Reproduction primarily occurs via seeding. Make certain that seeds are dispersed on the soil's uppermost layer, as illumination is crucial for their sprouting. Maintain a continuously damp, yet not oversaturated, soil condition. Sprouting generally takes place within a fortnight. Relocate young plants to their final spot once they have developed several mature leaves. Employ this customized method for optimal outcomes.
Optimal Period for Carveseed Propagation?
Propagation Method
Seeding
Propagation Period
Spring
Tools for Carveseed Propagation?
Seed trays
Seed trays are vital for planting carveseed seeds in a controlled setting. They ensure proper spacing, preventing overcrowding and promoting uniform growth. These trays also simplify handling and moving young plants, minimizing stress during development.
Fine-grade vermiculite or perlite
Vermiculite or perlite is essential for soil aeration and moisture retention during carveseed sowing. These materials create an ideal growing medium that holds enough water while draining well, crucial for germination and early growth, preventing root rot and encouraging healthy root development.
Misting bottle
A misting bottle is crucial for gently watering carveseed seeds without dislodging them or eroding the soil. Consistent misting keeps the soil moist but not saturated, creating optimal humidity for carveseed germination.
Labels and markers
Using labels and markers for seed trays is very helpful, especially when propagating various species. This tool aids in monitoring and providing specific care for each stage of carveseed's growth, reducing errors and ensuring accurate progress tracking.
Grow lights (if indoor propagation)
Grow lights are important for indoor carveseed propagation, providing a steady light source vital for photosynthesis when natural sunlight is absent. This tool helps carveseed seedlings develop strong, healthy foliage, promoting robust growth.
How to Propagate Carveseed?
Propagation Type
Simple
Caring for Newly Propagated Carveseed?
Caring for Newly Propagated Carveseed?
After transplanting, place carveseed in a sunny spot with well-draining soil. Water regularly but avoid overwatering to prevent root rot. Apply mulch around the plant bases to retain moisture and control weeds. Watch for pests and diseases, treating them as needed. Prune dead or damaged foliage to encourage healthy growth and flowering.
Common Mistakes to Avoid When Propagating Carveseed
Poor soil preparation
Using a poorly draining soil mix can lead to waterlogging, which is harmful to carveseed's roots, potentially causing root rot.
Excessive watering
While establishing new plants, overwatering is common, but it can suffocate carveseed roots and hinder growth due to lack of oxygen.
Planting too deep
Planting carveseed seeds too deeply can prevent them from getting enough light for proper germination, resulting in low germination rates.
Neglecting early care
Failing to provide consistent care in the initial stages after propagation can make carveseed less resilient and more vulnerable to diseases and pests.
Tips For Propagating Carveseed
Appropriate soil mix
Utilize a well-draining soil mix, potentially with added sand or perlite, to encourage good root development and prevent waterlogging.
Controlled watering
Water carveseed sparingly, ensuring the soil is moist but not saturated. Allow the top layer of soil to dry before rewatering.
Surface sowing
Scatter carveseed seeds on the soil surface, as they require light for effective germination. A light covering of thin soil or sand can protect them while still allowing light penetration.
Consistent monitoring
Regularly check for growth, moisture levels, and any signs of pests or disease. Early detection can prevent many issues and promote healthier carveseed growth.



