How to Transplant African parrot gladiola?
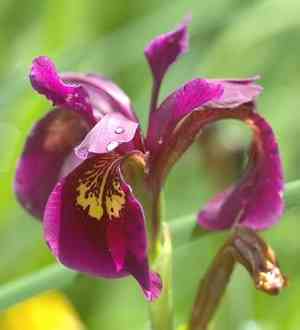
The ideal period for relocating african parrot gladiola is during the pleasant temperatures of late spring. Selecting a bright spot with soil that drains effectively will guarantee your african parrot gladiola thrives. Careful manipulation throughout this procedure is crucial for optimal results.
What Preparations are Needed Before Transplanting African Parrot Gladiola?
What is the Ideal Time for Transplanting African Parrot Gladiola?
The optimal time for relocating african parrot gladiola is during late spring. This period allows your african parrot gladiola to establish roots comfortably before summer's heat. Moving african parrot gladiola at this time leverages moderate temperatures and increasing daylight, promoting robust root growth. Plus, it's a chance to enjoy gardening in pleasant weather!
How Much Space Should You Leave Between African Parrot Gladiola Plants?
When preparing to plant your african parrot gladiola, ensure adequate room by spacing them approximately 5-6 inches (12.7-15.2 cm) apart. This provides each african parrot gladiola sufficient area to thrive!
What is the Best Soil Mix for African Parrot Gladiola Transplanting?
Prior to planting your african parrot gladiola, enrich the garden bed with well-draining soil rich in organic matter. A foundational fertilizer, such as a balanced 10-10-10 blend, lightly mixed into the soil will ensure a successful start for your african parrot gladiola.
Where Should You Relocate Your African Parrot Gladiola?
Locate a sunny spot in your garden where your african parrot gladiola can receive at least 6 hours of daily sunlight. They flourish in bright, cheerful locations, just like their vibrant appearance!
What Equipments Should You Prepare Before Transplantation African Parrot Gladiola?
Gardening Gloves
To safeguard your hands while handling soil and plants.
Hand Trowel
For digging and creating small, precise holes for corms or young plants.
Shovel or Spade
To excavate and move larger plants or to prepare the new planting site.
Watering Can or Hose
For hydrating the plant before and after its relocation.
Wheelbarrow or Plant Cart
To transport the plant safely without causing harm.
Pruning Shears
For trimming any damaged roots or leaves prior to transplanting.
Garden Fork
To loosen the soil around the plant without harming its root system.
Mulch
To cover the soil post-transplant, conserving moisture and inhibiting weeds.
How Do You Remove African Parrot Gladiola from the Soil?
How Do You Remove African Parrot Gladiola from the Soil?
From Ground: First, water the african parrot gladiola plant to moisten the soil, facilitating removal. Use a garden fork to gently loosen the soil surrounding the plant, then use a shovel or spade to dig a wide trench around it, being careful not to harm the root ball. Slide the shovel beneath the root ball to lift the plant from its original spot.From Pot: Water the african parrot gladiola to loosen the soil. Turn the pot sideways, tap the bottom, and carefully pull the plant out by the stem's base. Support the root ball with your hand to prevent it from breaking apart.From Seedling Tray: Water the seedlings thoroughly before removal to minimize stress. Use a hand trowel or a dibber to gently lift each plant from its cell, taking care to handle the plant by its leaves rather than the stem to avoid damage.
Step-by-Step Guide for Transplanting African Parrot Gladiola
Preparation
Gather all necessary tools and keep them accessible before you begin. Wear gardening gloves for protection.
Removing the Plant
Depending on its origin, remove the african parrot gladiola plant from the ground, pot, or seedling tray using the described methods, ensuring minimal root system damage.
Transplanting Hole
Dig a hole in the prepared area, making it twice as wide and the same depth as the root ball or corm of the african parrot gladiola, to allow ample space for roots to spread.
Placing the Plant
Carefully position the african parrot gladiola plant in the center of the hole. If planting corms, place them with the pointed end facing upwards.
Firming the Soil
Gently backfill the hole with soil, firming it around the base to eliminate air pockets. Ensure the plant sits at the same soil level as it was in its original location.
Watering
Water the plant thoroughly to settle the soil and hydrate the roots.
Mulching
Apply a layer of mulch around the base of the african parrot gladiola to retain moisture and deter weed growth, keeping it away from the stem to prevent rot.
How Do You Care For African Parrot Gladiola After Transplanting?
Watering Regimen
Establish a consistent watering schedule to keep the soil moist but not waterlogged, adjusting for weather and drainage.
Monitoring Growth
Observe your african parrot gladiola for signs of stress or wilting, which may indicate issues with root establishment or water requirements.
Staking
If the african parrot gladiola grows tall or is exposed to strong winds, consider staking the plant for support as it develops.
Gradual Sunlight Exposure
If the african parrot gladiola was previously in a shadier spot, slowly acclimate it to fuller sun exposure to prevent sunscald.
Seasonal Care
Be aware of your african parrot gladiola's seasonal needs, such as when to trim foliage after blooming and when to anticipate dormancy if applicable.
Troubleshooting Common Issues with African Parrot Gladiola Transplantation.
What's the best time to transplant african parrot gladiola?
Aim for a period when the soil has warmed, typically in the heart of spring.
How deep should I plant african parrot gladiola corms during transplanting?
Plant corms at a depth of 4 inches (10 cm), ensuring the pointed end faces upward.
Can african parrot gladiola be transplanted in the fall?
Transplanting african parrot gladiola in fall is not ideal as it prefers the warmth of mid to late spring.
What spacing should be maintained between african parrot gladiola while transplanting?
Place african parrot gladiola about 5-6 inches (12-15 cm) apart to give them ample room to flourish.
Why are my transplanted african parrot gladiola not blooming?
They may need more sunlight, or insufficient time has elapsed since transplanting for root establishment.
Should I water african parrot gladiola immediately after transplanting?
Yes, water them gently to settle the soil and provide hydration for root development.
How can I tell if african parrot gladiola has been planted too deeply?
If growth is slow or foliage looks unhealthy, you may need to adjust the planting depth.
My african parrot gladiola looks wilted after transplanting, what should I do?
Ensure they're well-watered and not in direct, scorching sunlight, which could cause stress.
Can I use fertilizer right after transplanting african parrot gladiola?
It's best to wait until african parrot gladiola is established before applying a balanced fertilizer.
Is it necessary to stake african parrot gladiola after transplanting?
As african parrot gladiola grows, staking can be helpful to support tall spikes and prevent wind damage.



