How to Transplant Chaparral gilia?
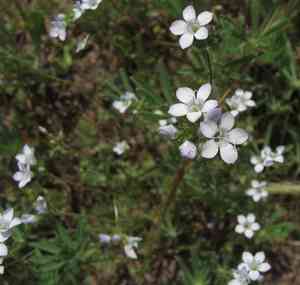
Chaparral gilia flourishes when transplanted between early and late spring, benefiting from the moderate weather. Select bright, adequately drained sites. Confirm the soil is slightly damp to aid in minimizing transplant stress.
What Preparations are Needed Before Transplanting Chaparral Gilia?
What is the Ideal Time for Transplanting Chaparral Gilia?
Chaparral gilia, being an annual, flourishes best when moved between early and late spring. This period allows for maximum root establishment and development prior to the intense summer heat. Transplanting at this time ensures vigorous growth and resilience, leading to healthier blooms and a stable life cycle, optimizing the plant's adaptation and success.
How Much Space Should You Leave Between Chaparral Gilia Plants?
When relocating chaparral gilia, position each plant 12-18 inches (30-45 cm) apart. This provides ample room for individual growth and expansion, fostering healthy development and minimizing competition for nutrients.
What is the Best Soil Mix for Chaparral Gilia Transplanting?
Prepare well-draining, sandy or loamy soil for chaparral gilia. Incorporate a balanced, all-purpose fertilizer into the soil before transplanting to ensure the young plants have sufficient nutrients to flourish.
Where Should You Relocate Your Chaparral Gilia?
Select a sunny location for transplanting chaparral gilia. These plants prefer direct sunlight and will perform best in an area where they receive at least 6-8 hours of sun daily.
What Equipments Should You Prepare Before Transplantation Chaparral Gilia?
Gardening Gloves
To safeguard your hands while handling soil and plants.
Shovel or Spade
For excavating around the plant and creating a hole in the ground for relocation.
Trowel
Useful for more precise digging and for working in confined areas.
Watering Can or Hose
To hydrate the plant before and after its move.
Pruning Shears
For trimming any damaged roots or foliage during the relocation process.
Compost or Mulch
To enhance soil quality and aid in moisture retention post-transplant.
How Do You Remove Chaparral Gilia from the Soil?
How Do You Remove Chaparral Gilia from the Soil?
From Ground: First, water the chaparral gilia plant to moisten the soil. Then, dig a wide trench around the plant using a shovel or spade, ensuring the plant's root ball remains intact. Carefully work the spade beneath the root ball to lift the plant from its original spot.From Pot: Water the chaparral gilia plant thoroughly to facilitate removal. Gently turn the pot on its side and tap the bottom to loosen the soil. Hold the base of the plant and carefully slide it out of the pot. If the plant is stuck, use a trowel to loosen the soil around the edges.From Seedling Tray: Water the chaparral gilia seedlings to ease their removal. Use a trowel or your fingers to gently lift each seedling from the tray, taking care to keep the root system intact. If the seedlings are closely packed, you might need to use a gentle, rocking motion to free them.
Step-by-Step Guide for Transplanting Chaparral Gilia
Preparation
Prepare the new planting site by digging a hole twice the size of the chaparral gilia plant's root ball. Mix some compost into the soil to provide nutrients.
Transferring
Place the chaparral gilia plant into the hole, ensuring that the top of the root ball is level with the ground surface. Backfill the hole with soil, gently pressing around the base to eliminate air pockets.
Watering
Water the chaparral gilia plant thoroughly after transplanting to settle the soil and provide moisture to the roots.
Mulching
Apply a layer of mulch around the base of the chaparral gilia plant to help retain moisture and regulate soil temperature.
How Do You Care For Chaparral Gilia After Transplanting?
Watering
Keep the soil around the chaparral gilia plant consistently moist, but not waterlogged, for the first few weeks after transplanting to help establish strong roots.
Monitoring
Regularly check the chaparral gilia plant for signs of stress, such as wilting, yellowing leaves, or slow growth, and address any issues promptly.
Protecting
Shield the chaparral gilia plant from strong winds and extreme temperatures during the initial recovery period to reduce transplant shock.
Fertilizing
After a few weeks, you can start to provide a balanced fertilizer to support new growth and root development.
Troubleshooting Common Issues with Chaparral Gilia Transplantation.
When is the best time to transplant chaparral gilia?
Early to late spring is ideal for transplanting chaparral gilia to encourage healthy growth.
What is the recommended spacing for chaparral gilia?
Space each chaparral gilia plant about 12-18 inches (30-45 cm) apart for optimal growth.
How should I prepare the soil for chaparral gilia?
Ensure well-drained, moderately fertile soil. Add compost to improve soil quality.
Should I harden off chaparral gilia before transplanting?
Yes, acclimate chaparral gilia to outdoor conditions for a week before transplanting.
How deep should I plant chaparral gilia?
Plant chaparral gilia at the same depth as in its original container to avoid stress.
Chaparral gilia looks wilted after transplanting. What should I do?
Water thoroughly and provide shade for a few days to help chaparral gilia recover.
How often should I water newly transplanted chaparral gilia?
Water young chaparral gilia plants regularly, keeping the soil consistently moist but not waterlogged.
What should I do if chaparral gilia doesn't thrive after transplanting?
Check for pests or diseases and ensure proper soil conditions and spacing are maintained.
Can I use mulch around chaparral gilia after transplanting?
Yes, a thin layer of mulch helps retain soil moisture and control weeds for chaparral gilia.
What are the signs of successful chaparral gilia transplantation?
Healthy new growth and lack of wilting indicate successful transplantation of chaparral gilia.



