How to Transplant Leafy broom?
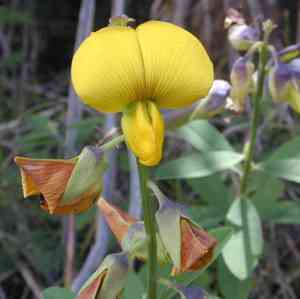
Provide leafy broom with a renewed beginning by relocating it from the end of spring into the heart of summer, allowing the warmth to stimulate root development. Select a bright location featuring soil that drains effectively, carefully assisting the roots to establish themselves without precise instructions.
What Preparations are Needed Before Transplanting Leafy Broom?
What is the Ideal Time for Transplanting Leafy Broom?
The perfect time for moving leafy broom is from late spring to early summer. Relocating leafy broom during this period ensures mild temperatures and longer days, which aid strong root development without the stress of intense summer heat. Establishing leafy broom at this point encourages vigorous growth, utilizing the prime growing season. Additionally, the pleasant weather benefits both the plant and the gardener!
How Much Space Should You Leave Between Leafy Broom Plants?
Hello, gardening enthusiast! When you're ready to introduce leafy broom to your garden, remember to space them approximately 36-48 inches (91-122 cm) apart. This will provide your plants ample room to thrive and display their beauty.
What is the Best Soil Mix for Leafy Broom Transplanting?
Before your leafy broom can establish itself, prepare the soil with plenty of organic material, such as compost or aged manure. They prefer well-drained, moderately fertile ground. A light application of a balanced, slow-release fertilizer will set them up for success.
Where Should You Relocate Your Leafy Broom?
Your leafy broom thrives in sunlight! Select a sunny location in your garden that receives at least 6-8 hours of direct sunlight daily. This will keep your leafy broom flourishing with vitality and vibrant health.
What Equipments Should You Prepare Before Transplantation Leafy Broom?
Gardening Gloves
To safeguard your hands while handling soil and the plant.
Shovel or Spade
To excavate the plant and prepare the new planting site.
Watering Can or Hose
For hydrating the plant before and after the relocation.
Pruning Shears
To trim any damaged roots or foliage prior to transplanting.
Wheelbarrow or Tarp
To move the plant from its original spot to the new location.
Stake or Plant Support
To help the leafy broom plant remain upright after transplanting, if needed.
How Do You Remove Leafy Broom from the Soil?
How Do You Remove Leafy Broom from the Soil?
From Ground: First, water the leafy broom plant to moisten the soil. Then, dig a wide trench around the plant using a shovel or spade, ensuring the plant's root ball stays intact. Carefully work the spade beneath the root ball to lift the plant from its initial position.From Pot: Water the leafy broom plant thoroughly to ease its removal. Gently tip the pot sideways and lightly tap the bottom to loosen the plant. Support the leafy broom plant by its base and carefully slide it out of the pot.From Seedling Tray: Dampen the soil in the tray and carefully remove the leafy broom seedling by lifting it from the base or using a spoon or plant label for leverage. Take special care not to harm the delicate roots during this process.
Step-by-Step Guide for Transplanting Leafy Broom
Digging the Hole
Excavate a hole in the ground that is twice the width of the leafy broom root ball and equally deep to ensure ample space for root expansion.
Preparing the Plant
Before placing the leafy broom into the hole, gently untangle any circling roots to encourage outward growth.
Placing the Plant
Carefully position the leafy broom into the hole, ensuring it stands upright. The top of the root ball should be level with the surrounding ground.
Refill the Hole
Gently backfill the hole with native soil around the root ball, compacting it slightly to eliminate large air pockets.
Watering
Water the leafy broom plant generously immediately after planting to help settle the soil around the roots and hydrate the plant.
Adding Support
If the leafy broom plant is tall or appears unstable, insert a stake into the ground and loosely tie the plant to it for support.
How Do You Care For Leafy Broom After Transplanting?
Monitoring
Keep a close watch on the leafy broom plant, looking for signs of stress such as wilting or discolored leaves, which may indicate a need for care adjustments.
Staking
If you've provided a stake or support, check regularly to ensure the ties are not too tight and are adjusted as the leafy broom plant grows.
Pruning
Remove any dead or damaged branches to encourage healthy growth and improve air circulation around the leafy broom plant.
Protection
Safeguard the newly transplanted leafy broom from pests and, if necessary, provide a protective barrier against wildlife or extreme weather.
Troubleshooting Common Issues with Leafy Broom Transplantation.
What's the best time to transplant leafy broom?
The optimal period is during the pleasant days of late spring to early summer.
How much space does leafy broom need when transplanting?
Allow a generous area between transplants, ideally 36-48 inches (91-122 cm) apart.
What soil type is best for transplanting leafy broom?
Utilize well-draining soil, enriched with organic matter to foster robust growth.
How deep should I plant leafy broom in the new location?
The root ball should be level with the soil surface, not deeper to prevent rot.
Can I transplant leafy broom on a hot day?
It's preferable to transplant on a cooler, overcast day to minimize transplant shock.
How often should I water leafy broom after transplanting?
Water thoroughly after transplanting, then regularly to keep the soil consistently moist, but not waterlogged.
Should I prune leafy broom before transplanting?
Prune dead or damaged stems to direct the plant's energy towards root establishment.
Does leafy broom require any special care post-transplant?
Apply mulch to retain moisture and protect the roots, and avoid immediate fertilization.
What if leaves of leafy broom wilt after transplanting?
Ensure adequate watering without overdoing it, and allow it time to recover from transplant shock.
Can I transplant leafy broom during flowering?
It's advisable to wait until the flowering period has concluded to reduce stress.



