How to Transplant Florida hammock milkpea?
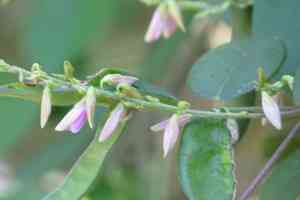
Florida hammock milkpea flourishes when transplanted from mid-spring to early summer. Select a location that receives full sun or partial shade, featuring soil that drains effectively. Should it be required, lightly moisten the root system to assist the plant in adjusting to its new environment.
What Preparations are Needed Before Transplanting Florida Hammock Milkpea?
What is the Ideal Time for Transplanting Florida Hammock Milkpea?
Moving florida hammock milkpea in mid to late spring ensures optimal root development prior to the intense summer heat. This timing takes advantage of warm soil temperatures and extended daylight, fostering strong growth and resilience. Early season relocation helps florida hammock milkpea adapt, improving its overall vigor and long-term survival.
How Much Space Should You Leave Between Florida Hammock Milkpea Plants?
When transplanting florida hammock milkpea, position them 18-24 inches (45-60 cm) apart. This provides ample room for them to expand comfortably, promoting healthy development and preventing overcrowding.
What is the Best Soil Mix for Florida Hammock Milkpea Transplanting?
For florida hammock milkpea, prepare soil that drains well, ideally sandy or loamy. Incorporate a foundational fertilizer such as compost or a balanced 10-10-10 (N-P-K) blend to supply necessary nutrients.
Where Should You Relocate Your Florida Hammock Milkpea?
Florida hammock milkpea thrives in full sunlight, so select a spot where they will receive at least 6-8 hours of direct sun daily. This promotes robust and vibrant growth.
What Equipments Should You Prepare Before Transplantation Florida Hammock Milkpea?
Gardening Gloves
To shield your hands while handling soil and plants.
Trowel or Small Shovel
For excavating holes and channels for the plant.
Garden Fork
To loosen the soil around the plant's root system without causing harm.
Watering Can or Hose
To hydrate the plant before and after its relocation.
Mulch
To help retain moisture in the soil surrounding the new planting site.
How Do You Remove Florida Hammock Milkpea from the Soil?
How Do You Remove Florida Hammock Milkpea from the Soil?
From Ground: First, moisten the florida hammock milkpea plant to dampen the soil. Then, dig a wide trench around the plant using a shovel or spade, ensuring the plant's root ball remains intact. Carefully work the spade beneath the root ball to lift the plant from its original spot.From Pot: Gently water the florida hammock milkpea in the container to soften the soil. Tap the sides of the pot to loosen the plant. Hold the plant's base and carefully tip the pot, allowing the plant to slide out with its root ball undisturbed.From Seedling Tray: Water the seedlings in the tray and use a small fork or your fingers to gently ease each florida hammock milkpea plant out, holding it by the leaves or stem, not the roots.
Step-by-Step Guide for Transplanting Florida Hammock Milkpea
Site Preparation
Prepare the new planting location by digging a hole slightly larger than the florida hammock milkpea plant's root ball. This will provide ample space for the roots to spread and develop.
Removing the Plant
Depending on its initial location, follow the removal techniques detailed in the previous section to ensure the florida hammock milkpea plant is carefully extracted and ready for relocation.
Placing the Plant
Position the florida hammock milkpea plant in the prepared hole so the top of its root ball is even with or slightly above the surrounding ground. Backfill the hole with soil, gently firming it around the roots to eliminate any air pockets.
Watering
Water the newly transplanted florida hammock milkpea generously to settle the soil around its roots. Continue to water at the plant's base to aid its adjustment to the new environment.
Applying Mulch
Apply a layer of mulch around the base of the florida hammock milkpea to help maintain soil moisture and reduce weed competition. Ensure the mulch is kept away from the plant's stem to prevent rot.
How Do You Care For Florida Hammock Milkpea After Transplanting?
Watering
Keep the soil around the florida hammock milkpea consistently moist, but not waterlogged, for the initial weeks post-transplant to encourage strong root development.
Monitoring
Observe the florida hammock milkpea plant for indications of stress, such as wilting or yellowing leaves. Address any issues promptly by adjusting water levels or checking for pests.
Mulching
Regularly inspect and maintain the mulch layer to ensure effective moisture retention and weed suppression.
Adjusting Support
If needed, provide stakes or other forms of support to keep the florida hammock milkpea plant upright and stable during its acclimation period in the new spot.
Troubleshooting Common Issues with Florida Hammock Milkpea Transplantation.
When is the best time to transplant florida hammock milkpea?
Mid-spring to early summer is ideal for relocating florida hammock milkpea. This ensures optimal growth and establishment.
How far apart should I space each florida hammock milkpea plant?
Space each florida hammock milkpea plant 18-24 inches (45-60 cm) apart to allow for proper root and foliage development.
What soil type is best for transplanting florida hammock milkpea?
Well-draining, sandy soil with organic matter is optimal for transplanting florida hammock milkpea. Avoid heavy clay soil.
How do I prepare the soil for florida hammock milkpea transplant?
Loosen soil up to 12 inches (30 cm), removing debris and incorporating compost to enhance fertility.
Do I need to water florida hammock milkpea immediately after transplanting?
Yes, thoroughly water florida hammock milkpea after transplanting to help settle the soil around its roots.
What should I do if florida hammock milkpea foliage wilts after transplanting?
Maintain consistent soil moisture without waterlogging, and provide temporary shade to lessen transplant shock.
Can I transplant florida hammock milkpea directly into full sun?
Yes, florida hammock milkpea can be moved into full sun. Gradually acclimate indoor plants to outdoor sunlight.
What size hole should I dig for florida hammock milkpea transplant?
Dig a hole twice as wide and as deep as florida hammock milkpeaâs root ball for comfortable establishment.
How do I know if florida hammock milkpea has outgrown its pot for transplanting?
If roots are circling the pot bottom or emerging from drainage holes, florida hammock milkpea is ready to be transplanted.
Should I prune florida hammock milkpea before transplanting?
Lightly trim damaged or excessively long roots before transplanting florida hammock milkpea to encourage healthy new growth.



