How to Transplant Stink bells?
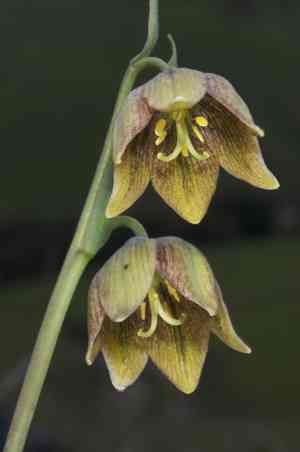
Stink bells flourishes when relocated from late fall to early winter, taking advantage of lower temperatures and damp earth. Select a sunny spot with good drainage for best development. Guarantee minimal disruption to the roots to encourage successful settling.
Essential Preparations Before Relocating Stink Bells
Optimal Period for Relocating Stink Bells?
The best time to move stink bells is from late autumn to early winter. This period is ideal as cooler temperatures and increased humidity lessen transplant shock, promoting better root establishment. Furthermore, this season allows the plant to settle before its active growth phase, ensuring vigorous development in spring.
Required Spacing Between Stink Bells Plants?
When moving stink bells, position them 6-8 inches (15-20 cm) apart. This spacing provides ample room for growth and ensures adequate air circulation, which helps prevent overcrowding and reduces disease risk.
Preferred Soil Mixture for Stink Bells Relocation?
Prepare a well-draining soil blend for stink bells relocation. They thrive in sandy or loamy soil with a pH between 6.5-7. Incorporate a phosphorus-rich base fertilizer to encourage robust root development. Composted organic matter or aged manure serves well as a foundational nutrient source.
Ideal New Location for Your Stink Bells?
Select a sunny spot for relocating stink bells, as they flourish in full sun to partial shade. Ensure the chosen site receives at least 6 hours of daily sunlight. Avoid placing them near tall plants or trees that could obstruct sunlight.
Equipment Needed Before Transplanting Stink Bells
Gardening Gloves
To safeguard your hands while handling soil and plants.
Hand Trowel
For excavating small holes and loosening earth around the plant.
Shovel or Spade
Aids in digging up and relocating the plant.
Watering Can or Hose
For hydrating the plant before and after its move.
Stakes and Ties
To offer support to the plant if necessary.
Mulch
Helps retain moisture and protect the plant post-transplant.
How to Extract Stink Bells from the Ground?
How to Extract Stink Bells from the Soil?
From Ground: First, moisten the soil around the stink bells plant. Then, using a shovel or spade, dig a wide trench approximately 6 inches from the plant, being careful not to harm the root ball. Gently work the spade beneath the root ball to lift the plant from its original spot.From Pot: Thoroughly water the stink bells plant. Carefully invert the pot while supporting the plant with one hand. Tap the pot's base to loosen the soil and slide the plant out. If it resists, run a knife along the pot's rim to free it.From Seedling Tray: Water the stink bells seedlings well. Use a hand trowel or small spoon to carefully lift each seedling from the tray, keeping the root system as intact and undisturbed as possible.
Detailed Steps for Transplanting Stink Bells
Site Preparation
Prepare the new site by digging a hole that is twice the width and equal to the depth of the stink bells plant's root ball.
Soil Preparation
Loosen the soil at the bottom of the hole and incorporate organic matter to enhance drainage and fertility.
Transplanting
Carefully place the stink bells plant into the hole, ensuring it sits at the same depth as it was previously. Backfill the hole with soil, gently pressing down to remove any air pockets.
Watering
Water the stink bells plant deeply immediately after transplanting to help the soil settle around the roots.
Mulching
Apply a layer of mulch around the plant's base, avoiding direct contact with the stem, to help retain moisture and regulate soil temperature.
Support
If the stink bells plant is tall or unstable, install stakes and ties to provide necessary support during its initial establishment phase.
Post-Transplant Care for Stink Bells
Watering
Maintain consistent moisture in the soil around the stink bells, ensuring it's damp but not waterlogged, for the first few weeks after transplanting to encourage strong root development.
Mulching
Regularly inspect the mulch and replenish it as needed to maintain a 2-3 inch layer, which aids in moisture retention and weed suppression.
Monitoring
Daily observe the stink bells plant for any indications of stress or disease. Look for drooping, yellowing leaves, or wilting, and address issues promptly.
Fertilizing
After 4-6 weeks, you can begin feeding the stink bells plant with a balanced, slow-release fertilizer to support its ongoing growth.
Resolving Common Issues with Stink Bells Transplantation.
When is the best time to transplant stink bells?
For optimal results, consider relocating stink bells in late fall or early winter.
How should I prepare the soil for stink bells transplant?
Ensure the soil is well-draining and enriched with organic matter before moving stink bells.
What is the ideal spacing for stink bells?
Plant stink bells bulbs 6-8 inches (15-20 cm) apart to allow for proper development.
How deep should stink bells bulbs be planted?
Bury stink bells bulbs approximately 3-4 inches (7-10 cm) deep in the soil.
What should I do immediately after transplanting stink bells?
Water thoroughly after relocating stink bells to aid in root establishment.
Stink bells are wilting after transplanting, what should I do?
Ensure stink bells receive consistent moisture and avoid overwatering; adjust soil drainage if necessary.
Can I transplant stink bells during blooming season?
Avoid moving stink bells while they are blooming; wait for dormancy in late fall or early winter.
How do I handle stink bells bulbs during transplant?
Handle stink bells bulbs gently to prevent damage to their roots and bulbs.
Why is the foliage of stink bells turning yellow after transplant?
Yellowing leaves can signal stress; ensure proper watering and check soil quality.
What are the light requirements for recently transplanted stink bells?
Stink bells prefer partial to full sunlight, adjusted to their natural environmental conditions.



