How to Transplant Turk's head?
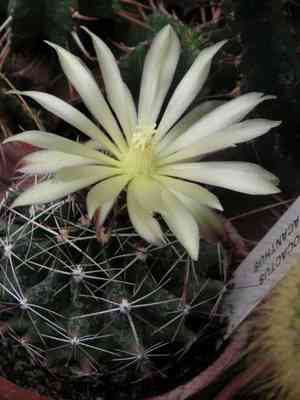
The ideal period to move turk's head is when the ground is warmed by the warmth of mid to late summer, which encourages root growth. Select a sunny location with good drainage, and gradually introduce turk's head to its new environment to avoid stress. A gentle reminder: a gradual approach guarantees successful transplantation.
What Preparations are Needed Before Transplanting Turk's Head?
What is the Ideal Time for Transplanting Turk's Head?
The optimal period for relocating turk's head is during the pleasant warmth of mid to late summer. This timing leverages the plant's natural growth cycle, promoting strong root development and easier adjustment in the warmer soil. Moving turk's head as summer peaks ensures that extended daylight and consistent temperatures support its recovery and growth, guaranteeing successful establishment in its new spot before colder seasons arrive.
How Much Space Should You Leave Between Turk's Head Plants?
When transplanting turk's head, ample spacing is crucial! Aim for approximately 3-5 feet (0.9-1.5 meters) between plants. This provides each specimen sufficient room to grow without competition, helping them flourish.
What is the Best Soil Mix for Turk's Head Transplanting?
For turk's head, a sandy or loamy soil rich in calcium carbonate is most suitable. Combine this with a low-nitrogen base fertilizer, applied sparingly. This blend will encourage vigorous growth.
Where Should You Relocate Your Turk's Head?
Turk's head thrives in sunny locations! Place it where it can receive at least 6 hours of full sun exposure daily. This will aid its growth and development. Remember, turk's head prefers warm, dry conditions.
What Equipments Should You Prepare Before Transplantation Turk's Head?
Shovel or Trowel
These are essential tools for excavating soil in both the original and new planting sites for your turk's head plant.
Gardening Gloves
To safeguard your hands while handling soil and the plant. Cacti like turk's head possess sharp spines that can easily pierce skin.
Pot (if applicable)
If your turk's head is currently in a container, you might need a larger one for its new home.
Gardening Apron
To keep your attire clean throughout the process.
Sturdy Footwear
Cacti spines can readily penetrate thin shoes; ensure you wear something thick and robust.
How Do You Remove Turk's Head from the Soil?
How Do You Remove Turk's Head from the Soil?
From Ground: First, hydrate the turk's head plant to moisten the surrounding soil. This will facilitate easier extraction. Carefully begin loosening the soil around the plant using a shovel or trowel, maintaining a wide perimeter to avoid damaging the roots. Once the soil is loose, gently work the tool beneath the root ball to lift the cactus from its original position. Exercise extreme caution during this step; the goal is to keep as much of the root system intact as possible.From Pot: Before extracting your turk's head from its container, water it thoroughly. This will help the plant slide out more easily. Then, gently tilt the pot sideways, supporting the plant with your other hand. Tap the bottom and sides of the pot to help dislodge the soil and roots. If the plant resists, you may need to carefully run a trowel around the inner edge of the pot to free any clinging roots.From Seedling Tray: If your turk's head is in a seedling tray, the removal process is quite straightforward. Prop up one side of the tray and carefully push from the bottom, beneath the cell containing the plant. As the seedling emerges, support it from the root ball, ensuring you do not pull on the stem. Holding it by the leaves is also not recommended as they can easily break.
Step-by-Step Guide for Transplanting Turk's Head
Digging Hole
In the new location, excavate a hole that is slightly wider and deeper than the root ball of your turk's head plant. The additional space allows for easier root accommodation.
Placing the Plant
Carefully position the turk's head into the hole. The top of the root ball should be level with the soil surface. If the hole is too deep, you can add some soil at the bottom to elevate it to the correct height.
Filling the Hole
Loosely backfill the hole, gently firming the soil as you proceed. Be sure not to compact it too tightly, to allow the roots easy penetration during their expansion.
Final Touches
Once the turk's head is securely in place, you can add some finishing touches such as applying mulch or decorative stones around the plant's base. This not only enhances its appearance but also helps retain soil moisture.
How Do You Care For Turk's Head After Transplanting?
Watering:
After transplanting your turk's head, it is crucial to water it thoroughly to aid its establishment in its new home. However, as a cactus adapted to arid conditions, avoid overwatering to prevent root rot.
Damage Control:
If any cactus spines broke during the transplanting process, gently remove them. Broken spines can potentially lead to the plant contracting diseases.
Monitoring:
Keep a close watch on your turk's head after transplantation for any signs of stress, such as wilting or discoloration. If observed, try to resolve the issues promptly.
Troubleshooting Common Issues with Turk's Head Transplantation.
When is the perfect time for transplanting turk's head?
The ideal time to transplant turk's head is around the S5-S6 period, or when the weather is mild and not excessively hot or cold.
What amount of spacing is ideal for turk's head?
Each turk's head requires an area of 3-5 feet (approximately 0.9-1.5 meters). This provides the plant ample room to flourish.
What are the steps to prepare turk's head for transplantation?
Begin by watering turk's head thoroughly the day before transplantation. Carefully remove it from its current pot, keeping the root ball intact.
How deep should the hole be dug for transplanting turk's head?
The hole should be wide and deep enough to accommodate turk's head's root system. Generally, it should be twice the width of the root ball.
What soil composition is best for transplanting turk's head?
Turk's head prefers well-drained soil. A mixture of garden soil, coarse sand, and organic compost works well for this plant.
What care or steps should be taken after transplantation of turk's head?
Immediately after transplanting, water turk's head thoroughly. Avoid direct sunlight for a few days. Regularly check for signs of stress.
How often should I water turk's head after transplanting?
Water turk's head once the soil is nearly dry, typically this might be once every two weeks. Overwatering can damage the plant.
Why is sunlight important for turk's head?
Turk's head requires abundant sunlight for healthy growth, but it doesn't tolerate extremely hot direct sunlight, which can cause sunburn.
How long to wait before transplanting turk's head after purchase?
Wait for at least a couple of weeks for turk's head to acclimate to your home environment before considering transplanting.
What signs indicate that turk's head needs to be transplanted?
When roots start growing out of the drainage hole or turk's head shows signs of growth stagnation, it's likely time for transplanting.



