How to Transplant Mercury spurge?
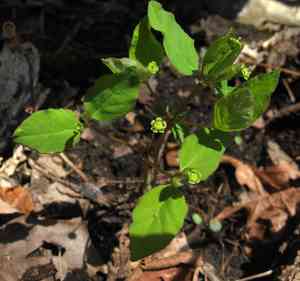
Mercury spurge flourishes most effectively when relocated between early and late spring, or from early to late winter, as these intervals offer ideal circumstances. Guarantee a bright or partially shaded spot with soil that drains efficiently for a successful transfer.
What Preparations are Needed Before Transplanting Mercury Spurge?
What is the Ideal Time for Transplanting Mercury Spurge?
The best period for relocating mercury spurge is from early to late spring or from early to late winter. These times offer optimal soil moisture and moderate temperatures, which aid in minimizing transplant shock and fostering robust root development. Moving the plant during these seasons maximizes its growth potential and ensures strong establishment.
How Much Space Should You Leave Between Mercury Spurge Plants?
Ensure ample room for each mercury spurge plant to flourish by spacing them 12-18 inches (30-45 cm) apart. This guarantees sufficient area for their roots and foliage to develop healthily.
What is the Best Soil Mix for Mercury Spurge Transplanting?
For mercury spurge, prepare soil that drains well and is rich in organic matter. A blend of loamy soil with some compost is perfect. Before planting, mix a balanced base fertilizer (such as a 10-10-10 NPK) into the soil to supply essential nutrients.
Where Should You Relocate Your Mercury Spurge?
Select a sunny spot for transplanting mercury spurge. This plant thrives in full sun, needing at least 6-8 hours of direct sunlight daily. Make sure the location is protected from strong winds to prevent harm to the young plants.
What Equipments Should You Prepare Before Transplantation Mercury Spurge?
Gardening Gloves
To safeguard your hands while handling soil and plants.
Spade or Shovel
For digging a trench around the plant and lifting it from the ground.
Trowel
Useful for more precise digging and working with the soil.
Watering Can or Hose
To hydrate the plant before and after relocation.
Pruning Shears
For trimming any damaged roots or plant parts.
Wheelbarrow or Large Container
To move the plant if relocating it a significant distance.
Mulch
To help retain moisture around the plant after transplanting.
How Do You Remove Mercury Spurge from the Soil?
How Do You Remove Mercury Spurge from the Soil?
From Ground: First, water the mercury spurge plant to moisten the soil. Then, dig a wide trench around the plant using a shovel or spade, ensuring the plant's root ball remains intact. Carefully work the spade under the root ball to lift the plant from its original location.From Pot: Gently water the mercury spurge plant to ensure the soil is damp but not waterlogged. Tap around the pot's sides to loosen the soil. Hold the base of the plant and gently slide it out of the pot. If necessary, tap the bottom of the pot or squeeze the container to release the root ball.From Seedling Tray: Water the seedlings to keep the soil moist. Use a pencil or a small stick to push up from the drainage holes underneath. Carefully slide each seedling out, ensuring you handle them by their leaves to avoid damaging the stems.
Step-by-Step Guide for Transplanting Mercury Spurge
Site Selection
Choose a spot with adequate sunlight and room for your mercury spurge plant to reach its full size.
Soil Preparation
Loosen the soil where you will be relocating the mercury spurge plant. Dig a hole that is twice the width and the same depth as the plant's root ball.
Transplanting The Plant
Place the mercury spurge plant into the hole, ensuring it is at the same depth it was growing previously. Fill the hole with soil, pressing lightly around the base to eliminate any air pockets.
Watering
Thoroughly water the mercury spurge plant immediately after transplanting to help settle the soil and reduce transplant shock.
Apply Mulch
Add a layer of mulch around the base of the mercury spurge plant to help retain moisture and regulate soil temperature.
How Do You Care For Mercury Spurge After Transplanting?
Watering
Keep the soil around the mercury spurge consistently moist, but not waterlogged, for the initial few weeks after transplanting to aid in strong root establishment.
Monitoring
Check the mercury spurge plant regularly for any signs of stress, such as wilting or discoloration, and adjust care as needed.
Weeding
Keep the area around your newly transplanted mercury spurge plant free from weeds to reduce competition for nutrients and water.
Pruning
Remove any damaged or dead growth from the mercury spurge plant to encourage healthy new development.
Troubleshooting Common Issues with Mercury Spurge Transplantation.
When is the best time to transplant mercury spurge?
Relocate mercury spurge from early spring to late spring or early winter to late winter.
How much space should I leave between mercury spurge plants?
Ensure each mercury spurge plant is about 12-18 inches (30-45 cm) apart for optimal growth.
How do I prepare the soil for transplanting mercury spurge?
Loosen the soil and mix in organic compost to improve drainage and nutrient content.
What should I do if roots are damaged during transplanting?
Trim damaged roots cleanly and replant gently, ensuring ample water to help recovery.
How deep should I plant mercury spurge after transplanting?
Plant mercury spurge at the same depth it was growing before to avoid stress.
Should I water mercury spurge immediately after transplanting?
Yes, water thoroughly to settle the soil and support the plantâs root establishment.
How can I protect mercury spurge from transplant shock?
Avoid disturbing roots excessively and water consistently. Mulch to retain soil moisture.
What if leaves wilt after transplanting mercury spurge?
Wilting is common. Keep the soil moist and provide shade until recovery.
How can I improve the chances of mercury spurge thriving after transplanting?
Use well-draining soil, adequate spacing, and regular watering while avoiding overwatering.
What are common transplanting mistakes to avoid for mercury spurge?
Avoid planting too deep, skipping watering, and neglecting proper soil preparation.



