How to Transplant Spurge?
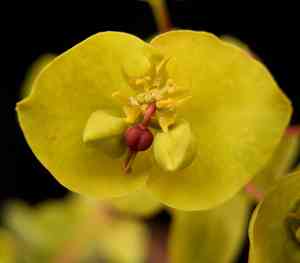
For euphorbia, the ideal period for relocation extends from the onset of early spring to the conclusion of late spring, ensuring peak development. Select a bright spot with soil that drains effectively, and carefully introduce euphorbia to its new environment for superior outcomes.
Essential Preparations Before Relocating Spurge?
Optimal Timing for Spurge Relocation?
The best time to move spurge is from the start of new growth in spring until early summer. Transplanting during this period takes advantage of mild weather, promoting root development and establishment. Placing spurge in this moderate climate ensures smooth adaptation, with the earth's gentle warmth encouraging a strong beginning. As your garden awakens, spurge will thrive alongside, guaranteeing vigor and abundant beauty.
Recommended Spacing Between Spurge Plants?
Hello, aspiring gardener! For your lovely spurges, you'll want to provide them ample room to flourish. Aim to position them approximately 6-12 inches apart, which is roughly 15-30 cm. This will allow each plant sufficient space to grow happily!
Ideal Soil Mixture for Spurge Transplantation?
For your spurges to flourish, they prefer well-draining soil enriched with a generous amount of organic matter â consider compost or peat moss for added nourishment. A balanced, slow-release fertilizer will give them a strong start!
Where to Replant Your Spurge?
These sun-loving spurges crave sunlight! Select a new location that receives full sun for most of the day. This bright spot will ensure your spurges grow robust and vibrant!
Equipment Needed Before Transplanting Spurge?
Gardening Gloves
To safeguard your hands while handling soil and plants.
Trowel
For digging and moving the spurge from its original container.
Watering Can
To hydrate the spurge before and after its relocation.
Spade or Shovel
For excavating the spurge if it's being moved from the ground.
Pruning Shears
To trim any damaged roots or excess foliage prior to transplanting.
Wheelbarrow or Garden Cart
To transport the spurge and any necessary soil or compost.
Rake
To smooth the ground and clear any debris before planting.
Rooting Hormone (optional)
To stimulate root development following transplantation.
How to Extract Spurge from the Soil?
How to Extract Spurge from the Soil?
From Ground: First, water the spurge plant to moisten the soil, making it easier to manage. Then, dig a wide trench around the plant using a shovel or spade, being careful not to harm the root system. Gently pry beneath the plant to lift it along with its root ball.From Pot: Thoroughly water the soil in the pot. Tilt the pot sideways and gently tap or press its sides to loosen the soil. Carefully slide the spurge out of the pot without pulling on its stems or leaves.From Seedling Tray: Dampen the soil to facilitate removal. Use a trowel or your fingers to gently lift the spurge seedling by its leaves, avoiding the delicate stem or roots. Support the root ball to prevent it from breaking apart.
Step-by-Step Guide for Relocating Spurge
Preparing the New Location
Gently clear the area of weeds and rocks and loosen the soil. If the ground is very dense, consider incorporating some compost to enhance its texture and fertility.
Digging the Planting Hole
Create a hole that is twice as wide and the same depth as the spurge's root ball to allow roots to spread easily.
Positioning the spurge
Place the spurge into the hole gently, ensuring it sits at the same depth as in its previous spot. The transition should be smooth, so the plant doesn't realize it has been moved.
Backfilling the Hole
Carefully refill the hole with the excavated soil, and if needed, a bit of compost. Gently firm the soil around the plant to remove air pockets, which can dry out roots.
Watering After Relocation
Water the spurge thoroughly after planting to settle the soil and hydrate the roots. This also helps to lessen transplant shock.
Applying Mulch
Spread a layer of organic mulch around the base of the spurge, leaving some space around the stem. This can help retain moisture and regulate soil temperature.
Post-Transplant Care for Spurge?
Monitoring
Inspect the spurge daily for signs of transplant shock, such as wilting or discolored leaves. Take necessary steps to alleviate stress on the plant.
Watering
Keep the spurge's soil consistently moist for the initial few weeks until it's established. However, be careful not to overwater, which can lead to root rot or fungal diseases.
Support and Protection
If needed, provide support with stakes or covers to shield the spurge from strong winds or pests during the first days after transplanting.
Feeding
Wait a few weeks before fertilizing the spurge. Allow it to adapt to its new environment first. Then, use a balanced, slow-release fertilizer suitable for spurge to encourage healthy growth.
Resolving Common Issues with Spurge Transplantation.
When is the ideal time to move spurge?
The prime period for relocating spurge is early to late spring, as the soil begins to warm.
What spacing should I use when transplanting spurge?
Give each spurge ample room to flourish; space them approximately 6-12 inches (15-30 cm) apart.
What if my spurge wilts after being transplanted?
Wilting can indicate shock. Ensure sufficient water and shade from intense sun while spurge adapts.
Why isn't my spurge growing after relocation?
It might be in shock or needs time to establish. Consistent watering and patience are crucial.
What soil type is best for transplanting spurge?
Rich, well-drained soil is perfect for spurge. Amend with compost to improve soil structure.
Can I transplant spurge on a hot, sunny day?
Transplant during cooler parts of the day or on overcast days to minimize stress on spurge.
How deep should I plant spurge when transplanting?
Plant spurge at the same depth it was in its previous container to prevent stem rot or drying out.
How much should I water spurge after transplanting?
Keep the soil consistently moist but not waterlogged for the first few weeks post-transplant.
Should I fertilize spurge immediately after transplanting?
Refrain from fertilizing until spurge has settled into its new location, to avoid burning roots.
What if spurge's leaves turn yellow after transplanting?
Yellow leaves could signal overwatering or a nutrient deficiency. Adjust watering and consider soil testing.



