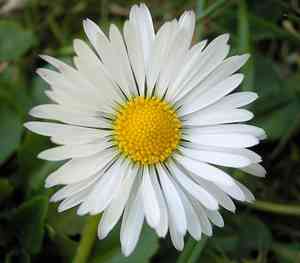
How to Transplant Brewer's aster?
Brewer's aster flourishes when relocated in the middle to end of spring, offering perfect circumstances for root development prior to the warmth of summer. Select a bright, adequately draining spot for peak development. Provide moderate irrigation to aid its adjustment.
What Preparations are Needed Before Transplanting Brewer's Aster?
What is the Ideal Time for Transplanting Brewer's Aster?
Brewer's aster, a perennial, flourishes best when moved from late spring to early summer. This period provides ideal soil warmth and extended daylight, promoting strong root development. Transplanting at this time minimizes shock and maximizes growth potential, leading to a healthy, thriving plant.
How Much Space Should You Leave Between Brewer's Aster Plants?
Ensure brewer's aster plants are spaced approximately 18-24 inches (45-60 cm) apart. This provides ample room for growth and guarantees adequate air circulation, lowering disease risk.
What is the Best Soil Mix for Brewer's Aster Transplanting?
Prepare the soil by blending well-draining sandy or loamy soil with compost or an all-purpose base fertilizer. This enriches the soil with nutrients and establishes a robust root foundation for brewer's aster.
Where Should You Relocate Your Brewer's Aster?
Place brewer's aster in a spot that receives full sun, ideally 6-8 hours of direct sunlight daily. This helps the plant thrive and produce abundant blooms.
What Equipments Should You Prepare Before Transplantation Brewer's Aster?
Gardening Gloves
To safeguard your hands while handling soil and the plant.
Shovel or Spade
For excavating holes and trenches to extract and replant the specimen.
Trowel
For more precise digging and soil adjustments.
Watering Can or Hose
To maintain adequate soil moisture during and after the relocation.
Plant Labels
To identify the location and specifics of the transplanted brewer's aster plants.
Mulch
To aid in moisture retention and inhibit weed growth around the newly planted specimens.
How Do You Remove Brewer's Aster from the Soil?
How Do You Remove Brewer's Aster from the Soil?
From Ground: First, hydrate the brewer's aster plant to moisten the soil. Next, dig a wide trench around the plant using a shovel or spade, ensuring the plant's root ball remains intact. Carefully work the spade beneath the root ball to lift the plant from its original spot.From Pot: Water the plant thoroughly a few hours prior to removal. Gently tilt the pot on its side and slide the plant out, supporting the stem's base and the root ball. If the plant resists, tap the pot's sides to loosen the soil.From Seedling Tray: Water the seedlings to moisten the soil. Use a trowel or your fingers to carefully lift each seedling from the tray, handling them by their leaves or root ball to prevent damage to the delicate stems.
Step-by-Step Guide for Transplanting Brewer's Aster
Site Selection
Choose a location with adequate sunlight and room for your brewer's aster plant to reach its mature size.
Prepare the Ground
Loosen the soil in the planting area with a shovel or spade. Remove any weeds or debris and ensure the soil drains well.
Dig the Hole
Excavate a hole slightly larger than the root ball of your brewer's aster plant. The hole should be deep enough for the plant to sit at its previous growing depth.
Transplanting
Place the brewer's aster plant into the hole, ensuring the top of the root ball is level with the surrounding soil. Backfill the hole with soil, gently pressing down to eliminate air pockets.
Watering
Thoroughly water the newly transplanted brewer's aster plant to settle the soil around the roots and help reduce transplant shock.
How Do You Care For Brewer's Aster After Transplanting?
Watering
Keep the soil around the brewer's aster consistently moist, but not waterlogged, for the initial weeks post-transplant to aid in strong root establishment.
Mulching
Apply a layer of mulch around the base of the brewer's aster plant to help retain moisture, regulate soil temperature, and suppress weeds.
Monitoring
Regularly inspect the brewer's aster plant for indications of stress or disease. Address any issues promptly to encourage healthy growth.
Support
If needed, provide support to the brewer's aster plant using stakes or plant ties to prevent damage from wind or heavy rain.
Troubleshooting Common Issues with Brewer's Aster Transplantation.
When is the best time to transplant brewer's aster?
Move brewer's aster in late spring to early summer for optimal growth and establishment.
What is the ideal spacing between transplanted brewer's aster plants?
Space brewer's aster plants 18-24 inches (45-60 cm) apart to ensure proper growth and airflow.
How do I prepare the soil for transplanting brewer's aster?
Ensure well-draining soil enriched with compost. A slightly acidic to neutral pH is ideal.
Should I water brewer's aster immediately after transplanting?
Yes, water thoroughly right after transplanting to help settle the roots and reduce transplant shock.
How deep should I plant brewer's aster into the ground?
Plant brewer's aster at the same depth it was growing previously, ensuring the crown is just above soil level.
Can I transplant brewer's aster in hot weather?
Avoid transplanting brewer's aster in hot weather; wait for cooler days to minimize stress on the plant.
How do I handle root-bound brewer's aster during transplanting?
Gently tease apart or cut any bound roots to encourage new growth and better establishment in the soil.
What aftercare does brewer's aster need post-transplanting?
Keep brewer's aster well-watered but not waterlogged. Mulch to retain moisture and reduce weeds.
Will pruning brewer's aster help after transplanting?
Lightly prune damaged or overly long stems to reduce stress and encourage stronger growth.
Can I use fertilizer immediately after transplanting brewer's aster?
Wait for 2-3 weeks before applying a well-balanced fertilizer to avoid burning the delicate new roots.


