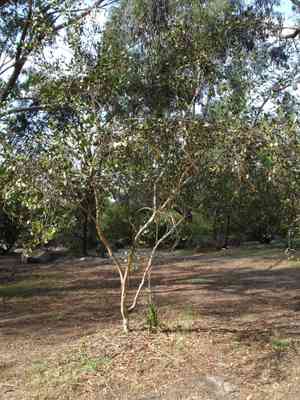
How to Transplant Round-leaved moort?
For Eucalyptus orbifolia, the most favorable period for relocation is between the beginning and end of spring, or from the start to the conclusion of winter. This timing enables the specimen to develop its root system during cooler temperatures. Place it in direct sunlight within a substrate that drains effectively for superior outcomes.
Essential Preparations Before Relocating Round-leaved Moort?
Optimal Period for Relocating Round-leaved Moort?
Round-leaved moort should be moved from early to late spring or early to late winter. These periods offer mild temperatures and adequate moisture, vital for root establishment. Relocating during these times allows the plant to adapt before extreme summer heat or winter cold, fostering healthier development and improved survival rates. Ensure the soil is prepared and drains well for best outcomes.
Required Spacing Between Round-leaved Moort Plants?
For relocating round-leaved moort, ensure each plant is positioned 12-15 feet (3.6-4.5 meters) apart. This provides ample room for growth and prevents overcrowding.
Best Soil Mixture for Round-leaved Moort Relocation?
Prepare well-draining soil for round-leaved moort. Loamy or sandy soil is most suitable. Incorporate a balanced base fertilizer to provide the plant with a nutrient boost; compost or slow-release fertilizers are excellent choices.
Ideal Location for Your Round-leaved Moort?
Select a site with full sunlight for round-leaved moort. This plant requires at least 6-8 hours of direct sunlight daily to thrive.
Equipment Needed Before Relocating Round-leaved Moort?
Gardening Gloves
To safeguard your hands while handling soil and the plant.
Spade or Shovel
For excavating around the plant and preparing the new planting site.
Watering Can or Hose
To maintain soil moisture, both during removal and after replanting the specimen.
Garden Fork
For loosening and aerating the soil surrounding the plant's root system.
Pruning Shears
To trim any damaged or excessive roots during the relocation process.
Wheelbarrow
To transport the plant from its original spot to the new location.
How to Extract Round-leaved Moort from the Ground?
How to Extract Round-leaved Moort from the Ground?
From Ground: First, hydrate the round-leaved moort plant to moisten the soil. Next, dig a wide trench around the plant using a shovel or spade, ensuring the plant's root ball remains intact. Carefully work the spade beneath the root ball to lift the plant from its initial position.From Pot: Gently tap the pot's sides to loosen the soil, then carefully slide the round-leaved moort plant out, supporting the root ball to prevent it from disintegrating.From Seedling Tray: Use a garden fork or a small trowel to carefully lift each seedling, aiming to keep as much of the root system intact as possible.
Step-by-Step Guide for Relocating Round-leaved Moort
Prepare New Site
Ensure the new planting location is ready by clearing any weeds and debris. Use a spade or garden fork to loosen the soil in the relocation area.
Dig Hole
Excavate a hole at the new site that is slightly larger than the root ball of the round-leaved moort plant. This provides ample space for the roots to spread and establish.
Add Soil and Water
Position the root ball into the hole, backfill with soil, and gently firm the soil down. Water the area thoroughly to settle the soil around the roots.
Support Plant
If the round-leaved moort plant is tall or prone to toppling, consider staking it for additional support until its roots are fully established.
Post-Relocation Care for Round-leaved Moort?
Watering
Keep the soil around the round-leaved moort consistently moist, but not waterlogged, for the initial weeks after relocation to encourage strong root development.
Mulching
Apply a layer of mulch around the plant's base to help retain moisture and inhibit weed growth.
Monitoring
Regularly inspect the plant for signs of stress or damage, such as wilting or yellowing leaves, and adjust care as necessary.
Feeding
Once the plant exhibits new growth, typically a few weeks post-relocation, begin feeding with a balanced, slow-release fertilizer to promote robust and healthy development.
Addressing Common Issues with Round-leaved Moort Relocation.
When is the optimal time to relocate round-leaved moort?
Relocate round-leaved moort from early spring to late spring or early winter to late winter.
What spacing is required between round-leaved moort plants?
Ensure a distance of 12-15 feet (3.7-4.6 meters) between each round-leaved moort plant.
What soil type does round-leaved moort prefer?
Round-leaved moort thrives in well-draining soil with a pH level ranging from slightly acidic to neutral.
How deep should the planting hole be for round-leaved moort?
The planting hole for round-leaved moort should be twice as wide and as deep as its root ball.
Should I water round-leaved moort immediately after relocation?
Yes, thoroughly water round-leaved moort immediately after relocation to help settle the soil.
How can I minimize transplant shock for round-leaved moort?
Water consistently and apply mulch around round-leaved moort to maintain moisture and temperature.
What if round-leaved moort leaves begin to yellow?
Check for water stress or nutrient deficiency; adjust watering and fertilize round-leaved moort accordingly.
Can I use fertilizer when relocating round-leaved moort?
Yes, use a balanced, slow-release fertilizer to support round-leaved moortâs growth after relocation.
How do I know if round-leaved moort is receiving too much sun?
If round-leaved moortâs leaves appear scorched or wilted, provide partial shade to prevent sunburn.
Is staking necessary for round-leaved moort after relocation?
Staking round-leaved moort can offer support and prevent wind damage while its roots establish.


