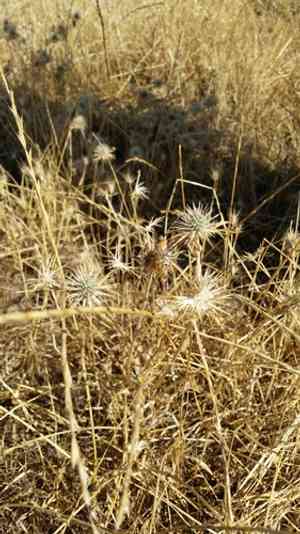
How to Transplant Coyote-thistle?
Coyote-thistle flourishes when relocated during the ideal window of late spring through early summer, benefiting from prime growing circumstances. Select a bright spot with soil that drains effectively for superior outcomes. Perform the transplant during this timeframe to reduce strain on the plant.
Essential Preparations Before Relocating Coyote-thistle?
When is the Best Time to Move Coyote-thistle?
The prime period to relocate coyote-thistle, a perennial, is from mid-spring to early summer. This timing allows coyote-thistle to develop robust root systems prior to the summer heat. Moving it during this window promotes root development and boosts the plant's resilience, leading to more vigorous growth and better adaptation in its new setting.
What Spacing is Recommended Between Coyote-thistle Plants?
When transplanting coyote-thistle, position plants approximately 12-18 inches (30-46 cm) apart. This spacing ensures adequate room for growth without competition for sunlight and nutrients.
What is the Optimal Soil Blend for Coyote-thistle Relocation?
Prepare well-draining soil enriched with compost or organic matter. Incorporating a balanced, slow-release fertilizer can provide coyote-thistle with a strong start. Ensure the soil retains some moisture but allows excess water to drain efficiently.
Where Should You Replant Your Coyote-thistle?
Choose a sunny spot for transplanting coyote-thistle. It thrives best with 6-8 hours of direct sunlight daily. Select a location that receives full sun to encourage strong and healthy plant development.
What Tools Are Necessary Before Transplanting Coyote-thistle?
Gardening Gloves
To safeguard your hands while handling soil and the plant.
Hand Trowel
For digging around and extracting the plant from its initial spot.
Shovel or Spade
Used for excavating the new planting hole in the ground.
Watering Can or Hose
To hydrate the plant both before and after its relocation.
Mulch
To aid in retaining soil moisture and inhibiting weed growth.
Compost or Organic Matter
To enrich the soil at the new planting site.
How to Extract Coyote-thistle from the Ground?
How to Extract Coyote-thistle from the Ground?
From Ground: First, moisten the soil around the coyote-thistle plant. Then, dig a wide trench around the plant using a shovel or spade, ensuring the plant's root ball stays intact. Carefully work the spade beneath the root ball to lift the plant from its original position.From Pot: Gently tap the pot's sides to loosen the soil. Tilt the pot slightly and carefully slide the coyote-thistle plant out by holding its main stem. If the plant is root-bound, you might need to gently loosen the roots with your fingers.From Seedling Tray: Water the tray to make the soil damp and soft. Use a small hand trowel or your fingers to carefully lift each coyote-thistle plant from the tray, ensuring as much of the root system as possible remains intact.
Detailed Steps for Transplanting Coyote-thistle
Site Preparation
Prepare the planting area by digging a hole that is twice as wide and the same depth as the coyote-thistle's root ball. Enrich the soil in the hole with compost or organic matter.
Plant Removal
Carefully extract the coyote-thistle from its original location following the appropriate removal method described previously.
Transplanting the Plant
Position the coyote-thistle in the center of the prepared hole. Ensure the top of the root ball is level with the surrounding soil surface. Backfill the hole with soil and gently firm it down around the plant's base.
Watering
Thoroughly water the coyote-thistle immediately after transplanting to settle the soil and eliminate any air pockets around the roots.
Post-Transplant Care for Coyote-thistle
Watering
Keep the soil around the coyote-thistle consistently moist, but not waterlogged, for the initial few weeks after transplanting to encourage strong root establishment.
Mulching
Apply a layer of mulch around the base of the coyote-thistle to help retain soil moisture and prevent weed growth.
Monitoring
Regularly inspect the coyote-thistle for any indications of stress or disease. Remove any dead or yellowing leaves to promote healthy development.
Resolving Common Issues with Coyote-thistle Transplantation.
What's the ideal time to transplant coyote-thistle?
Transplant coyote-thistle in mid to late spring or early summer for optimal results.
How much space should I leave between coyote-thistle plants?
Space coyote-thistle plants 12-18 inches (30-45 cm) apart for best growth.
How do I prepare the soil for coyote-thistle?
Loosen the soil to a depth of 12 inches (30 cm) and mix in compost for nutrients.
What should I do if coyote-thistle looks wilted post-transplant?
Ensure the plant is adequately watered but not oversaturated, and provide partial shade for recovery.
How deep should I plant coyote-thistle?
Plant coyote-thistle at the same depth it was in its original container.
Do I need to prune coyote-thistle before transplanting?
Remove any damaged or dead leaves, but avoid heavy pruning before transplanting coyote-thistle.
What is the best watering schedule after transplanting coyote-thistle?
Water coyote-thistle thoroughly and then maintain consistent moisture for the first few weeks.
Should coyote-thistle be fertilized after transplanting?
Wait a few weeks post-transplant to fertilize, allowing coyote-thistle to establish its roots first.
How do I ensure coyote-thistle establishes well in its new location?
Water regularly, mulch to retain moisture, and protect coyote-thistle from extreme weather conditions.
What's the best way to handle the roots during transplanting coyote-thistle?
Handle roots gently, and avoid disturbing them more than necessary for coyote-thistle to acclimate smoothly.


