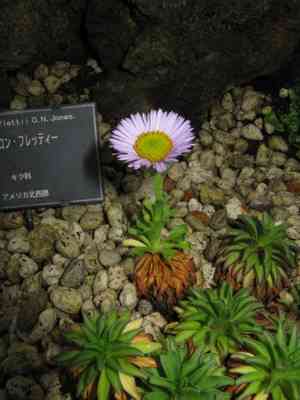
How to Transplant Flett's fleabane?
For flett's fleabane, the ideal period for transplanting is in the cooler part of early to mid-spring. Select a bright location with soil that drains effectively. Provide steady hydration after moving the plant to aid flett's fleabane in developing strongly.
What Preparations are Needed Before Transplanting Flett's Fleabane?
What is the Ideal Time for Transplanting Flett's Fleabane?
Flett's fleabane, a perennial, flourishes when moved in early to mid-spring. During this period, the ground is damp and temperatures are mild, aiding root establishment. Relocating at this time ensures vigorous growth and lessens transplant shock. The cool weather also minimizes water stress, giving flett's fleabane a strong start for the growing season.
How Much Space Should You Leave Between Flett's Fleabane Plants?
When arranging flett's fleabane, ensure each plant is positioned 18-24 inches (45-60 cm) apart. This provides ample room for development and prevents competition for nutrients and light.
What is the Best Soil Mix for Flett's Fleabane Transplanting?
For flett's fleabane, select well-draining soil with a blend of loamy and sandy textures. Prepare the bed with a balanced fertilizer, such as a 10-10-10 (N-P-K) mix, to supply essential nutrients from the outset.
Where Should You Relocate Your Flett's Fleabane?
Choose a spot for flett's fleabane that gets full sun to partial shade. Optimal locations receive at least 6 hours of sunlight daily to ensure your plants thrive. A sunny environment will help flett's fleabane bloom beautifully!
What Equipments Should You Prepare Before Transplantation Flett's Fleabane?
Gardening Gloves
To safeguard your hands while handling soil and plants.
Shovel or Spade
For digging the transplant hole and extracting the plant from its original spot.
Trowel
Useful for excavating smaller holes or making soil adjustments.
Watering Can or Hose
To hydrate the plant before and after its relocation.
Wheelbarrow or Bucket
For moving the plant from its initial position to the new site.
Mulch
To help retain moisture and offer a protective layer for the newly transplanted plant.
How Do You Remove Flett's Fleabane from the Soil?
How Do You Remove Flett's Fleabane from the Soil?
From Ground: First, moisten the flett's fleabane plant's soil. Then, dig a wide trench around the plant with a shovel or spade, keeping the root ball intact. Carefully work the spade beneath the root ball to lift the plant from its original spot.From Pot: Gently turn the pot on its side and tap the edges to loosen the soil. Carefully slide the flett's fleabane plant out, supporting the base to keep the root ball together.From Seedling Tray: Water the seedlings to facilitate removal. Use a pencil or small tool to gently push up from the tray's bottom, lifting the flett's fleabane plant by its leaves without harming the stem.
Step-by-Step Guide for Transplanting Flett's Fleabane
Site Preparation
Prepare the new planting area by digging a hole twice as wide and as deep as the flett's fleabane plant's root ball.
Root Inspection
Examine the roots before placing the plant in its new spot. Trim any damaged or excessively long roots with sanitized scissors.
Plant Placement
Position the flett's fleabane plant in the center of the hole, ensuring the top of the root ball is level with the surrounding ground.
Backfilling
Refill the hole with the previously removed soil, gently pressing it down to eliminate any air pockets.
Watering
Thoroughly water the flett's fleabane plant after transplanting to settle the soil around its roots.
Mulching
Apply a layer of mulch around the plant's base to help retain moisture and regulate soil temperature.
How Do You Care For Flett's Fleabane After Transplanting?
Watering
Keep the soil around the flett's fleabane consistently damp, but not waterlogged, for the initial weeks post-transplant to aid in strong root development.
Monitoring
Regularly check the plant for signs of distress, such as wilting or yellowing leaves, and adjust care as necessary.
Weed Control
Maintain the area around the flett's fleabane free of weeds that could compete for nutrients and water.
Protection
If needed, use stakes or supports to help the flett's fleabane plant remain upright as it establishes itself in its new location.
Troubleshooting Common Issues with Flett's Fleabane Transplantation.
When is the best time to transplant flett's fleabane?
The optimal time to transplant flett's fleabane is early to mid-spring, ensuring ideal growth conditions.
How far apart should I space flett's fleabane plants?
Space flett's fleabane plants 18-24 inches (45-60 cm) apart to allow sufficient growing space.
How deep should I dig when transplanting flett's fleabane?
Dig a hole 10 inches (25 cm) deep, enough to comfortably accommodate the root ball.
What type of soil is best for flett's fleabane transplantation?
Utilize well-drained, loamy soil rich in organic matter for successful flett's fleabane transplantation.
Do I need to water flett's fleabane immediately after transplanting?
Yes, water flett's fleabane thoroughly post-transplant to help roots settle and reduce stress.
How much sunlight does flett's fleabane require?
Flett's fleabane thrives in full sunlight. Ensure the site receives at least 6 hours of direct sun.
What should I do if the leaves of flett's fleabane turn yellow post-transplant?
Yellow leaves may indicate overwatering or poor drainage. Adjust irrigation accordingly.
How can I protect newly transplanted flett's fleabane from pests?
Apply insecticidal soap or neem oil and routinely inspect plants for early pest detection.
Is mulch beneficial for transplanting flett's fleabane?
Yes, applying mulch around flett's fleabane helps retain moisture and suppress weeds, aiding growth.
How can I prevent transplant shock in flett's fleabane?
Transplant in early morning or late afternoon, and handle roots gently to minimize shock.


