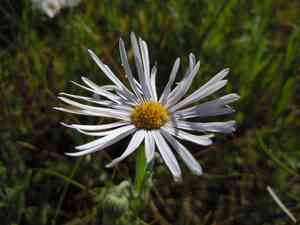
How to Transplant Tufted fleabane?
Erigeron annuus flourishes when relocated in the prime periods of mid to late spring or early summer, owing to conducive root establishment circumstances. Select a bright spot with adequately draining earth for superior outcomes.
What Preparations are Needed Before Transplanting Tufted Fleabane?
What is the Ideal Time for Transplanting Tufted Fleabane?
Tufted fleabane is best moved during mid to late spring or early summer. These periods provide optimal soil warmth and moisture, promoting robust root development. Transplanting at these times minimizes stress and allows ample growth before harsh weather, boosting the plant's resilience and growth potential.
How Much Space Should You Leave Between Tufted Fleabane Plants?
To allow tufted fleabane sufficient room to develop, position each plant 12-18 inches (30-45 cm) apart. This ensures good air circulation and helps prevent overcrowding.
What is the Best Soil Mix for Tufted Fleabane Transplanting?
For tufted fleabane, utilize soil that drains effectively. Incorporate a balanced base fertilizer, such as a 10-10-10, to enrich the soil with vital nutrients prior to planting.
Where Should You Relocate Your Tufted Fleabane?
Select a sunny location for tufted fleabane. They flourish in full sun, meaning they require at least 6-8 hours of direct sunlight daily.
What Equipments Should You Prepare Before Transplantation Tufted Fleabane?
Gardening Gloves
To safeguard your hands while handling soil and tufted fleabane.
Shovel or Spade
For excavating around the plant and creating a new planting site.
Trowel
To assist in digging around roots and maneuvering the plant.
Watering Can or Hose
For hydrating the plant before and after its relocation.
Wheelbarrow
Optional. To move the plant if transporting it a greater distance.
Organic Mulch
To provide a protective layer around the plant following transplantation.
Stakes and Plant Ties
Optional, for supporting the plant if necessary.
How Do You Remove Tufted Fleabane from the Soil?
How Do You Remove Tufted Fleabane from the Soil?
From Ground: First, moisten the tufted fleabane plant to dampen the soil. Then, dig a wide trench around the plant using a shovel or spade, ensuring the plant's root ball remains intact. Carefully work the spade beneath the root ball to lift the plant from its original spot.From Pot: Thoroughly water the tufted fleabane plant. Gently tap the pot's edges to loosen the soil. Tilt the pot and carefully slide the plant out, making sure to keep the root ball whole. If the plant is stuck, gently run a trowel along the pot's rim.From Seedling Tray: Water the tufted fleabane seedlings well before removal. Use a trowel to gently lift each seedling, ensuring you support the root ball and avoid damaging the roots.
Step-by-Step Guide for Transplanting Tufted Fleabane
Site Preparation
Clear the area of unwanted plants and debris where you intend to transplant the tufted fleabane.
Prepare the Hole
Excavate a hole that is twice the width of the tufted fleabane's root ball and the same depth as its previous location.
Add Compost
Improve the soil by mixing in some compost or organic material to supply nutrients for the tufted fleabane.
Place the Plant
Carefully position the tufted fleabane into the hole, ensuring it's at the same depth as before. Backfill the hole with soil, gently firming it around the roots.
Water
Thoroughly water the tufted fleabane to help settle the soil and lessen transplant shock.
Mulch
Apply a layer of organic mulch around the base of the tufted fleabane to help retain moisture and inhibit weed growth.
How Do You Care For Tufted Fleabane After Transplanting?
Watering
Keep the soil around the tufted fleabane consistently moist, but not waterlogged, for the initial weeks post-transplant to aid in strong root establishment.
Monitoring
Regularly inspect the tufted fleabane for indications of stress or disease. Prompt action will help ensure a healthy plant.
Support
If the tufted fleabane appears unstable, use stakes and plant ties to provide support until it becomes firmly established.
Mulching
Replenish mulch as needed to maintain a healthy covering around the tufted fleabane, being careful not to let mulch touch the stem directly to prevent rot.
Pruning
Remove any dead or damaged foliage to encourage vigorous growth and reduce strain on the plant.
Troubleshooting Common Issues with Tufted Fleabane Transplantation.
When is the best time to transplant tufted fleabane?
The optimal period for relocating tufted fleabane is from mid to late spring or early summer.
What is the recommended spacing for tufted fleabane?
Position each tufted fleabane plant 12-18 inches (30-45 cm) apart to ensure adequate development.
How deep should I plant tufted fleabane?
Plant tufted fleabane at the same depth it was originally growing to prevent root stress.
What type of soil does tufted fleabane prefer?
Tufted fleabane thrives in well-drained, sandy, or loamy soil for optimal growth.
Should I water tufted fleabane immediately after transplanting?
Yes, thoroughly water tufted fleabane right after transplanting to help the roots settle in.
How do I prepare the new site for tufted fleabane?
Loosen the soil and mix in compost to enrich the planting area for tufted fleabane.
What should I do if tufted fleabane wilts after transplanting?
Ensure proper watering and temporarily shade tufted fleabane to help it recover from transplant shock.
Do I need to prune tufted fleabane before transplanting?
It's beneficial to trim damaged roots and dead stems before relocating tufted fleabane.
How can I protect tufted fleabane from transplant shock?
Minimize root disturbance and water consistently to reduce transplant shock for tufted fleabane.
What is the ideal weather for transplanting tufted fleabane?
Choose a cool, overcast day to transplant tufted fleabane to lessen stress on the plant.


