How to Transplant Japanese lovegrass?
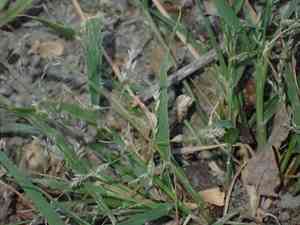
The ideal time to relocate japanese lovegrass is from late spring into early summer, as the ground temperature is perfect for roots to take hold. Select a bright spot with soil that drains effectively. Adhering to this schedule will provide japanese lovegrass with a robust beginning.
What Preparations are Needed Before Transplanting Japanese Lovegrass?
What is the Ideal Time for Transplanting Japanese Lovegrass?
For japanese lovegrass, the perfect time for moving it is at the start of vigorous growth – specifically, late spring transitioning into early summer. Relocating japanese lovegrass during this period allows it to benefit from longer days and warmer soil, which are crucial for root development and strong growth. This timing enables the young japanese lovegrass shoots to absorb the gentle yet intense seasonal sunlight, ensuring a healthy move to their new spot. By choosing this optimal moment, you provide japanese lovegrass with the best conditions to flourish and thrive in its new setting, boosting its vitality and enhancing your garden's appeal.
How Much Space Should You Leave Between Japanese Lovegrass Plants?
When planning to plant japanese lovegrass, aim to provide each individual plant with ample room to grow. A spacing of 6-12 inches (15-30 cm) between plants will suffice, allowing roots to expand and leaves to receive sunlight without overcrowding or competition!
What is the Best Soil Mix for Japanese Lovegrass Transplanting?
To ensure japanese lovegrass feels comfortable in its new home, prepare a suitable spot with soil that drains well. Incorporate a mild, balanced fertilizer to give your green companions a cheerful beginning. Consider it a nurturing layer of nutrients for their root systems!
Where Should You Relocate Your Japanese Lovegrass?
Select a sunny location where the sun appears intermittently throughout the day – japanese lovegrass thrives best in full to partial sunlight. This means a spot where the sun shines brightly for 6 hours or more, to maintain their vigor and upright stems!
What Equipments Should You Prepare Before Transplantation Japanese Lovegrass?
Gardening Gloves
To safeguard your hands while handling soil and plants.
Shovel or Spade
For excavating the plant from its original spot and digging the new hole.
Hand Trowel
Useful for detailed work or smaller specimens.
Watering Can or Hose
To hydrate the japanese lovegrass plant both prior to and following transplantation.
Wheelbarrow or Planting Tray
For moving the japanese lovegrass plant and soil without causing damage.
Pruning Shears
To carefully trim any damaged roots or foliage.
How Do You Remove Japanese Lovegrass from the Soil?
How Do You Remove Japanese Lovegrass from the Soil?
From Ground: First, moisten the japanese lovegrass plant's soil to facilitate easier removal. Dig a wide trench around the plant using a shovel or spade, ensuring the root ball remains intact. Gently maneuver the tool beneath the root ball to lift the plant from its initial position.From Pot: Water the japanese lovegrass plant beforehand. Turn the pot on its side, grasp the plant's base, tap the bottom, and carefully extract the plant. If the plant is rootbound, you might need to squeeze the pot or cut it away without harming the root ball.From Seedling Tray: Dampen the soil surrounding the seedlings. Carefully use a spoon or a dibber to lift each seedling without disturbing adjacent plants. Ensure the root ball is supported to prevent unnecessary stress on the plant.
Step-by-Step Guide for Transplanting Japanese Lovegrass
Digging the Hole
Excavate a hole in the ground that is twice the width of the japanese lovegrass plant's root ball and of equal depth, ensuring roots can spread and establish quickly.
Preparing the Plant
Carefully extract the japanese lovegrass plant from its previous location using the method appropriate for that situation. Aim to retain as much soil around the roots as possible to minimize transplant shock.
Placing the Plant
Position the japanese lovegrass plant in its new hole. The top of the root ball should be level with the ground surface. Ensure it stands upright and faces your desired direction.
Filling the Hole
Backfill the hole with the excavated soil, gently firming it down to eliminate any air pockets. Continue this until the root ball is completely covered and the soil is level.
Watering After Transplanting
Thoroughly water the japanese lovegrass plant immediately after transplanting to settle the soil and provide essential hydration for root recovery.
Mulching
Apply a layer of mulch around the base of the japanese lovegrass to help retain soil moisture and suppress weed growth. Avoid piling mulch directly against the plant's stem.
How Do You Care For Japanese Lovegrass After Transplanting?
Watering Schedule
Maintain a consistent watering routine for the initial weeks as the japanese lovegrass plant establishes itself. Water deeply to encourage robust root development, but be careful not to overwater.
Inspecting for Damages
Regularly check the japanese lovegrass plant for signs of transplant shock, such as wilting or discolored leaves, and trim any damaged parts with pruning shears.
Staking if Necessary
If the japanese lovegrass plant is tall or appears unstable, provide support with stakes to ensure it grows straight and strong.
Adjustment Period
Allow the japanese lovegrass plant time to adapt to its new surroundings before expecting significant growth. Be patient, as it may take some time for the plant to show new growth while its root system establishes.
Troubleshooting Common Issues with Japanese Lovegrass Transplantation.
When is the best time to transplant japanese lovegrass for optimal growth?
The ideal period is from late spring to early summer when temperatures are consistently warm.
How far apart should I space japanese lovegrass when transplanting?
Aim for a spacing of 6-12 inches (15-30 cm) to allow each plant ample room to flourish.
Why is my japanese lovegrass not thriving after transplant?
This could be due to insufficient watering, unsuitable soil pH, or shock from the transplant process.
How much should I water japanese lovegrass after transplanting?
Keep the soil consistently moist until established, but prevent waterlogging the roots.
Can japanese lovegrass be transplanted in full sun?
Yes, japanese lovegrass prefers full sun, but ensure the soil remains moist post-transplant.
What is the best soil for transplanting japanese lovegrass?
Opt for well-draining soil rich in organic matter for the most favorable outcomes.
Should I fertilize japanese lovegrass after transplanting?
Wait a few weeks before applying a balanced fertilizer to allow roots time to settle.
How do I handle rootbound japanese lovegrass during transplanting?
Gently separate crowded roots to encourage spreading and growth in the new soil.
Can I transplant japanese lovegrass during a heatwave?
It's advisable to wait for cooler weather to avoid placing additional stress on the plants.
What are signs of transplant shock in japanese lovegrass?
Wilting, yellowing leaves, and stunted growth can indicate shock. Provide shade and keep the soil moist.



