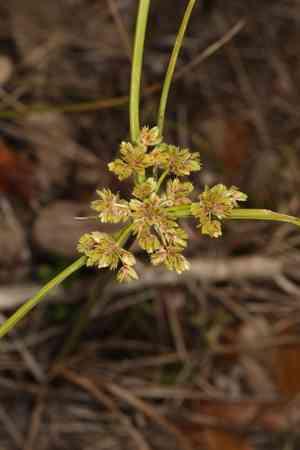
How to Transplant Surinam sedge?
The ideal period for relocating surinam sedge spans from the onset of early spring to the peak of late spring, capitalizing on robust development once established. Select a location offering abundant light and soil that drains effectively, guaranteeing surinam sedge flourishes following its move.
What Preparations are Needed Before Transplanting Surinam Sedge?
What is the Ideal Time for Transplanting Surinam Sedge?
The optimal period for relocating surinam sedge spans from the onset of spring to the early days of summer. During this timeframe, mild temperatures and consistent moisture offer surinam sedge ideal conditions to establish roots firmly and adapt to its new site. Moving surinam sedge then allows it to benefit from the entire growing season, ensuring strong development before summer's intense heat. This timing also aligns with the natural growth cycle of perennials, fostering vigorous growth and establishment in their new environments.
How Much Space Should You Leave Between Surinam Sedge Plants?
When relocating your surinam sedge, remember to provide each plant with adequate personal space. Aim for approximately 9-12 inches (23-30 cm) between each specimen. This grants them sufficient room to expand and thrive!
What is the Best Soil Mix for Surinam Sedge Transplanting?
For surinam sedge, the perfect substrate is a well-draining soil. Begin by enriching your soil with organic compost or a balanced slow-release fertilizer. This will provide your surinam sedge with a nourishing start!
Where Should You Relocate Your Surinam Sedge?
Your surinam sedge thrives in sunlight! Select a location that receives ample sun exposure, ideally full sun for the healthiest plant. Look for an area that gets at least 6 hours of direct sunlight daily.
What Equipments Should You Prepare Before Transplantation Surinam Sedge?
Gardening Gloves
To safeguard your hands while handling soil and plants.
Spade or Shovel
For excavating the surinam sedge from its original position.
Garden Trowel
Useful for managing smaller plants or for detailed work around the root system.
Watering Can or Hose
To hydrate the surinam sedge before and after relocation to lessen plant stress.
Pruning Shears
To trim any damaged roots or foliage prior to transplanting.
Wheelbarrow or Plant Dolly
For moving the surinam sedge if it's too large to carry by hand.
Measuring Tape
To assist in correctly spacing the plants during transplantation.
How Do You Remove Surinam Sedge from the Soil?
How Do You Remove Surinam Sedge from the Soil?
From Ground: First, water the surinam sedge to moisten the soil. Then, dig a wide trench around the plant using a shovel or spade, ensuring the plant's root ball remains intact. Carefully work the spade beneath the root ball to lift the surinam sedge from its initial spot.From Pot: Water the surinam sedge to make the soil damp. Turn the container on its side and gently tap the bottom and sides. Grasp the surinam sedge by its base and carefully slide it out. If it resists, run a trowel along the inner edge of the pot to help loosen the roots.From Seedling Tray: Water the seedlings gently to avoid disturbing the delicate roots. Use a garden trowel or a spoon to carefully lift each surinam sedge seedling out of its cell, supporting the root ball to prevent it from breaking apart.
Step-by-Step Guide for Transplanting Surinam Sedge
Digging
Choose the new site for your surinam sedge and excavate a hole approximately twice the width of the root ball and the same depth to allow roots to spread easily.
Root Pruning
Inspect the root ball and remove any dead, broken, or circling roots with your pruning shears to encourage healthier development.
Placing surinam sedge
Position the surinam sedge in the center of the hole. Ensure it is planted at the same depth it was growing previously. The top of the root ball should be level with the surrounding ground.
Filling In
Gently backfill the hole with the native soil you removed. Lightly tamp it down to eliminate air pockets without overly compacting the soil around the plant.
Watering
Thoroughly water the surinam sedge after planting to settle the soil around the roots and to help reduce transplant shock.
Mulching
Apply a layer of mulch around the base of the surinam sedge to help retain soil moisture and to inhibit weed growth.
How Do You Care For Surinam Sedge After Transplanting?
Initial Watering
Water the surinam sedge generously immediately after transplanting and establish a routine to keep the soil moist for the first few weeks as the roots become established.
Monitor Growth
Observe the surinam sedge for indications of stress such as wilting leaves or discoloration and take appropriate action as needed.
Weeding
Regularly remove weeds around your surinam sedge to prevent competition for nutrients and water in the soil.
Frequent Check-Ups
Inspect your surinam sedge often to detect any signs of pests or diseases early, allowing for prompt intervention.
Gradual Sun Exposure
If the surinam sedge was previously in a shadier location, gradually acclimate it to the new light conditions to prevent shock.
Troubleshooting Common Issues with Surinam Sedge Transplantation.
What's the best time to transplant surinam sedge?
For optimal outcomes, relocate surinam sedge during the calm growth period from early to late spring.
How far apart should I space surinam sedge when transplanting?
Allow each surinam sedge to thrive by spacing them 9-12 inches (23-30 cm) apart.
How much sun does surinam sedge need after transplanting?
Post-transplant, surinam sedge flourishes in full to partial sunlight. Find a sunny spot for healthy growth!
What soil conditions favor surinam sedge after transplanting?
Well-draining soil with moderate moisture is ideal for surinam sedge after relocation.
How deep should I plant surinam sedge's roots when transplanting?
Ensure surinam sedge's roots are comfortably placed in a hole twice as wide as the root ball.
How much should I water surinam sedge after transplanting?
Water surinam sedge generously immediately after transplanting, then maintain consistent moisture as it settles in.
When is surinam sedge safe to transplant in colder zones?
Protect surinam sedge from frost by transplanting after the last hint of winter cold disappears.
Should I fertilize surinam sedge right after transplanting?
Refrain from fertilizing. Allow surinam sedge to establish itself for a few weeks in its new location.
Why is my transplanted surinam sedge wilting?
Wilting could indicate stress. Ensure adequate sunlight, proper watering, and no root damage during transplantation.
How to prevent transplant shock in surinam sedge?
Gradual adjustment to outdoor conditions and careful handling of roots minimize transplant shock in surinam sedge.


