How to Transplant Bristly flatsedge?
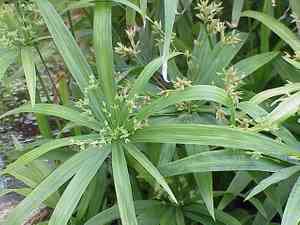
Bristly flatsedge flourishes when relocated between early and late spring, benefiting from ideal growing circumstances. Provide a bright location with permeable soil for improved rooting. Think about applying a thin layer of mulch to preserve hydration and aid root expansion.
Necessary Preparations Before Moving Bristly Flatsedge?
When is the Best Time to Relocate Bristly Flatsedge?
The perfect window for relocating bristly flatsedge spans from the beginning to the end of spring. This period guarantees the plant benefits from milder temperatures and increased soil moisture, fostering strong root development. Moving it during this time sets bristly flatsedge up for peak growth and resilience throughout its active season.
What Distance Should Be Maintained Between Bristly Flatsedge Plants?
Bristly flatsedge requires a spacing of 12-18 inches (30-45 cm) between plants to allow ample room for growth and expansion. This ensures proper air circulation and minimizes competition for essential nutrients.
Which Soil Mixture is Optimal for Bristly Flatsedge Relocation?
Prepare soil that drains well and is rich in organic material. Incorporate compost into the top 6-8 inches (15-20 cm) of soil and consider adding a balanced general-purpose fertilizer, such as 10-10-10, to encourage vigorous growth.
Where Should You Replant Your Bristly Flatsedge?
Bristly flatsedge flourishes in conditions ranging from full sun to partial shade. Select a location that receives at least 6 hours of sunlight daily to ensure robust growth and abundant blooms.
What Tools Are Needed Before Transplanting Bristly Flatsedge?
Gardening Gloves
To safeguard your hands while handling soil and plants.
Shovel or Spade
For excavating and lifting the plant from its original spot.
Watering Can or Hose
To hydrate the plant both before and after its relocation.
Trowel
For digging smaller holes when moving plants from pots or trays.
Wheelbarrow or Bucket
To transport the plant and soil if the new site is a significant distance away.
Pruners
For trimming any damaged roots or foliage.
Mulch
To aid in retaining soil moisture post-transplantation.
How to Extract Bristly Flatsedge from the Ground?
How to Extract Bristly Flatsedge from the Ground?
From Ground: First, moisten the soil around the bristly flatsedge plant by watering it. Next, use a shovel or spade to dig a wide trench around the plant, making sure the root ball remains intact. Carefully maneuver the spade beneath the root ball to lift the plant from its initial position.From Pot: Water the bristly flatsedge plant thoroughly. Gently invert the pot while supporting the plant and slide it out. If it doesn't come out easily, tap the pot's sides to loosen the soil.From Seedling Tray: Water the bristly flatsedge in the tray to facilitate removal. Use a trowel to carefully lift the seedlings, taking care not to harm the roots. For very small seedlings, a spoon can be used for more delicate handling.
Step-by-Step Guide for Relocating Bristly Flatsedge
Location Selection
Choose a spot with adequate sunlight and room for your bristly flatsedge to reach its full mature size.
Excavating the Hole
Dig a hole in the ground that is twice as wide and the same depth as the bristly flatsedge's root ball.
Preparing the Cavity
Fill the bottom of the hole with a few inches of compost or an appropriate soil mix to supply nutrients to the plant.
Positioning the Plant
Gently place the bristly flatsedge into the hole, ensuring the top of the root ball is level with the ground. Backfill the hole with soil, gently firming it around the root ball.
Hydration
Water the bristly flatsedge thoroughly immediately after transplanting to settle the soil and eliminate air pockets.
How to Care for Bristly Flatsedge After Relocation?
Watering
Keep the soil around the bristly flatsedge consistently damp, but not waterlogged, for the initial weeks post-transplant to encourage strong root development.
Mulching
Apply a 2-3 inch layer of mulch around the base of the bristly flatsedge to help retain soil moisture and prevent weed growth.
Support
If the bristly flatsedge is tall or top-heavy, consider providing a stake or support to help it stay upright until it is firmly established.
Observation
Closely monitor the bristly flatsedge for the first few weeks for any indications of stress, such as wilting or discoloration, and address any issues promptly.
Addressing Common Issues with Bristly Flatsedge Relocation.
What is the optimal time to move bristly flatsedge?
Relocate bristly flatsedge between early and late spring for best growth and establishment.
How much space should I allow between bristly flatsedge plants?
Space bristly flatsedge plants 12-18 inches (30-45 cm) apart to ensure proper development and air circulation.
How do I prepare the soil for moving bristly flatsedge?
Incorporate organic compost into the soil to enhance drainage and nutrient content before relocating bristly flatsedge.
What if bristly flatsedge leaves begin to wilt after being moved?
Ensure bristly flatsedge is adequately watered and consider adding mulch to retain moisture and lessen stress.
How deep should I plant bristly flatsedge in the garden?
Plant bristly flatsedge at the same depth it was previously growing to avoid root stress.
What kind of sunlight is best for bristly flatsedge after relocation?
Provide bristly flatsedge with full to partial sunlight, ensuring it receives at least 4-6 hours of direct sun daily.
How often should I water bristly flatsedge after being moved?
Water bristly flatsedge regularly to keep the soil moist but not saturated during the initial weeks post-transplant.
What should I do if bristly flatsedge isn't thriving after relocation?
Check for pests, confirm proper watering, and improve soil conditions if necessary to support bristly flatsedge's health.
Can I move bristly flatsedge into a container instead of the garden?
Yes, bristly flatsedge can be relocated into a container with good drainage and placed in appropriate sunlight.
How can I reduce transplant shock for bristly flatsedge?
Move bristly flatsedge on a cooler day, water it thoroughly, and provide some initial shade to ease its adjustment.