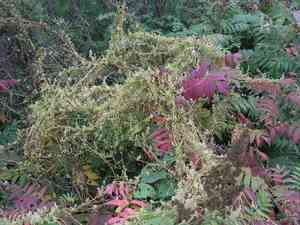
How to Transplant Japanese dodder?
The most favorable period for relocating japanese dodder is during the early vibrancy of spring, specifically at the commencement of the growing season, allowing ample time for root establishment in a bright location with soil that drains effectively. Handle with care.
What Preparations are Needed Before Transplanting Japanese Dodder?
What is the Ideal Time for Transplanting Japanese Dodder?
The optimal period for relocating japanese dodder is when winter transitions into a mild spring, typically from early to mid-spring. This timing leverages the moderate weather, which promotes root development without the strain of extreme cold or heat. Moving japanese dodder during this favorable season allows the plant to benefit from the upcoming warm growth phase, establishing a strong foundation for its annual cycle. A helpful tip: this strategic timing perfectly aligns with japanese dodder's natural growth rhythm, ensuring a successful transfer!
How Much Space Should You Leave Between Japanese Dodder Plants?
Greetings, gardening enthusiasts! When rehousing your japanese dodder, remember to provide them with adequate personal space. Aim for a comfortable distance of approximately '12-18 inches (30-45 cm)' between each specimen. This grants them ample room to expand and thrive!
What is the Best Soil Mix for Japanese Dodder Transplanting?
For your japanese dodder, envision preparing a comfortable growing medium: Select well-draining soil and incorporate a balanced fertilizer, such as a 10-10-10 NPK blend, to give them a strong start. A light application according to package directions should suffice!
Where Should You Relocate Your Japanese Dodder?
Your japanese dodder enjoys basking in sunlight, much like we do on a bright day. Choose a luminous spot that receives full sun for the majority of the day. This is their preferred environment where they will flourish best!
What Equipments Should You Prepare Before Transplantation Japanese Dodder?
Gardening Gloves
To safeguard your hands while handling soil and plants.
Trowel
For excavating small holes or channels to replant young plants.
Spade or Shovel
To dig up the plant if it is large or from the ground.
Watering Can
To hydrate the plant prior to and following its relocation.
Pruning Shears
To trim any superfluous or damaged parts of the plant before moving it.
Bucket or Wheelbarrow
To transport the plant and soil without creating a mess.
Garden Hose or Water Source
To ensure the soil is adequately moist for the transplant.
How Do You Remove Japanese Dodder from the Soil?
How Do You Remove Japanese Dodder from the Soil?
From Ground: First, moisten the japanese dodder plant to dampen the soil. This facilitates plant removal and helps protect the root system. Using a shovel or spade, excavate a wide trench around the plant, leaving sufficient space to avoid damaging its root ball. Carefully slide the spade beneath the root ball at an angle to lift the plant from the soil.From Pot: Begin by watering your japanese dodder plant to moisten the soil, which helps minimize root stress. Invert the pot sideways, tap the base, and gently press on the pot's sides to loosen the plant. Gradually pull the plant by its base, not the stem, until it slides out with the root ball intact.From Seedling Tray: Water the japanese dodder seedlings thoroughly before beginning to aid in their removal. Use a trowel or your fingers to gently lift each seedling from its compartment. Take care to support the root ball and avoid harming the delicate roots.
Step-by-Step Guide for Transplanting Japanese Dodder
Prepare the New Site
Ensure the new location possesses the appropriate conditions that have been previously identified.
Dig Hole
Excavate a hole in the prepared area that is just deep enough for the root ball of japanese dodder to rest at the same level it was originally growing.
Placement
Gently position the japanese dodder into the hole, carefully spreading out the roots if they are intertwined or dense.
Backfill Soil
Refill the hole with soil, handling the plant delicately to prevent any damage. Firm the soil around the plant with your hands to ensure it stands upright and to eliminate any large air pockets.
Initial Watering
Water the japanese dodder thoroughly after planting to help settle the soil and provide hydration to the roots. Avoid excessive watering to prevent waterlogging.
How Do You Care For Japanese Dodder After Transplanting?
Initial Care
During the first few weeks, assess the japanese dodder's stability in its new location by checking if it is upright and exhibiting signs of growth.
Monitoring Health
Observe for any indications of stress, such as wilting or discolored foliage, and respond appropriately with proper care.
Regular Care Routine
Establish a consistent care regimen including weeding and checking for pests, ensuring japanese dodder flourishes in its new environment.
Troubleshooting Common Issues with Japanese Dodder Transplantation.
When is the best time to transplant japanese dodder?
Relocate japanese dodder during the ideal period of early to mid-spring for optimal development.
How much space does japanese dodder need when transplanting?
Provide japanese dodder with approximately 12-18 inches (30-45 cm) of space between plants to allow for expansion.
Why is my japanese dodder wilting after transplanting?
Post-transplant wilting could be due to shock. Ensure careful handling and adequate watering.
What's the ideal soil condition for transplanting japanese dodder?
Favor japanese dodder with well-draining soil, rich in organic matter, and a balanced pH level.
Can I transplant japanese dodder on a hot, sunny day?
It's best to transplant japanese dodder on an overcast day or during cooler hours to minimize stress.
How deep should I plant japanese dodder seedlings?
Plant japanese dodder at the same depth it was previously growing for a smooth transition.
How often should I water japanese dodder after transplanting?
Water japanese dodder generously upon transplant, then regularly as it establishes roots, avoiding waterlogging.
What should I do if japanese dodder shows no growth after transplanting?
Japanese dodder may be experiencing shock. Allow it time, and ensure it receives proper sunlight and moisture.
Is it necessary to fertilize japanese dodder after transplanting?
Allow japanese dodder to acclimate to its new location before applying a balanced fertilizer after a few weeks.
Why are the leaves of japanese dodder turning yellow after transplanting?
Yellowing foliage may indicate overwatering or nutrient deficiency. Adjust watering practices and soil composition accordingly.


