How to Transplant Canadian honewort?
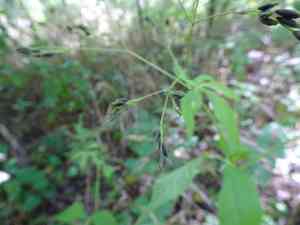
The optimal period for relocating canadian honewort is throughout the spring renewal phase â specifically, from early to mid-spring. Select a site offering partial shade and fertile, damp earth. To facilitate a seamless shift, guarantee minimal disruption to the roots and generous irrigation following the transplant.
Essential Preparations Before Relocating Canadian Honewort
Optimal Timing for Canadian Honewort Relocation?
The best time to move canadian honewort is during early to mid-spring. This period allows the plant to establish its root system before the intense heat of summer. Transplanting canadian honewort at this time provides a stable start in its new spot, promoting robust growth. By relocating canadian honewort within this window, you set the stage for a flourishing season. Act promptly as spring begins, ensuring canadian honewort benefits from cooler soil and milder weather, crucial for a strong perennial display.
Recommended Spacing Between Canadian Honewort Plants?
When arranging canadian honewort, aim for approximately 1 foot (30.5 cm) of separation between each plant. This spacing ensures ample room for comfortable growth without competing for essential nutrients and water.
Ideal Soil Blend for Canadian Honewort Transplanting?
For canadian honewort, prepare a soil that drains well and is rich in nutrients, enhanced with compost or a foundational organic fertilizer. This mixture will supply the perfect nourishment to encourage vigorous, healthy development.
Where to Replant Your Canadian Honewort?
Canadian honewort thrives in areas with partial shade, so it's wise to select a garden spot that offers a balance of sun and shade throughout the day. Excessive sun can be detrimental, while insufficient light may hinder its growth.
Tools Required Before Transplanting Canadian Honewort
Gardening Gloves
To protect your hands from potential harm while handling the plant and soil.
Trowel
This garden implement will assist in loosening the soil around the roots and in lifting the plant from the ground or its container.
Shovel or Spade
These are useful if the canadian honewort plant is large and has deep roots in the ground.
Pruners/Shears
Necessary for removing any dead or damaged leaves or stems from the plant prior to transplanting.
Watering Can or Hose
You will need this to hydrate the plant before and after its relocation.
Wheelbarrow or Bucket
For transporting the plant from its original spot to its new home.
How to Extract Canadian Honewort from the Soil?
How to Extract Canadian Honewort from the Soil?
From Ground: Begin by thoroughly watering the canadian honewort plant. This makes the soil easier to manage and reduces plant stress. Using a spade or shovel, dig a trench around the plant, being careful not to harm the root ball. Work the spade beneath the root ball, and gently lift the plant from its location.From Pot: Water the plant and carefully tilt the pot sideways. Support the main stem with one hand and use the other to gently separate the pot from the root ball. Avoid pulling too forcefully to prevent damage to the plant or roots.From Seedling Tray: Moisten the soil and carefully remove the canadian honewort seedling by holding a leaf, not the stem. Gently use a spoon or small trowel under the root ball to lift it out, ensuring the roots remain undamaged.
Step-by-Step Guide for Relocating Canadian Honewort
Preparation
Prepare the transplant hole in your garden beforehand. It should be twice as wide and the same depth as the root ball of your canadian honewort plant.
Placement
Position your canadian honewort plant in the center of the hole, ensuring it stands upright. The top of its root ball should be level with or slightly below the surrounding soil surface.
Backfilling
Carefully refill the hole with the excavated soil, gently firming it around the plant's base to provide support and eliminate any air pockets.
Watering
Water your canadian honewort plant thoroughly immediately after transplanting. This will further remove air pockets and ensure good root-to-soil contact.
Mulching
Apply a 2-inch layer of mulch around the plant's base. This helps retain moisture and control weeds.
Post-Transplant Care for Canadian Honewort
Pruning
Remove any dead or yellowing leaves to help the canadian honewort plant conserve energy for root establishment. Avoid extensive pruning right after transplanting, as this can cause additional stress.
Watering
Maintain a consistent watering schedule in the weeks following transplant. The soil should stay moist but not waterlogged. Gradually reduce watering as the plant becomes established.
Pest and Disease Monitoring
Regularly inspect the plant for signs of pests or diseases. If detected, use an appropriate organic pest control method or fungicide.
Frost Protection
If frost is predicted in the weeks after transplant, consider covering your canadian honewort plant with a frost cloth or moving potted canadian honewort plants indoors.
Addressing Common Issues with Canadian Honewort Transplantation.
What is the best season to transplant canadian honewort?
The optimal period to move canadian honewort is during the S1-S2 timeframe. The plant establishes most effectively during these months.
How much space should be between each canadian honewort when transplanting?
Each canadian honewort should be positioned approximately 1 foot (about 30 cm) apart. This provides sufficient room for them to grow and flourish.
How deep should I dig the hole for canadian honewort?
The hole should be twice the width of the root ball and equally deep. This allows canadian honewort to spread its roots comfortably.
What type of soil is best for canadian honewort when transplanting?
Canadian honewort prefers well-drained soil enriched with organic matter. A soil pH that is neutral to slightly acidic is most suitable.
Do I need to water canadian honewort immediately after transplanting?
Yes, it is vital to water canadian honewort thoroughly right after transplanting; this helps the plant settle into its new environment and aids root development.
Can I transplant canadian honewort in the shade?
Canadian honewort is quite adaptable but performs best in partial to full sun. However, it can tolerate some shade.
Why are my transplanted canadian honewort's leaves getting yellow?
Yellow leaves might indicate overwatering or inadequate drainage. Ensure canadian honewort has good drainage, and be careful not to overwater.
What should I do if the transplanted canadian honewort doesn't show new growth?
Be patient! Canadian honewort can take several weeks to establish. If no new growth appears after a month, re-evaluate its location, soil, and watering routine.
Why is my transplanted canadian honewort wilting?
Wilting after transplanting can be due to transplant shock. Be gentle during the transplant process and always water deeply afterward. Canadian honewort will recover with time.
How often do I need to water canadian honewort after transplanting?
Water canadian honewort thoroughly immediately after transplanting and then as needed periodically. Remember, canadian honewort prefers well-drained soil, so avoid overwatering.



