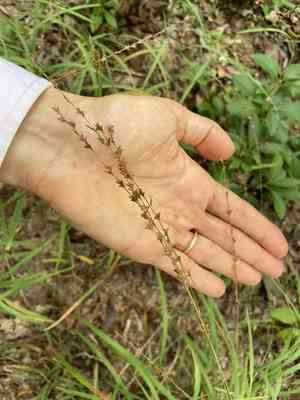
How to Transplant Slender woodoats?
The most favorable periods for relocating slender woodoats are from early to mid-spring or during late autumn, owing to the moderate climate. Select a site with partial shade and good drainage, steering clear of regions susceptible to dryness. Verify that the earth is fortified to facilitate a smooth adjustment.
What Preparations are Needed Before Transplanting Slender Woodoats?
What is the Ideal Time for Transplanting Slender Woodoats?
Moving slender woodoats in early to mid-spring is optimal due to rising ground temperatures and increased humidity, which promote robust root development. This timing allows the plant a full growing season to adjust and flourish. Additionally, favorable weather conditions minimize stress on slender woodoats, maximizing successful relocation.
How Much Space Should You Leave Between Slender Woodoats Plants?
When relocating slender woodoats, position each plant 16-18 inches (40-45 cm) apart. This ensures ample room for growth and sufficient air circulation, reducing disease risk.
What is the Best Soil Mix for Slender Woodoats Transplanting?
For slender woodoats, prepare soil that drains well and is enriched with compost or a balanced base fertilizer. Aim for a mixture that holds moisture without becoming waterlogged, which is perfect for healthy root growth.
Where Should You Relocate Your Slender Woodoats?
Select a spot for slender woodoats that receives partial shade. While slender woodoats can endure some sun, it thrives best with approximately 3-4 hours of direct sunlight daily, benefiting from protection against intense afternoon rays.
What Equipments Should You Prepare Before Transplantation Slender Woodoats?
Gardening Gloves
To safeguard your hands when handling soil and plants.
Shovel or Spade
For excavating around the slender woodoats plant and creating the new planting site.
Garden Fork
To assist in loosening the soil and lifting the plant with minimal root disruption.
Trowel
For more precise digging tasks and placing smaller companion plants near slender woodoats.
Watering Can or Garden Hose
To keep the plant hydrated during and after the relocation process.
Mulch
To aid in retaining soil moisture and suppressing weeds around the newly moved plant.
Stakes and Twine (if necessary)
To offer support to the slender woodoats plant if it is tall or delicate.
How Do You Remove Slender Woodoats from the Soil?
How Do You Remove Slender Woodoats from the Soil?
From Ground: First, hydrate the slender woodoats plant to moisten the soil. Then, dig a wide trench around the plant using a shovel or spade, ensuring the plant’s root ball remains intact. Carefully work the spade beneath the root ball to lift the plant from its original spot.From Pot: Gently water the plant to loosen the soil. Tilt the pot sideways and lightly tap the sides to free the root ball. If needed, use a garden fork to carefully extract the plant, taking care not to harm the roots.From Seedling Tray: Lightly water the seedlings to dampen the soil. Use a pencil or similar tool to push up from the bottom of each cell to release the seedlings. Handle the seedlings by their leaves, not the stem, to prevent damage.
Step-by-Step Guide for Transplanting Slender Woodoats
Planting Time
Ensure weather conditions are suitable for relocating slender woodoats, ideally performing it in the early morning or late afternoon on a cool, overcast day to reduce stress.
Create New Hole
Dig a hole in the new spot that is twice as wide and as deep as the slender woodoats's root ball. This ensures the roots have ample room to spread.
Add Compost
Incorporate some compost into the excavated soil. This provides additional nutrients and enhances soil structure for slender woodoats.
Place Plant
Position the slender woodoats plant in the center of the hole at the same depth it was growing previously. Fill the hole halfway with soil and gently press down to eliminate any air pockets.
Water Thoroughly
After partially backfilling the hole, water the plant thoroughly to help the soil settle. Continue filling the hole while watering periodically to ensure the soil remains settled and moist.
Finish Filling and Mulching
Fill the remainder of the hole with soil, firm it gently, and add a layer of mulch around the plant's base. This helps retain moisture and keeps weeds at bay.
How Do You Care For Slender Woodoats After Transplanting?
Watering
Keep the soil around the slender woodoats consistently damp, but not waterlogged, for the initial weeks post-transplant to aid in strong root establishment.
Mulching
Replenish the mulch as necessary to maintain a 2-3 inch layer, but keep it away from the plant’s stem to prevent rot.
Monitoring
Regularly inspect slender woodoats for signs of transplant shock such as wilting or yellowing leaves, and provide additional care and water if required.
Fertilization
Avoid fertilizing immediately after transplanting; wait at least 4-6 weeks before applying a balanced, slow-release fertilizer.
Troubleshooting Common Issues with Slender Woodoats Transplantation.
When is the best time to transplant slender woodoats?
The optimal period to relocate slender woodoats is in early spring, mid-spring, or late fall.
How much space should I leave between plants?
Allow 16-18 inches (40-45 centimeters) of space between each slender woodoats plant for healthy development.
What soil type is best for slender woodoats?
Slender woodoats thrives in well-draining soil composed of a mix of sand, silt, and clay.
How deep should I plant slender woodoats?
Plant slender woodoats at the same depth it was in its original container for optimal results.
How do I prepare the soil before transplanting slender woodoats?
Amend the soil with organic compost to enrich nutrients and ensure proper moisture retention.
How often should I water slender woodoats after transplanting?
Water slender woodoats thoroughly immediately after transplanting, then maintain consistently moist soil for the first few weeks.
What should I do if slender woodoats looks wilted after transplanting?
Ensure it's not waterlogged or too dry and provide temporary shade if necessary.
Can I transplant slender woodoats in hot weather?
Avoid relocating slender woodoats during hot weather; it causes stress. Aim for cooler periods in the season.
Do I need mulch for slender woodoats after transplanting?
Mulch around slender woodoats helps retain moisture and suppress weeds, but keep it a few inches away from the stems.
Should I fertilize slender woodoats after transplanting?
Wait a few weeks for slender woodoats to settle in before applying a gentle, balanced fertilizer.


