How to Transplant Pincushion flower?
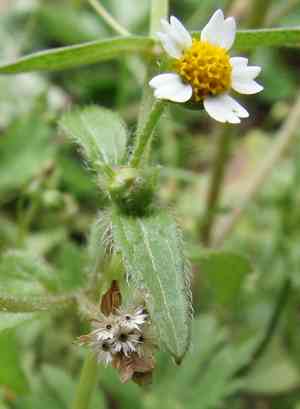
The optimal period for relocating pincushion flower is during the gentle awakening of the season, specifically from early spring's thaw to mid-spring's bloom. To ensure success, identify a location bathed in sunlight with effective drainage. A helpful tip: exercise caution when handling pincushion flower to prevent upsetting its root system.
What Preparations are Needed Before Transplanting Pincushion Flower?
What is the Ideal Time for Transplanting Pincushion Flower?
The perfect time for moving pincushion flower is at the start of the gardening season â early to mid-spring. This timing allows pincushion flower to settle in before the summer heat. Relocating pincushion flower then aligns with its growth cycle, promoting strong roots and abundant blooms. In spring's mild temperatures and gentle rains, pincushion flower flourishes, promising a garden adorned with its vibrant flowers. Indeed, this strategic timing gives your pincushion flower the best start for a spectacular display.
How Much Space Should You Leave Between Pincushion Flower Plants?
When relocating your pincushion flower, aim for a separation of approximately 6-12 inches (15-30 cm) between plants. This provides each plant ample room to develop and thrive without being overcrowded.
What is the Best Soil Mix for Pincushion Flower Transplanting?
Prepare a soil that drains well and is rich in organic material for your pincushion flower. Incorporate a balanced, slow-release fertilizer to give your plants an excellent start. An initial soil pH between 6.0 and 7.0 would be optimal.
Where Should You Relocate Your Pincushion Flower?
Select a location for your pincushion flower that receives full sunlight for most of the day. This will ensure your blooms are vivid and robust. Steer clear of excessively shaded areas to prevent stunted growth and fewer flowers.
What Equipments Should You Prepare Before Transplantation Pincushion Flower?
Gardening Gloves
To safeguard your hands while handling soil and plants.
Shovel or Spade
For excavating the plant from its current spot and digging the new hole.
Garden Fork
Useful for loosening the earth around the plant's root system.
Watering Can or Hose
To hydrate the plant before and after its relocation.
Pruning Shears
For trimming any dead or excess foliage.
Wheelbarrow or Plant Dolly
To move the pincushion flower if it is large or heavy.
Trowel
For more delicate tasks or smaller plants.
Soil Knife
To divide the root ball if necessary.
Rooting Hormone (optional)
To stimulate root development after transplanting.
How Do You Remove Pincushion Flower from the Soil?
How Do You Remove Pincushion Flower from the Soil?
From Ground: First, moisten the pincushion flower to soften the soil, making it easier to extract the plant without harming its roots. Then, use a shovel or garden fork to dig a wide circle around the plant, going deep enough to get beneath the root ball. Gently lift the plant from the ground, taking care to keep the root ball intact.From Pot: Water the pincushion flower thoroughly before beginning. Turn the pot on its side, grasp the plant by its base, and tap the bottom to loosen it. Carefully pull the plant out, supporting the root ball, to avoid undue stress on the stems and roots.From Seedling Tray: Dampen the soil in the tray first. Use a trowel or soil knife to carefully lift each pincushion flower from its cell, being gentle not to tear the roots or compact the surrounding soil.
Step-by-Step Guide for Transplanting Pincushion Flower
Prepare New Location
Excavate a hole in the ground at the chosen spot that is twice as wide and the same depth as the pincushion flower's root ball.
Inspect Roots
Examine the pincushion flower's root ball prior to transplanting. Trim away any damaged or dead roots with pruning shears, and gently untangle any circling roots to encourage outward growth.
Enhance Root Environment
If using rooting hormone, apply it to the freshly trimmed and untangled roots according to the product's instructions.
Position the Plant
Place the pincushion flower in the center of the new hole, ensuring it sits at the same depth it was previously growing. Gently spread out the roots.
Backfill the Hole
Slowly refill the hole with the excavated soil, gently pressing down around the base of the pincushion flower to eliminate air pockets and ensure good soil-to-root contact.
Water Thoroughly
Immediately water the pincushion flower to settle the soil and hydrate the roots. Continue watering to keep the soil consistently moist without overwatering.
How Do You Care For Pincushion Flower After Transplanting?
Watering
Ensure consistent moisture for the pincushion flower, watering when the top inch of soil feels dry to the touch to aid root establishment.
Support
If the pincushion flower is tall or top-heavy, gently insert a stake into the soil near the base and loosely tie the plant for stability.
Mulching
Apply a layer of organic mulch around the base of the pincushion flower, being careful to avoid direct contact with the stem, to conserve soil moisture and reduce weed competition.
Monitoring
Regularly check the pincushion flower for signs of stress, such as wilting or discolored leaves, and address any issues promptly with appropriate care.
Pruning
Remove any additional dead or damaged foliage during the initial weeks to direct the pincushion flower's energy into establishing new roots.
Troubleshooting Common Issues with Pincushion Flower Transplantation.
What is the optimal time to transplant pincushion flower?
The best window for relocating pincushion flower is early to mid-spring, when growth is robust.
How far apart should I space pincushion flower seedlings when transplanting?
Allow a generous spacing of 6-12 inches (15-30 cm) between pincushion flower to accommodate growth.
Why are my transplanted pincushion flower wilting after planting?
Wilting may be due to root disturbance or insufficient watering. Handle roots gently and ensure consistent moisture.
Can I transplant pincushion flower on a hot, sunny day?
Transplant on a cloudy day or in the evening to avoid heat stress, ensuring pincushion flower's smooth transition.
Should I fertilize pincushion flower immediately after transplanting?
Wait a few days for pincushion flower to acclimate before fertilizing to prevent root burn and stress.
How deep should I plant pincushion flower when transplanting?
Set pincushion flower at the same depth it grew in its previous container to prevent root suffocation or exposure.
My transplanted pincushion flower look droopy, how can I fix this?
Ensure soil is well-draining and consistently moist. Drooping often indicates water stress or poor soil conditions.
Is it necessary to prune pincushion flower before transplanting?
Light pruning can help pincushion flower focus on root establishment. Remove only damaged or overly long stems.
How do I choose the best location to transplant pincushion flower?
Relocate pincushion flower to a sunny spot with well-draining soil. Avoid low areas where water collects.
What soil preparation is needed before transplanting pincushion flower?
Enrich the soil with compost and ensure it's loose and crumbly to welcome pincushion flower's roots.



