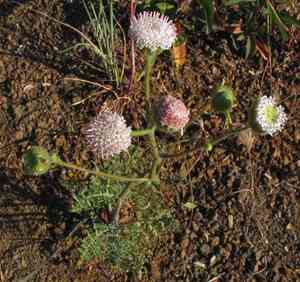
How to Transplant White pincushion?
White pincushion flourishes when transplanted during the lively core of spring. This yearly plant favors a bright, adequately drained location. Confirm the soil is rich but airy. Refrain from excessive watering; a damp, not saturated, setting is perfect for effective relocation.
What Preparations are Needed Before Transplanting White Pincushion?
What is the Ideal Time for Transplanting White Pincushion?
The perfect period to move white pincushion is from early to mid-spring. This timeframe provides prime growing conditions with milder temperatures and increased sunlight, promoting root establishment and plant development. Transplanting during these seasons guarantees strong growth and resilience, especially beneficial for annuals like white pincushion that quickly develop their root systems.
How Much Space Should You Leave Between White Pincushion Plants?
Ensure you position white pincushion with a separation of 12-18 inches (30-45 cm) between each specimen. This will provide ample room for growth without competition for resources.
What is the Best Soil Mix for White Pincushion Transplanting?
Select soil that drains well and incorporate a balanced, all-purpose fertilizer before planting white pincushion. A light, sandy soil or loam is most suitable for this plant.
Where Should You Relocate Your White Pincushion?
Choose a spot that gets full sun, approximately 6-8 hours of direct sunlight daily. This is crucial for healthy growth and abundant blooms.
What Equipments Should You Prepare Before Transplantation White Pincushion?
Gardening Gloves
To safeguard your hands while handling soil and plants.
Shovel or Spade
For digging holes and trenches for the plants.
Trowel
For greater precision when working with soil, particularly in pots and seedling trays.
Watering Can or Hose
To hydrate the soil before and after transplanting.
Garden Fork
To gently loosen the soil around the plant's roots.
Wheelbarrow
To move plants and tools around the garden.
Mulch
To help maintain soil moisture after transplanting.
How Do You Remove White Pincushion from the Soil?
How Do You Remove White Pincushion from the Soil?
From Ground: First, water the white pincushion plant to moisten the soil. Then, dig a wide trench around the plant using a shovel or spade, ensuring the plant's root ball remains intact. Carefully work the spade under the root ball to lift the plant from its original spot.From Pot: Water the white pincushion plant thoroughly. Gently compress the sides of the pot to loosen the soil. Tilt the pot sideways and carefully tap the bottom to slide out the plant with its root ball intact.From Seedling Tray: Water the seedlings gently to dampen the soil. Use a trowel or your fingers to carefully scoop out the white pincushion seedlings, ensuring as much soil as possible stays with the root system.
Step-by-Step Guide for Transplanting White Pincushion
Preparation
Water the soil in the transplant area a day prior, making digging easier and retaining moisture for the new location.
Digging Holes
Excavate a hole at the transplant site that is twice as wide and the same depth as the white pincushion's root ball. Ensure holes are spaced according to the plant's mature size requirements.
Plant Placement
Position the white pincushion plant in the hole, making sure the top of the root ball is level with the surrounding soil. Add or remove soil from beneath the root ball as needed.
Backfilling
Gently refill the hole with soil, pressing it down softly to eliminate air pockets around the roots.
Watering
Thoroughly water the newly transplanted white pincushion to help settle the soil and encourage root growth.
Mulching
Apply a layer of mulch around the base of the white pincushion to help retain soil moisture and regulate temperature.
How Do You Care For White Pincushion After Transplanting?
Watering
Keep the soil around the white pincushion consistently moist, but not waterlogged, for the initial weeks post-transplant to aid in establishing strong roots.
Monitoring
Regularly inspect the white pincushion for indications of transplant shock, such as wilting or yellowing leaves, and provide additional water if necessary.
Protection
Shield the white pincushion from strong winds or excessive sun until it settles into its new location, using temporary shading if required.
Feeding
After a few weeks, begin applying a balanced, slow-release fertilizer to promote healthy growth and development.
Troubleshooting Common Issues with White Pincushion Transplantation.
What's the best time to transplant white pincushion?
The optimal time to transplant white pincushion is early to mid-spring when conditions are ideal.
How do I prepare the soil for transplanting white pincushion?
Ensure the soil is well-draining and rich. Incorporate compost to enhance its texture.
What is the recommended spacing for white pincushion?
Space white pincushion plants 12-18 inches (30-45 cm) apart for optimal development.
Should I water white pincushion immediately after transplanting?
Yes, water the plant right after transplanting to help establish its roots.
What type of potting mix should be used for white pincushion?
Utilize a well-draining potting mix with organic matter for superior results.
How deep should I plant white pincushion seedlings?
Plant white pincushion seedlings at the same depth they were in their original container.
How do I prevent transplant shock in white pincushion?
To avoid shock, transplant on a cloudy day and keep the root ball intact.
When should I start acclimatizing white pincushion for transplant?
Begin acclimatizing white pincushion a week before transplant by gradually increasing outdoor exposure.
Will white pincushion thrive in partial shade?
While white pincushion prefers full sun, it can endure partial shade with some reduction in blooming.
How to deal with wilting after transplanting white pincushion?
Ensure consistent watering and avoid direct sunlight immediately post-transplant to minimize wilting.


