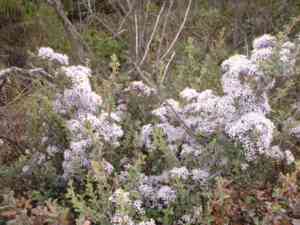
How to Transplant Sonoma ceanothus?
Sonoma ceanothus flourishes when relocated between early and mid-spring, as this timeframe facilitates superior root development. Select a bright, adequately drained spot. Exercise caution to safeguard the root structure, guaranteeing successful growth and acclimation.
What Preparations are Needed Before Transplanting Sonoma Ceanothus?
What is the Ideal Time for Transplanting Sonoma Ceanothus?
Sonoma ceanothus, a perennial plant, should ideally be moved from early to mid-spring. This period offers optimal soil moisture and mild temperatures, reducing transplant shock. Moving it during this time ensures strong root development and healthy growth before the hotter summer months. Proper timing maximizes the plant's ability to establish effectively in its new location.
How Much Space Should You Leave Between Sonoma Ceanothus Plants?
For successful transplanting of sonoma ceanothus, ensure you space each plant 6-10 feet (1.8-3 meters) apart. This will give them enough room to grow and thrive without competing for resources.
What is the Best Soil Mix for Sonoma Ceanothus Transplanting?
Prepare well-draining soil mixed with compost or organic matter to improve its quality. Sonoma ceanothus prefers slightly acidic to neutral pH soils. A base fertilizer with balanced nutrients (e.g., 10-10-10) can be mixed into the soil to support healthy growth.
Where Should You Relocate Your Sonoma Ceanothus?
Sonoma ceanothus loves sunlight! Pick a location that receives full sun for at least 6 hours a day. Ensuring ample sunlight helps sonoma ceanothus develop vibrantly and stay healthy.
What Equipments Should You Prepare Before Transplantation Sonoma Ceanothus?
Gardening Gloves
To protect your hands while working with the soil and plant.
Shovel or Spade
For digging around and lifting the plant from its original location.
Watering Can or Hose
To water the plant before and after transplanting.
Trowel
For detailed digging and handling soil around the plant.
Pruners
To trim any damaged or excess roots or branches.
Wheelbarrow
For transporting the plant if the distance is significant.
How Do You Remove Sonoma Ceanothus from the Soil?
How Do You Remove Sonoma Ceanothus from the Soil?
From Ground: First, water the sonoma ceanothus plant to dampen the soil. Then, dig a wide trench around the plant using a shovel or spade, ensuring the plant's root ball remains intact. Carefully work the spade under the root ball to lift the plant from its original location.From Pot: Water the sonoma ceanothus plant thoroughly. Gently tap the sides of the pot to loosen the soil. Carefully tilt the pot and slide the plant out, ensuring you hold the main stem and supporting as much of the root ball as possible.From Seedling Tray: Make sure not to water too much, but keep the soil slightly moist. Gently press the bottom of the tray cells to lift the seedlings. Use a trowel to ease out the plant, ensuring you take ample soil from around the roots.
Step-by-Step Guide for Transplanting Sonoma Ceanothus
Prepare the New Site
Make sure the site is ready before you remove the plant from its current location. Dig a hole at the new site that's twice the size of the root ball of your sonoma ceanothus.
New Soil Preparation
Mix compost with the existing soil, and make sure the soil is loose and aerated to give the roots room to establish.
Transplanting Time
Water the plant in its current location to make the removal process easier. Carry the sonoma ceanothus with its root ball intact to the new location. Place the plant in the center of the hole and fill it with soil. Gently press the soil around the base to stabilize the plant.
Watering the Transplanted sonoma ceanothus
Water the plant immediately after transplanting to help the soil settle around the roots. Ensure the root area is thoroughly soaked.
Mulching
Apply a layer of mulch around the base of the plant to help retain moisture and suppress weed growth.
How Do You Care For Sonoma Ceanothus After Transplanting?
Watering
Keep the soil around the sonoma ceanothus consistently moist, but not soggy, for the first few weeks after transplanting to help establish strong roots.
Monitoring
Check for signs of transplant shock like wilting or yellowing leaves. Prune any dead or damaged foliage.
Fertilization
Fertilize lightly if necessary after a few weeks, once the plant has started to establish in its new location, using a balanced fertilizer.
Troubleshooting Common Issues with Sonoma Ceanothus Transplantation.
When is the best time to transplant sonoma ceanothus?
For optimal growth, transplant sonoma ceanothus from early spring to late spring.
How far apart should I space sonoma ceanothus?
Maintain a spacing of 6-10 feet (1.8-3 meters) between each sonoma ceanothus plant.
How deep should the hole be for transplanting sonoma ceanothus?
The hole should be twice as wide and as deep as the root ball.
What type of soil is best for sonoma ceanothus?
Well-drained soil with a slightly acidic to neutral pH is ideal for sonoma ceanothus.
Should I water sonoma ceanothus immediately after transplanting?
Yes, water thoroughly after transplanting to help settle the soil around the roots.
How much sunlight does sonoma ceanothus need after transplanting?
Sonoma ceanothus requires full sun to thrive, ensuring at least 6 hours of direct sunlight daily.
Can I use mulch around sonoma ceanothus after transplanting?
Yes, apply 2-3 inches (5-7.6 cm) of mulch, keeping it away from the plant's base.
How to handle root damage while transplanting sonoma ceanothus?
Trim damaged roots cleanly and ensure healthy roots are spread out in the new hole.
Is fertilizing necessary after transplanting sonoma ceanothus?
Fertilizing is optional; if desired, use a balanced, slow-release fertilizer minimally.
What to do if sonoma ceanothus shows signs of transplant shock?
Provide ample water, reduce sunlight if possible, and avoid fertilizing until recovery.


