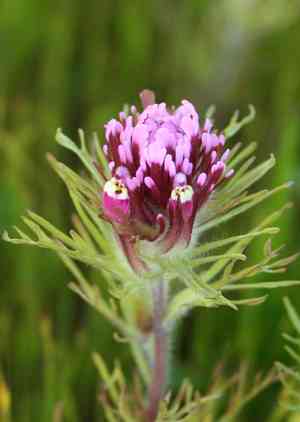
How to Transplant Exserted indian paintbrush?
Relocating exserted indian paintbrush is most successful from early spring through its peak flowering period. A bright, adequately draining location stimulates its development. Should it be required, carefully managing the root system facilitates the transplant.
What Preparations are Necessary Before Relocating Exserted Indian Paintbrush?
What is the Optimal Period for Transplanting Exserted Indian Paintbrush?
The prime window for moving exserted indian paintbrush spans from early spring's onset to the brink of summer. This timing enables exserted indian paintbrush to develop roots prior to the summer heat. Transplanting exserted indian paintbrush thrives in moderate temperatures and increasing daylight, which collectively foster vigorous growth. Seize this opportunity for a thriving beginning!
How Much Space Should You Allot Between Exserted Indian Paintbrush Plants?
Prior to transplanting exserted indian paintbrush, please ensure adequate room for their development. Aim for an optimal spacing of 8-12 inches (20-30 cm) apart. This provides each plant sufficient area to grow, while still creating a dense display.
What is the Best Soil Mixture for Exserted Indian Paintbrush Transplanting?
For your exserted indian paintbrush, prepare a well-draining, loamy soil, akin to a comfortable bed: neither too firm nor too soft. A measure of a balanced, slow-release fertilizer will set them up for prosperity. Target a soil pH of approximately 6.5, slightly acidic.
Where Should You Replant Your Exserted Indian Paintbrush?
Locate a sunny spot for your exserted indian paintbrush, where they will receive at least 6 hours of direct sunlight daily. They are sun-lovers, so more light is always beneficial! Choose a site with good air circulation to maintain their health and vitality.
What Equipment Should You Prepare Before Relocating Exserted Indian Paintbrush?
Gardening Gloves
To safeguard your hands while handling soil and plants.
Trowel
For excavating small holes or channels to accommodate the exserted indian paintbrush's root mass.
Watering Can or Hose with a Gentle Spray Attachment
For hydrating the exserted indian paintbrush before and after relocation.
Spade or Shovel
To extract exserted indian paintbrush plants from the ground, pot, or seedling tray with a larger root system.
Pruning Shears
For trimming any damaged or excessively long roots prior to transplanting.
Wheelbarrow or Garden Cart
To transport the exserted indian paintbrush and any gardening supplies.
Measuring Tape
To ensure appropriate spacing between the transplanted exserted indian paintbrush plants.
How Do You Extract Exserted Indian Paintbrush from the Soil?
How Do You Extract Exserted Indian Paintbrush from the Soil?
From Ground: First, hydrate the exserted indian paintbrush plant to moisten the soil. Then, excavate a wide trench around the plant using a shovel or spade, ensuring the plant's root ball remains intact. Carefully work the spade beneath the root ball to lift the plant from its original position.From Pot: Water the exserted indian paintbrush to dampen the soil and facilitate removal. Gently tap the pot's sides to loosen the soil and roots. Incline the pot sideways and carefully slide the plant out, supporting the stem's base with your hand.From Seedling Tray: Water the seedling tray to ensure the root ball is moist and cohesive. Use a trowel or your fingers to gently dislodge the exserted indian paintbrush seedling from its compartment, making sure to include the entire root ball.
Step-by-Step Guide for Transplanting Exserted Indian Paintbrush
Prepare the New Location
Dig a hole in your chosen spot that is as deep and twice as wide as the exserted indian paintbrush's root ball to allow for its growth.
Root Ball Care
Examine the exserted indian paintbrush's root ball and trim any damaged or elongated roots. Gently loosen the outer roots to encourage their spread into the surrounding soil.
Plant Placement
Carefully position the exserted indian paintbrush into the hole at the same depth it was previously growing. The stem's base should be level with the surrounding soil surface.
Backfilling the Hole
Refill around the root ball with soil, gently tamping down to eliminate air pockets. Create a slight depression around the plant's base to retain water.
Watering
Thoroughly water the exserted indian paintbrush after planting to settle the soil and provide moisture to the roots. Apply water at the plant's base until the soil is saturated.
Stabilization
If necessary, add stakes around the exserted indian paintbrush to offer support and prevent damage from strong winds or heavy rain until the plant establishes itself.
How Do You Care For Exserted Indian Paintbrush After Transplanting?
Monitoring
Regularly inspect the exserted indian paintbrush for indications of stress, such as wilting or discolored leaves, which may signal a need for more or less water.
Adjusting Support
Adjust the stakes as the exserted indian paintbrush grows, and remove them once the plant is sufficiently stable to stand independently.
Weeding
Keep the area surrounding the exserted indian paintbrush free of weeds, which can compete for nutrients and water.
Mulching
Apply a layer of mulch around the exserted indian paintbrush's base to help retain moisture, regulate soil temperature, and reduce weed competition.
Trimming
Snip off any dead or fading flowers to help the plant direct its energy towards establishing strong root systems and promoting healthy growth.
Troubleshooting Common Issues with Exserted Indian Paintbrush Transplantation.
Why is my exserted indian paintbrush wilting after transplanting?
Wilting may stem from root shock or insufficient hydration. Ensure careful handling during transplanting and provide adequate water without over-saturating the soil.
How do I correctly space exserted indian paintbrush during transplanting?
Space exserted indian paintbrush 8-12 inches (20-30 cm) apart. This spacing encourages healthy growth by providing ample room for roots and foliage.
When's the optimal time to transplant exserted indian paintbrush?
The best transplanting period is from early to late spring, offering a mild weather window for exserted indian paintbrush to establish.
Can I transplant exserted indian paintbrush in the summer?
Transplanting exserted indian paintbrush during summer is not ideal due to heat stress. Aim for cooler spring months for better establishment.
What signs show exserted indian paintbrush is ready for transplant?
Look for established roots filling the current container but not yet circling the pot, indicating readiness.
How deep should I plant exserted indian paintbrush during transplanting?
Plant exserted indian paintbrush at the same depth it was in its previous container to avoid burying the stem too deep.
My exserted indian paintbrush looks droopy post-transplant; what should I do?
Droopiness can be common; maintain consistent moisture and protect the plant from harsh elements while it recovers.
What soil condition is best for transplanting exserted indian paintbrush?
Use well-draining soil with ample organic matter to provide exserted indian paintbrush the best start when transplanting.
How do I protect exserted indian paintbrush from transplant shock?
Minimize root disturbance, water thoroughly after transplanting, and shield from intense sun for a few days.
Is it necessary to fertilize exserted indian paintbrush after transplanting?
Wait 2-4 weeks before applying a balanced fertilizer to avoid burning the roots while they're still delicate.


