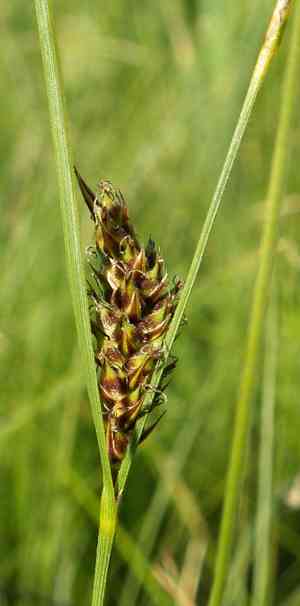
How to Transplant Woollyfruit sedge?
The ideal window for relocating woollyfruit sedge is its vigorous growth phase, extending from the latter part of spring through mid-summer. Select a location featuring damp ground for these enduring plants. A helpful suggestion: guarantee a humid setting to accommodate woollyfruit sedge's tender root system.
What Preparations are Needed Before Transplanting Woollyfruit Sedge?
What is the Ideal Time for Transplanting Woollyfruit Sedge?
The optimal period for relocating woollyfruit sedge spans from early spring's onset through mid-summer. This timeframe provides an ideal mix of warm soil and moderate temperatures, facilitating robust root establishment without the stress of extreme heat or cold. During this season, the gradual increase in daylight and warmth encourages vigorous growth and root development in woollyfruit sedge. Moving woollyfruit sedge now leverages the peak growing season, allowing ample time for establishment prior to winter's dormancy.
How Much Space Should You Leave Between Woollyfruit Sedge Plants?
To allow your woollyfruit sedge ample room to thrive, aim for a spacing of approximately 6-12 inches (15-30 cm) between plants. This distance ensures each plant has sufficient area to grow without competing for essential nutrients and sunlight.
What is the Best Soil Mix for Woollyfruit Sedge Transplanting?
Your woollyfruit sedge will flourish in soil that is moist and drains well. You can enhance the soil by incorporating peat or organic compost, which will create a nutrient-rich foundation. A balanced, slow-release fertilizer applied during preparation can give your woollyfruit sedge a strong start.
Where Should You Relocate Your Woollyfruit Sedge?
Select a site that offers full to partial sunlight for your woollyfruit sedge. This location should receive at least 4-6 hours of direct sun daily, but can also tolerate some shade. Ensuring the correct sun exposure will promote healthy growth and vitality for your woollyfruit sedge.
What Equipments Should You Prepare Before Transplantation Woollyfruit Sedge?
Shovel or spade
For digging up the woollyfruit sedge and preparing a new planting hole.
Gardening gloves
To safeguard your hands while handling soil and the plant.
Watering can or hose
To hydrate the woollyfruit sedge both before and after its relocation.
Pruning shears
For trimming any dead or excess plant parts prior to transplanting.
Wheelbarrow or garden cart
To move the woollyfruit sedge and soil if necessary.
Measuring tape
To ensure correct spacing between transplanted woollyfruit sedge when planting multiple specimens.
Mulch
To cover the soil around the woollyfruit sedge post-transplant, aiding in soil temperature regulation and moisture retention.
How Do You Remove Woollyfruit Sedge from the Soil?
How Do You Remove Woollyfruit Sedge from the Soil?
From Ground: Begin by watering the woollyfruit sedge to moisten the soil, making it easier to work with. Using a shovel or spade, carefully dig around the plant to avoid damaging its root system. Once enough soil is loosened, gently slide the shovel beneath and lift the woollyfruit sedge from the ground.From Pot: Water the woollyfruit sedge thoroughly beforehand. Gently tap the pot's sides to loosen the soil. Invert the pot, supporting the plant with your hand, and carefully ease the woollyfruit sedge out. If it resists, you might need to cut the pot away.From Seedling Tray: Water the seedlings to ensure moist soil. Use a spoon or a dibber to gently lift each woollyfruit sedge seedling from its compartment, being careful not to harm the delicate roots.
Step-by-Step Guide for Transplanting Woollyfruit Sedge
Preparation
Gather all necessary tools and have them readily accessible. Water the woollyfruit sedge in its current location.
Removal
Carefully follow the appropriate procedure based on whether your woollyfruit sedge is being removed from the ground, a pot, or a seedling tray.
Transport
If the woollyfruit sedge isn't being planted immediately, place it in a container or cover its roots with a damp cloth to prevent dehydration during transit.
Hole Digging
Excavate a hole twice the width of the root ball and of equal depth. This provides ample space for root expansion.
Plant Placement
Position the woollyfruit sedge centrally within the hole. The top of the root ball should be level with the surrounding soil surface.
Backfilling
Gently refill the area around the root ball with soil. As you fill, lightly compact the soil to eliminate air pockets.
Watering
Thoroughly water the woollyfruit sedge to settle the soil and remove any remaining air gaps. This also provides essential hydration for the roots.
How Do You Care For Woollyfruit Sedge After Transplanting?
Mulching
Apply a layer of mulch around the base of the woollyfruit sedge to help retain soil moisture and protect its roots.
Regular Watering
For the initial few weeks post-transplant, ensure the woollyfruit sedge receives consistent watering. The soil should remain moist but not waterlogged to encourage root development.
Pruning
Remove any damaged or dead foliage to direct the woollyfruit sedge's energy towards establishing new roots rather than repairing old growth.
Monitoring
Observe the woollyfruit sedge for signs of transplant shock, such as wilting leaves or stunted growth. These symptoms require prompt action, typically by adjusting water or shade conditions.
Protection
During the first few weeks, provide some shade during the hottest part of the day to reduce stress on the woollyfruit sedge as it adapts to its new environment.
Troubleshooting Common Issues with Woollyfruit Sedge Transplantation.
Why are my woollyfruit sedge seedlings not thriving after transplant?
Verify they were planted within the optimal transplanting window, from late spring to mid-summer, and spaced 6-12 inches (15-30 cm) apart for adequate growth.
How much sunlight does woollyfruit sedge require after transplanting?
Ensure woollyfruit sedge gets ample light but avoid harsh, direct sunlight immediately after transplanting to prevent shock and stress.
What's the best soil type for transplanting woollyfruit sedge?
Transplant woollyfruit sedge into moist, well-drained soil rich in organic matter to support root development and overall plant health.
How soon after transplanting woollyfruit sedge should I water them?
Water woollyfruit sedge immediately after transplanting to settle the soil around the roots and help alleviate transplant shock.
Can I fertilize woollyfruit sedge right after transplanting?
Avoid immediate fertilization; wait several weeks, then use a balanced, slow-release fertilizer to prevent burning sensitive roots.
Why are the leaves of my transplanted woollyfruit sedge turning yellow?
Yellowing leaves may indicate overwatering or poor drainage. Ensure the soil is moist but not waterlogged.
How do I know if woollyfruit sedge has been planted too deep or shallow?
The root crown of woollyfruit sedge should be at soil level. If leaves are wilted or roots exposed, re-adjust the planting depth.
What is the ideal spacing for woollyfruit sedge when transplanting?
Space woollyfruit sedge evenly, approximately 6-12 inches (15-30 cm) apart. Proper spacing allows for sufficient airflow and growth expansion.
How to protect woollyfruit sedge from pests during the transplanting process?
Inspect woollyfruit sedge for pests before transplanting and use organic insecticidal soaps or barriers post-transplant to prevent infestations.
Why is my woollyfruit sedge not growing as expected after transplant?
Insufficient sunlight, incorrect watering, poor soil conditions, or plant shock could hinder growth. Review care practices and adjust as needed for recovery.


