How to Transplant Heavy sedge?
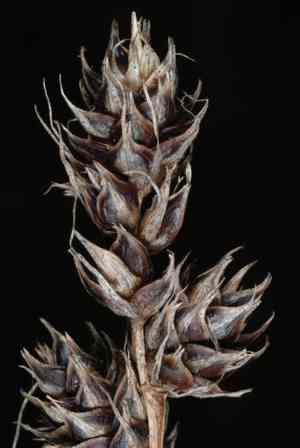
Heavy sedge flourishes when relocated from the beginning to the end of summer, since the warm ground speeds up root development. Select a spot with ample sunlight or partial shade and soil that drains effectively. Refrain from transplanting in excessively moist environments for the best outcome.
What Preparations are Needed Before Transplanting Heavy Sedge?
What is the Ideal Time for Transplanting Heavy Sedge?
The best time to move heavy sedge is from the start to the end of summer. This period allows the plant to develop roots in warm soil and benefit from extended daylight. Transplanting then ensures strong growth and better adaptation to its new spot, enhancing its perennial nature.
How Much Space Should You Leave Between Heavy Sedge Plants?
When relocating heavy sedge, position each plant approximately 12-18 inches (30-45 cm) apart. This provides ample room for root expansion and promotes good air circulation, which helps prevent disease.
What is the Best Soil Mix for Heavy Sedge Transplanting?
Prepare soil that drains well for heavy sedge. A blend of loam and organic compost is most effective. Before transplanting, enrich the soil with a balanced base fertilizer like 10-10-10 to give your plants a robust start.
Where Should You Relocate Your Heavy Sedge?
Select a site that receives full to partial sunlight for transplanting heavy sedge. Ideally, this means about 4-6 hours of direct sun daily. This helps ensure vigorous growth and vibrant green foliage.
What Equipments Should You Prepare Before Transplantation Heavy Sedge?
Gardening Gloves
To safeguard your hands while handling soil and plants.
Shovel or Spade
For excavating the plant and creating a new planting hole.
Watering Can or Hose
To hydrate the plant before and after its relocation.
Garden Trowel
For more precise digging tasks, such as working around the root ball.
Soil Knife or Hand Rake
To assist in loosening the soil around the root system.
Plant Labels
To mark the plant's new position if moving multiple plants or distinguishing species.
How Do You Remove Heavy Sedge from the Soil?
How Do You Remove Heavy Sedge from the Soil?
From Ground: First, moisten the heavy sedge plant to dampen the soil. Then, dig a wide trench around the plant with a shovel or spade, ensuring the root ball stays intact. Carefully work the spade beneath the root ball to lift the plant from its original spot.From Pot: Water the heavy sedge plant thoroughly to help the soil compact and hold together. Gently grasp the plant's base and invert the pot, tapping the bottom if needed. Allow the root ball to slide out of the pot whole.From Seedling Tray: Water the heavy sedge plant in the seedling tray before removal. Use a small tool like a garden trowel to gently lift each seedling from the tray, ensuring the root ball remains intact.
Step-by-Step Guide for Transplanting Heavy Sedge
Site Selection
Choose an appropriate location with adequate sunlight and space for the heavy sedge plant to reach its full size.
Prepare the Planting Hole
Dig a hole twice as wide and as deep as the heavy sedge plant's root ball. Loosen the soil at the bottom to encourage root development.
Plant Removal
Follow the instructions in the removal process section to carefully extract the heavy sedge plant from its initial spot.
Place the Plant
Position the heavy sedge plant in the center of the hole, ensuring the top of the root ball is level with or slightly above the surrounding ground.
Backfill the Hole
Fill the hole with soil, gently pressing it around the root ball to eliminate air pockets. Be careful not to over-compact the soil.
Watering
Water the newly transplanted heavy sedge plant thoroughly immediately after planting to help settle the soil.
Mulching
Apply a layer of mulch around the base of the heavy sedge plant to help retain moisture, regulate temperature, and suppress weeds.
How Do You Care For Heavy Sedge After Transplanting?
Watering
Keep the soil around the heavy sedge consistently moist, but not waterlogged, for the first few weeks after transplanting to help establish strong roots.
Monitoring
Regularly inspect the heavy sedge for signs of stress, such as wilting or yellowing leaves, and adjust care as needed.
Protection
Consider using plant supports or protective covers if the new location is exposed to strong winds or harsh weather conditions.
Troubleshooting Common Issues with Heavy Sedge Transplantation.
When should I transplant heavy sedge?
Early to late summer is the best time to transplant heavy sedge.
How far apart should heavy sedge plants be spaced?
Space heavy sedge plants 12-18 inches (30-45 cm) apart for optimal growth.
What type of soil is best for heavy sedge?
Use well-draining, moist soil for healthy heavy sedge growth.
Should I water heavy sedge immediately after transplanting?
Yes, water heavy sedge thoroughly right after transplanting to help establish roots.
How deep should I plant heavy sedge?
Plant heavy sedge at the same depth it was growing previously to avoid stress.
How can I minimize transplant shock in heavy sedge?
Water well, avoid disturbing roots, and transplant during cooler parts of the day.
Can I use fertilizer when transplanting heavy sedge?
Avoid fertilizing immediately; wait until heavy sedge is established to prevent burn.
What should I do if heavy sedge looks wilted after transplanting?
Ensure adequate watering and shade if needed; heavy sedge should recover quickly.
How can I prepare the soil for transplanting heavy sedge?
Loosen the soil up to 10 inches (25 cm) deep and mix in compost.
Should I trim heavy sedge's foliage before transplanting?
Yes, trimming a little reduces transplant shock and helps heavy sedge focus on root growth.



