How to Transplant Low northern sedge?
Low northern sedge flourishes when relocated at the beginning and height of spring, since the cool, damp environment supports root development. Choose areas with partial shade, making sure the ground drains effectively. Prevent undue strain during the move for best growth.
Essential Preparations Before Relocating Low Northern Sedge?
Optimal Period for Moving Low Northern Sedge?
Low northern sedge, a perennial, thrives when moved in early to mid-spring. This timing allows root establishment before summer's intense heat. Relocating low northern sedge then ensures vigorous growth, boosts pest and disease resistance, and optimizes nutrient absorption, leading to a healthier, more robust plant.
Recommended Spacing Between Low Northern Sedge Plants?
When relocating low northern sedge, aim for 12-18 inches (30-45 cm) between each plant to provide ample space for development and air circulation.
Ideal Soil Blend for Low Northern Sedge Relocation?
For low northern sedge, prepare well-draining soil enriched with compost or a balanced base fertilizer to supply necessary nutrients for healthy development.
Where to Replant Your Low Northern Sedge?
Select a site for low northern sedge that gets partial to full sunlight, as this plant flourishes in light conditions from dappled shade to full sun.
Tools Required Before Relocating Low Northern Sedge?
Gardening Gloves
To safeguard your hands while handling soil and plants.
Hand Trowel
For digging and moving small plants.
Spade or Shovel
For excavating larger holes and lifting plants from the ground.
Watering Can or Hose
For hydrating the plant before and after relocation.
Measuring Tape
To ensure proper spacing between plants during relocation.
Mulch
To aid in moisture retention and weed suppression.
Root Knife or Pruner
For severing roots if needed.
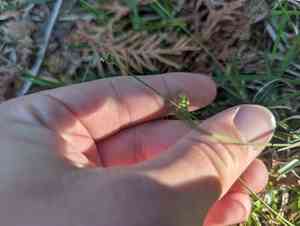
How to Extract Low Northern Sedge from the Ground?
How to Extract Low Northern Sedge from the Ground?
From Ground: First, moisten the low northern sedge plant to dampen the soil. Then, dig a wide trench around the plant using a shovel or spade, ensuring the root ball remains intact. Carefully work the spade beneath the root ball to lift the plant from its original spot.From Pot: Thoroughly water the low northern sedge plant to loosen the soil. Gently tip the pot onto its side and tap the bottom to release the plant. If root-bound, use a root knife or pruner to carefully separate the roots or make vertical cuts in the root ball.From Seedling Tray: Water the low northern sedge seedlings to make the soil moist. Use a trowel or your fingers to gently lift each seedling from the tray, taking care not to harm the roots.
Detailed Guide for Relocating Low Northern Sedge
Prepare the New Planting Site
Dig a hole in the new spot that is twice as wide and as deep as the low northern sedge's root ball. Position the plant in the hole, ensuring the top of the root ball is level with the surrounding soil.
Hole Preparation
Create a small soil mound at the bottom of the hole to help spread the roots evenly. Gently place the low northern sedge on the mound and arrange the roots naturally.
Backfill the Hole
Fill the hole with soil, gently tamping it down to remove air pockets. Ensure the plant is stable and upright.
Watering
Thoroughly water the low northern sedge immediately after relocation to help settle the soil and eliminate air pockets. Continue regular watering to help the plant establish in its new location.
Mulching
Apply a 2-3 inch layer of mulch around the base of the low northern sedge to retain moisture and reduce weed growth. Keep the mulch away from the stem to prevent rot.
Post-Relocation Care for Low Northern Sedge?
Watering
Keep the soil around the low northern sedge consistently moist, but not waterlogged, for the initial few weeks after relocation to aid in strong root development.
Growth Monitoring
Regularly inspect the low northern sedge for indications of stress or poor development. Promptly address any issues such as pests, diseases, or insufficient watering.
Fertilizing
Once the low northern sedge has settled in its new location, you can apply a balanced fertilizer to encourage healthy growth. Follow the manufacturer's guidelines for the correct application rate.
Resolving Common Issues with Low Northern Sedge Relocation.
When is the best time to relocate low northern sedge?
The ideal time to move low northern sedge is in early to mid-spring for optimal growth.
How much space should be between each low northern sedge plant?
Each low northern sedge plant should be spaced 12-18 inches (30-45 cm) apart to ensure healthy growth.
How deep should I plant low northern sedge?
Plant low northern sedge at the same depth it was previously growing to avoid stress.
What type of soil is best for low northern sedge?
Use well-draining soil, preferably with a neutral to slightly acidic pH, for low northern sedge.
Should I water low northern sedge immediately after relocating?
Yes, thoroughly water low northern sedge right after relocation to help settle the roots and reduce shock.
How to reduce relocation shock in low northern sedge?
Minimize root disturbance, water well and perhaps use a root stimulator to reduce relocation shock in low northern sedge.
How to prepare the soil before relocating low northern sedge?
Loosen the soil and mix in compost or organic matter to boost nutrients before relocating low northern sedge.
Can low northern sedge be relocated in summer?
Avoid summer relocation as the heat can stress low northern sedge. Early to mid-spring is best.
What kind of lighting does low northern sedge need after relocating?
Ensure low northern sedge receives partial to full sunlight after relocating for optimal health and growth.
Should I mulch around low northern sedge after relocating?
Yes, apply a thin layer of mulch around low northern sedge to retain moisture and control weeds.


